
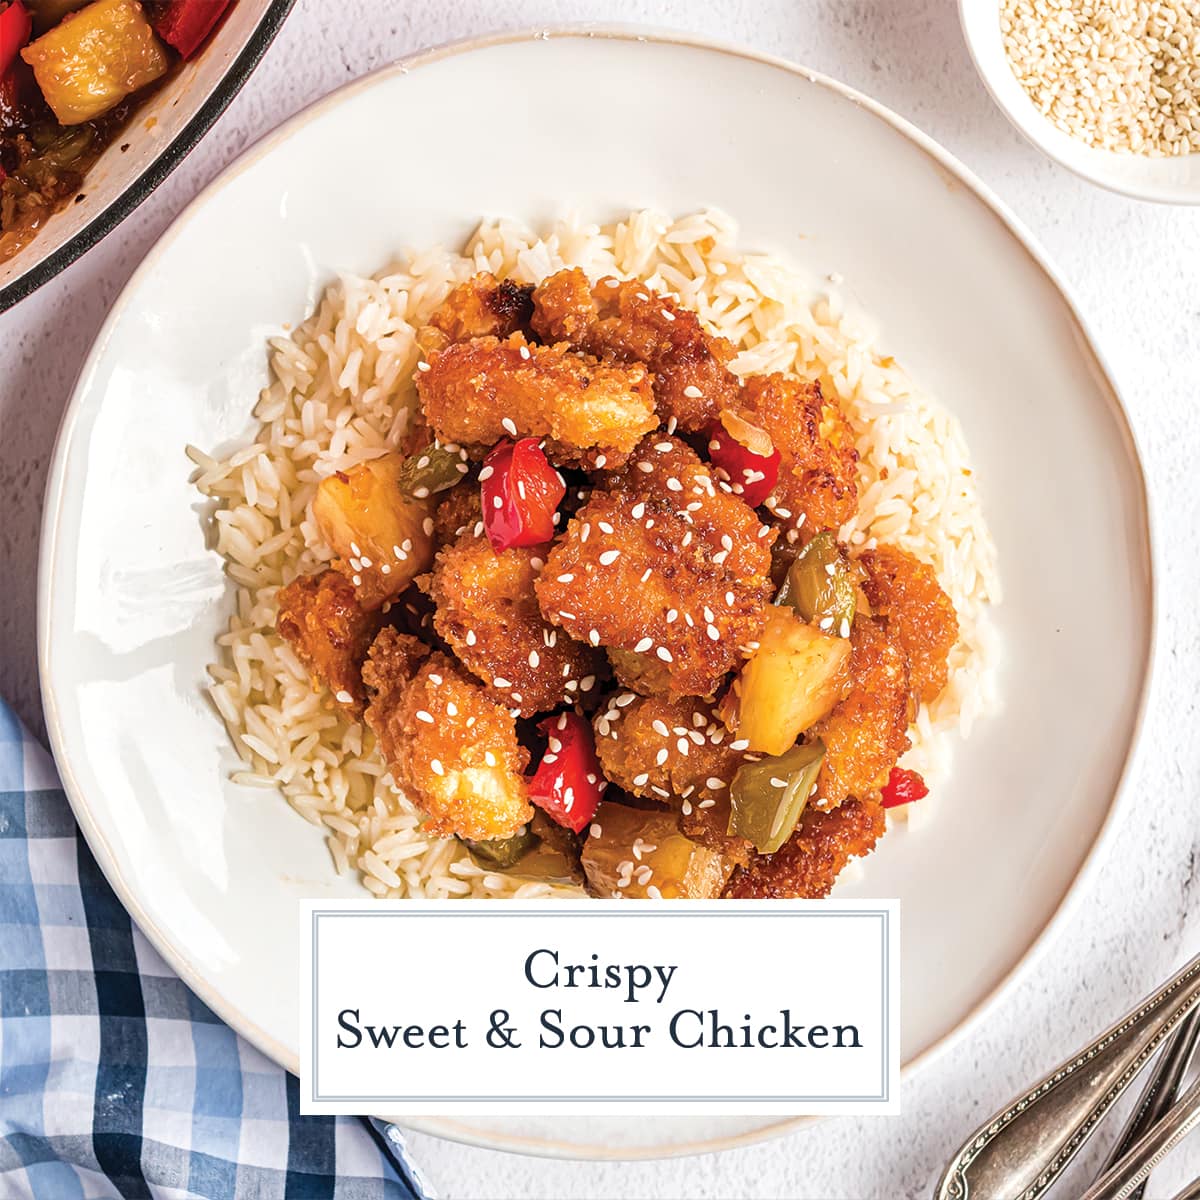
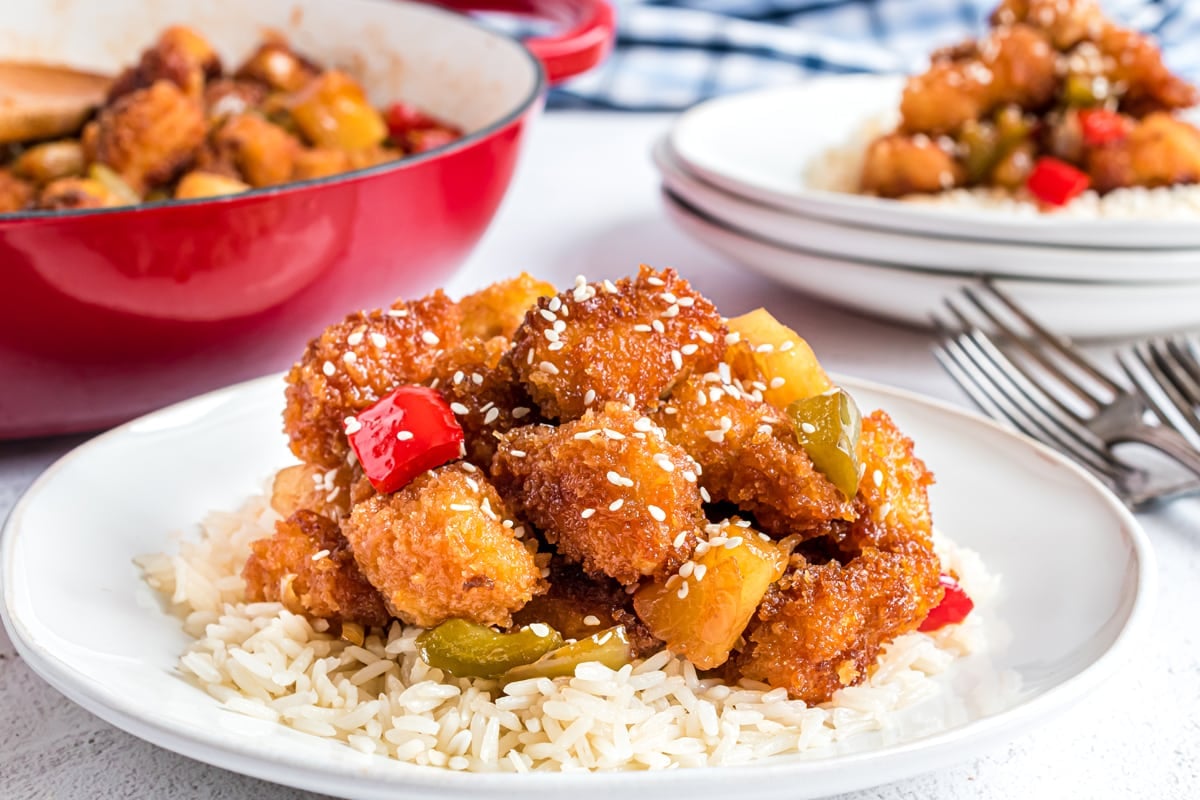
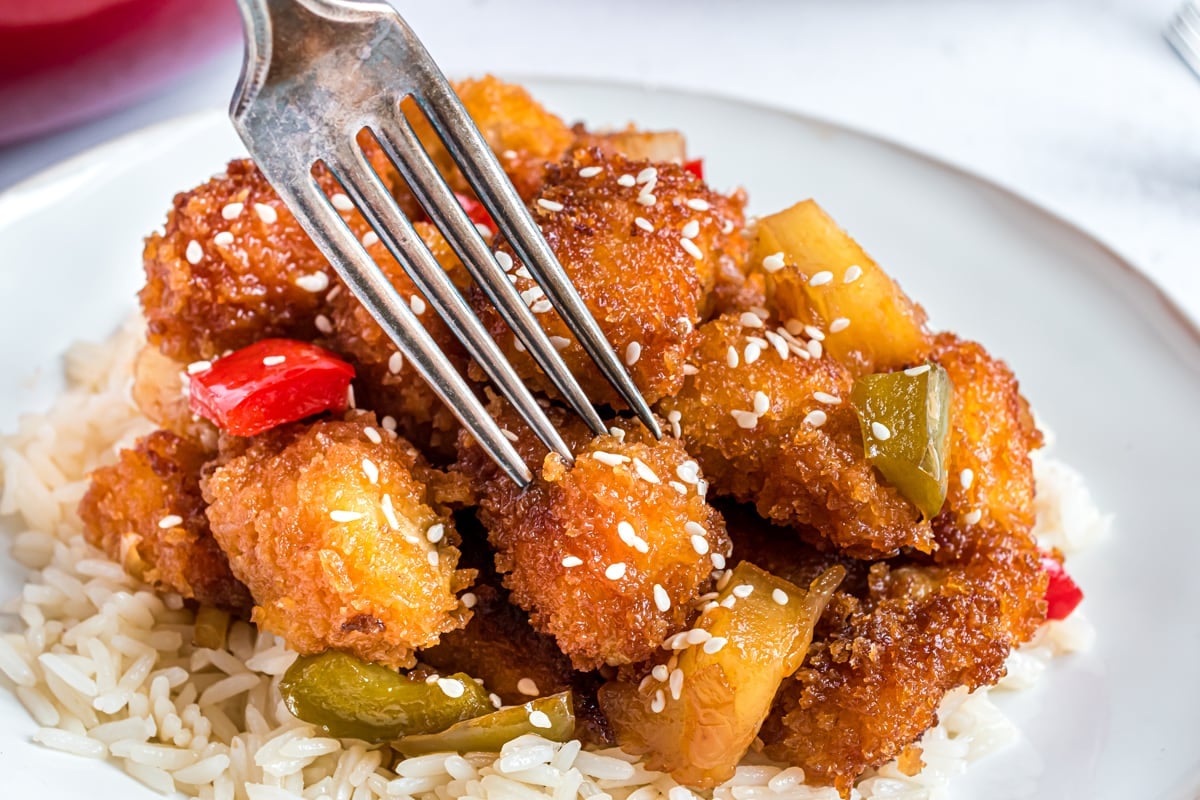
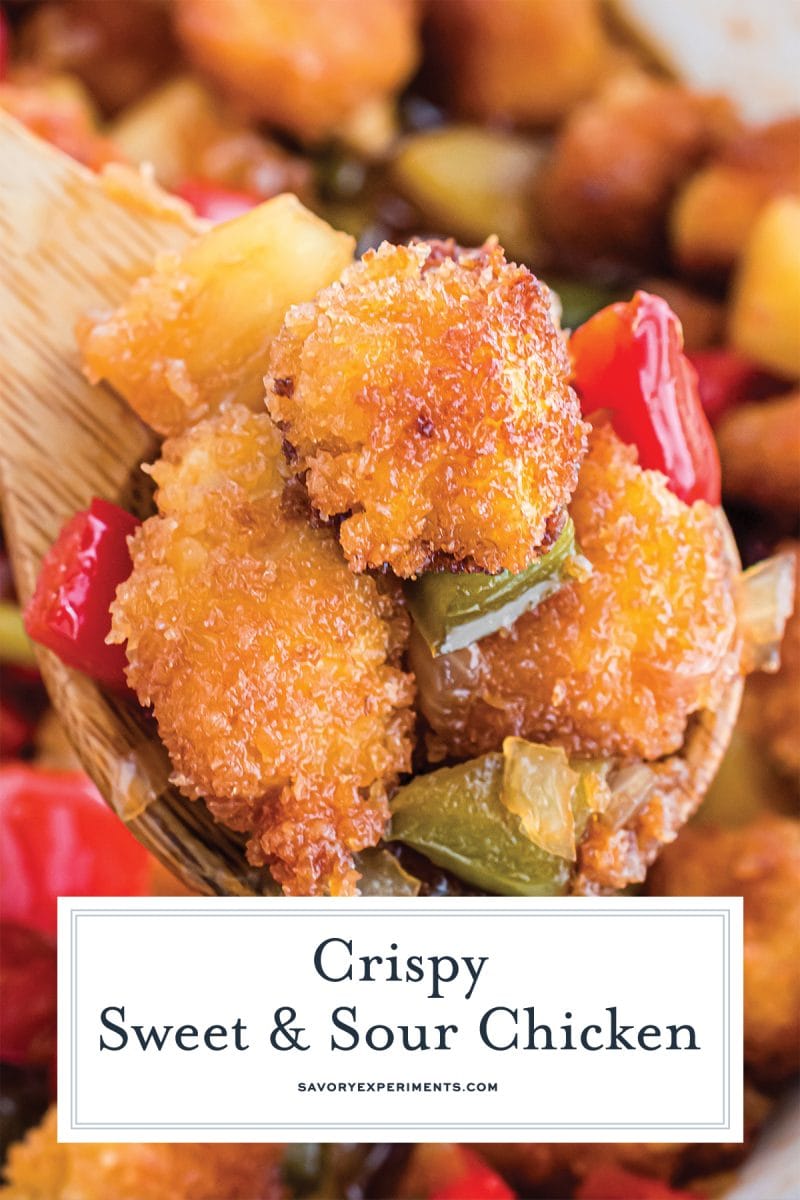
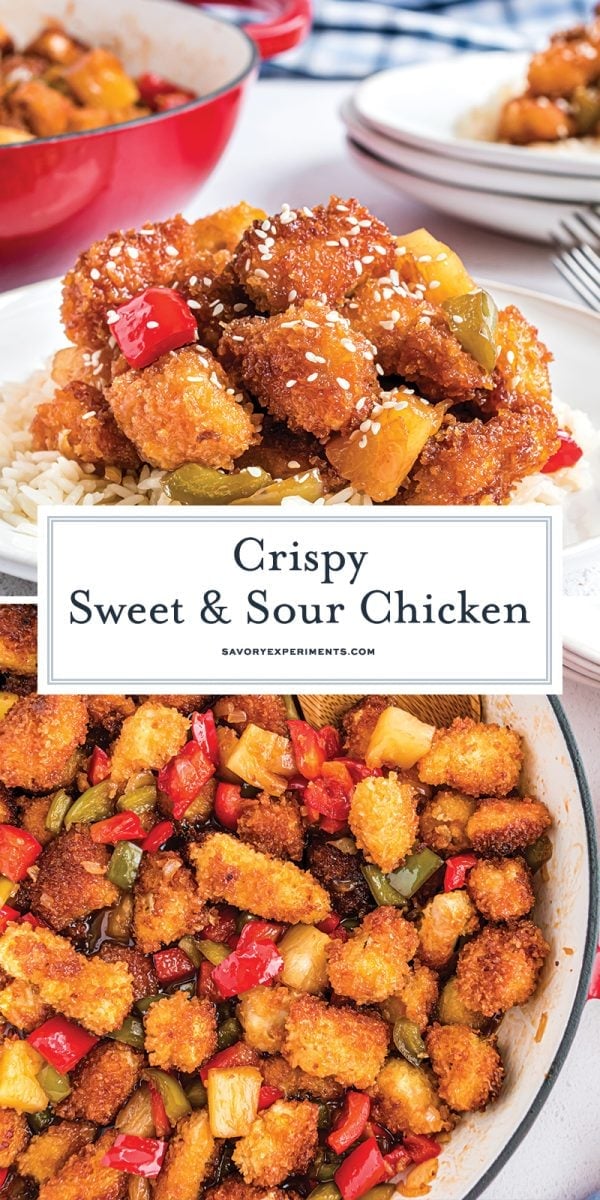
Make this Sweet and Sour Chicken recipe and treat your family to crispy pan-fried chicken coated with a quick sweet and sour sauce made with pantry staples. Want to skip frying? No problem- scroll on down for our baked version.
Is my family the only one that has a 30-minute debate about what to order from Chinese restaurants and then ends up ordering way too much anyway?
Our go-tos are sweet and sour chicken, orange chicken and pot stickers. Sweet and sour chicken is always coated in this tangy sauce that balances sourness with a delectable sweetness. There never seems to be enough leftovers to make all of us happy, so it felt like the right time to whip up a homemade version.
Ingredients
One of the most surprising things most home cooks discover when they make homemade chinese take out recipes, is just how little the ingredients have to do with Chinese food. Ketchup and pineapple juice? Huh?
Truthfully, a lot of what Americans think of as Chinese food has little to do with authentic Chinese cooking. It’s a style of food that was born of Chinese immigrants developing familiar dishes using American ingredients available to them.
And lucky us! This family favorite uses common pantry ingredients that are widely available to all of us at any mainstream grocery store. You’ll need:
- Corn starch
- Egg
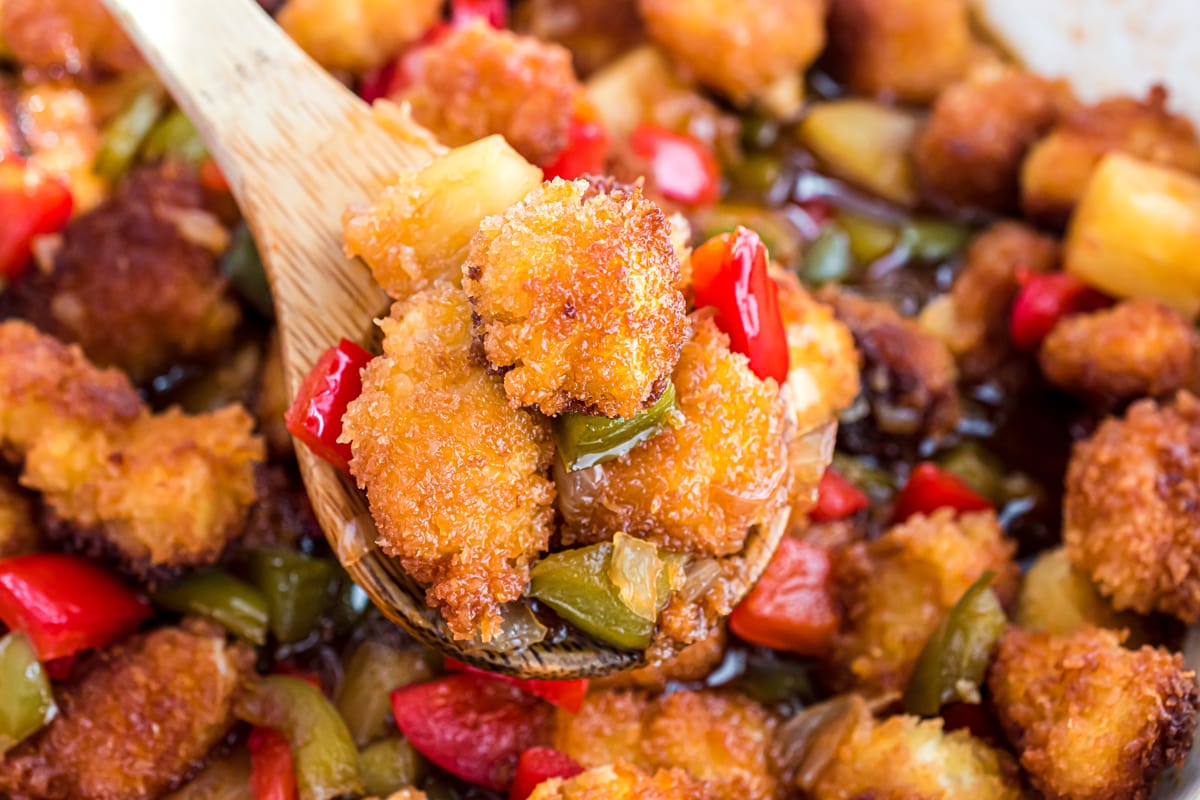
- Panko Breadcrumbs– regular breads crumbs or flour are also options, panko gives the best crunch and is hearty enough to stay crunchy when tossed in sauce.
- Chicken Breasts– thigh meat is fine, either will give you crispy chicken.
- Pineapple chunks in 100% juice– stay away from the syrup, your sauce will be too sweet. Fresh pineapple also works, but you will still need to purchase pineapple juice.
- Brown sugar
- Low Sodium Soy Sauce– please stick with low sodium, otherwise you could end up too salty.
- Rice Wine Vinegar– apple cider vinegar or just rice vinegar is an easy swap
- Ketchup– you can opt for a plain tomato paste instead, but you will have more of a sour sauce than sweet.
- Red and Green Bell Peppers– any color or just one color will do.
- Onion– White or yellow is fine.
- Garlic– garlic powder also works, use about 1/2 teaspoon
- Oil– Any neutral oil with a decent smoke point works, vegetable, canola and peanut are the ones we use. Please do not use sesame oil, it packs too much flavor!
- Sesame seeds or Green Onions– optional for garnish
- Crushed Red Pepper- if you want a little heat, add a sprinkle to the sauce!
Why Is Sweet and Sour Sauce Pink?
One ingredient you definitely won’t find on this ingredient list is food dye. That iconic pink color we associate with sweet and sour chicken comes from artificial coloring. It’s unnecessary, and doesn’t do anything for the overall flavor, so we’re skipping it.
The ketchup will give a bit of red color, but real sweet and sour sauce is more of a caramelized brown hue.
More Veggies, Please!
I also recommend getting creative with your veggie add-ins. I went traditional with a blend of red and green sweet peppers and I love the flavor they add to the sauce. After making the sauce, try adding:
- Steamed broccoli
- Steamed Cauliflower
- Grated carrot
- Sliced water chestnuts
- Mini corns
- Bean sprouts
How to Make Sweet and Sour Chicken
As with many things, once you learn how to make this recipe, you’ll be surprised at just how easy it is to make. No wok or special equipment needed, just a few prep bowls, some oil for frying, and a large saute pan.
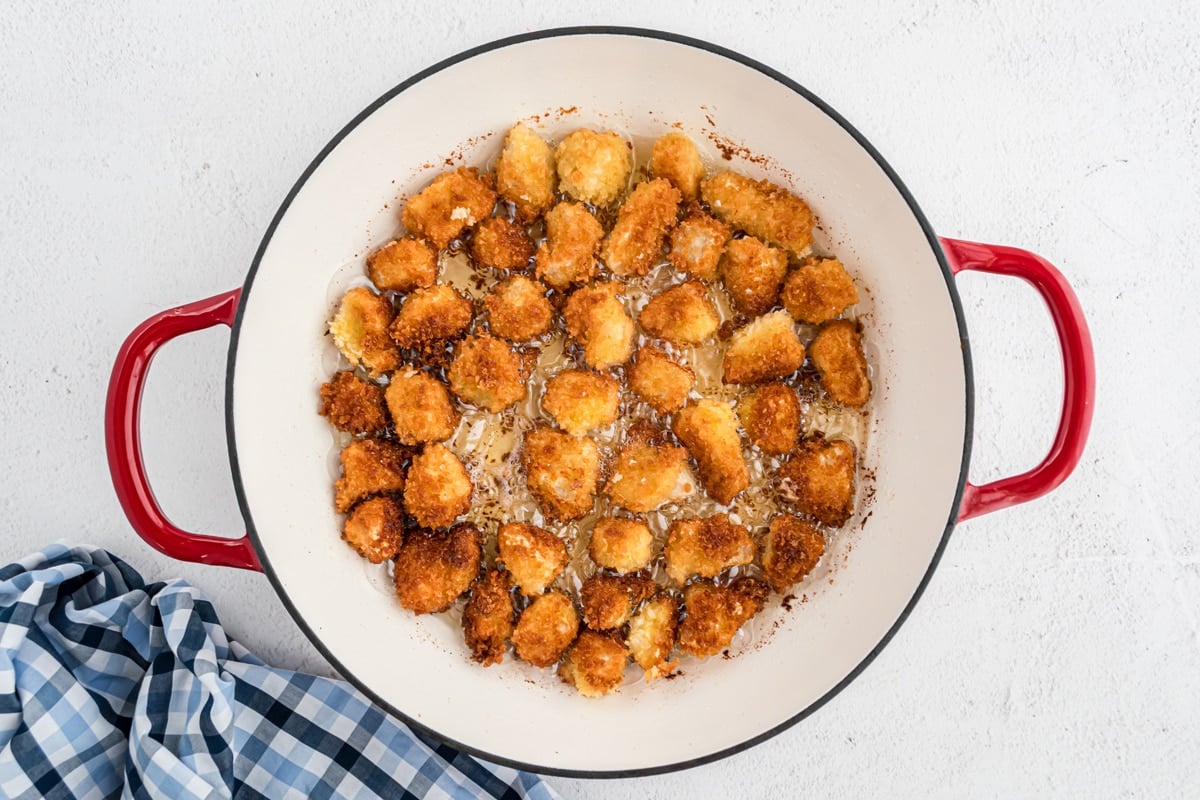
- Instead of using a batter, we opted for panko which gives a nice crunch and stays crunchy when tossed in sauce. opted for breading the chicken breast pieces in a cornstarch, egg, breadcrumb combo which provided optimal crispiness in the chicken.
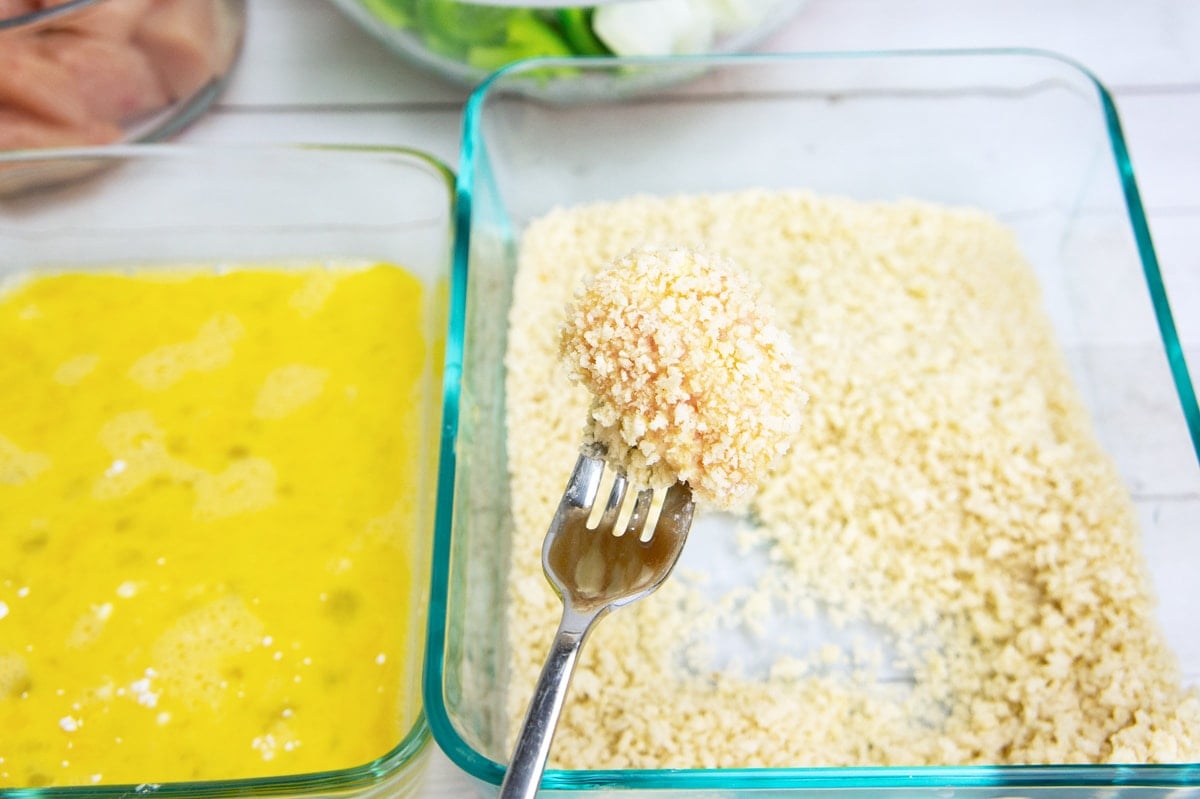
It’s a three-part, standard breading process of cornstarch to absorb extra moisture, egg to bind, and breadcrumbs to seal in the chicken and give you that crunch.
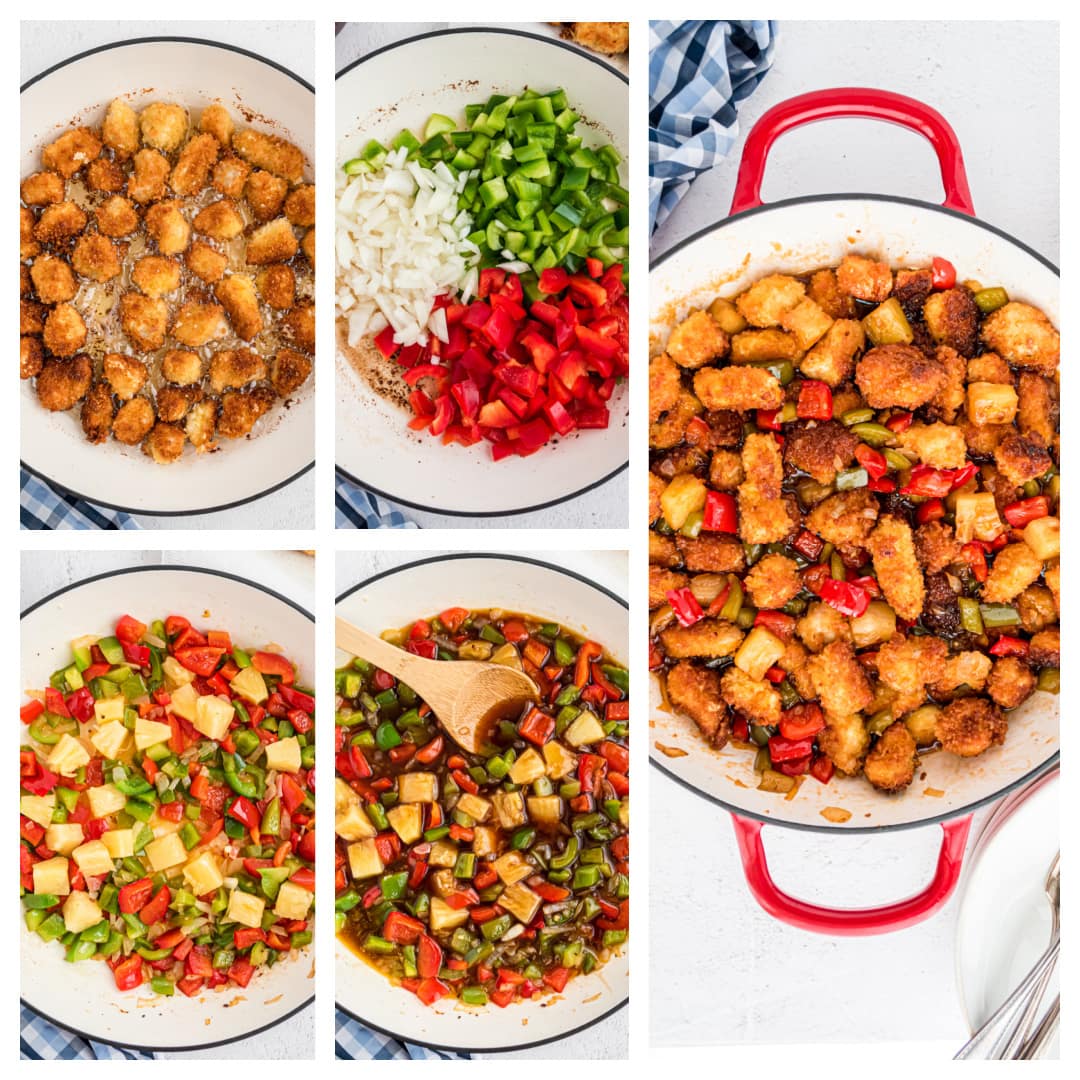
- Heat the oil in a large skillet (I like a big ole cast iron) to 350°F, then add chicken. You might be able to do one batch, but don’t crowd it. Fry until golden brown, approximately 5 minutes per batch.
- While the chicken is deep frying, combine the sauce ingredients in a bowl or measuring cup with a spout and set aside.
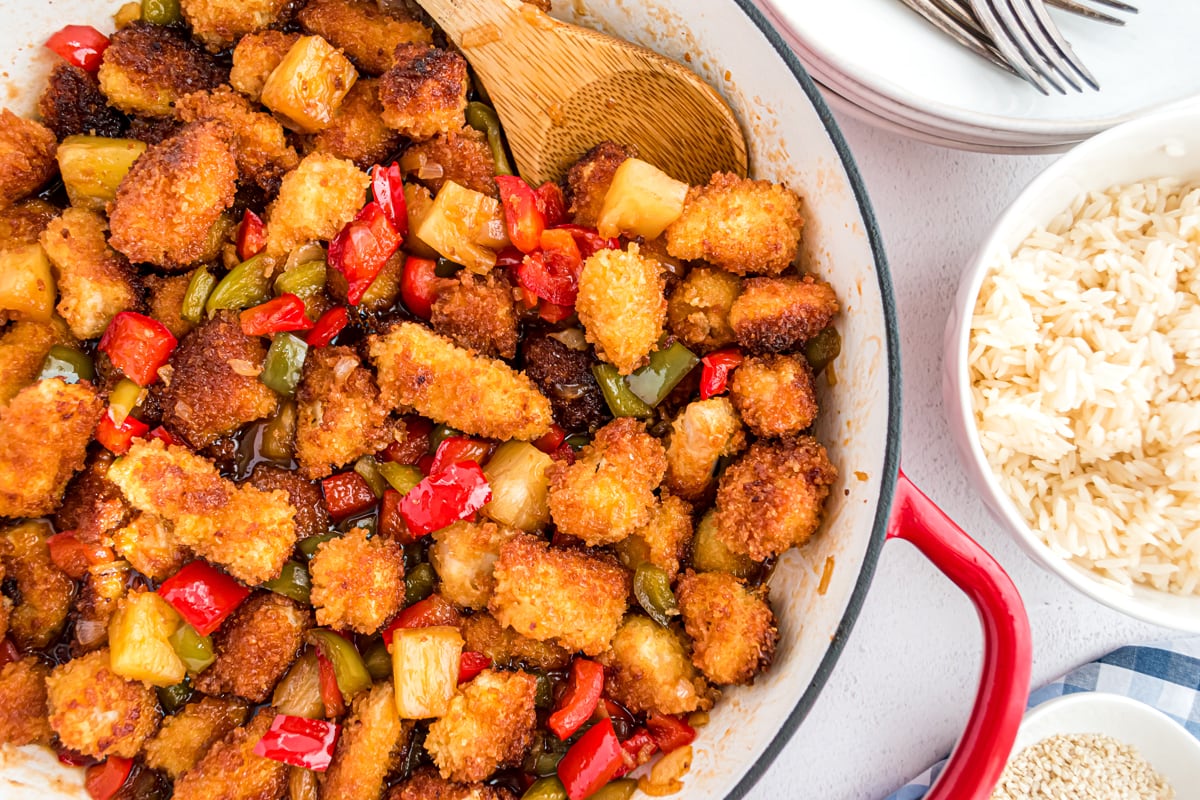
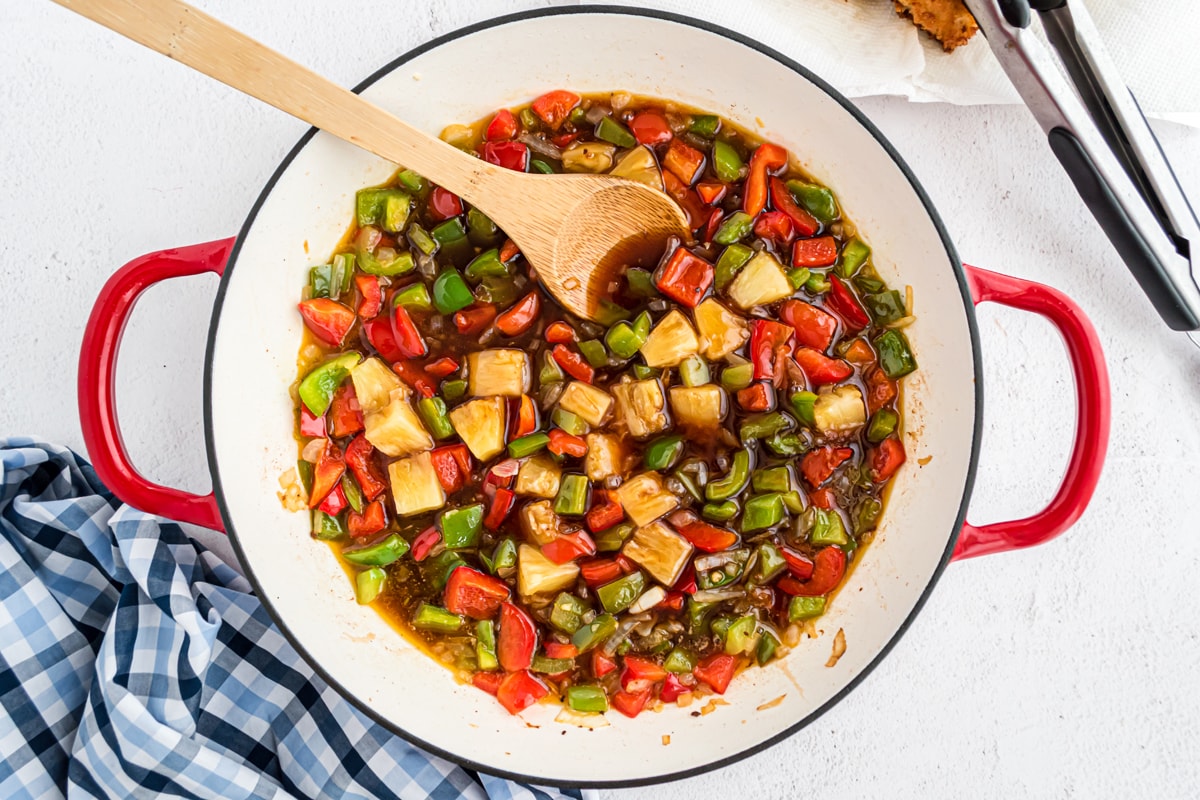
- Next, saute the red & green bell pepper, onion, pineapple, and garlic, then toss all of it with the sauce until it’s nice and thick. The sugars will caramelize and help to give it some body.
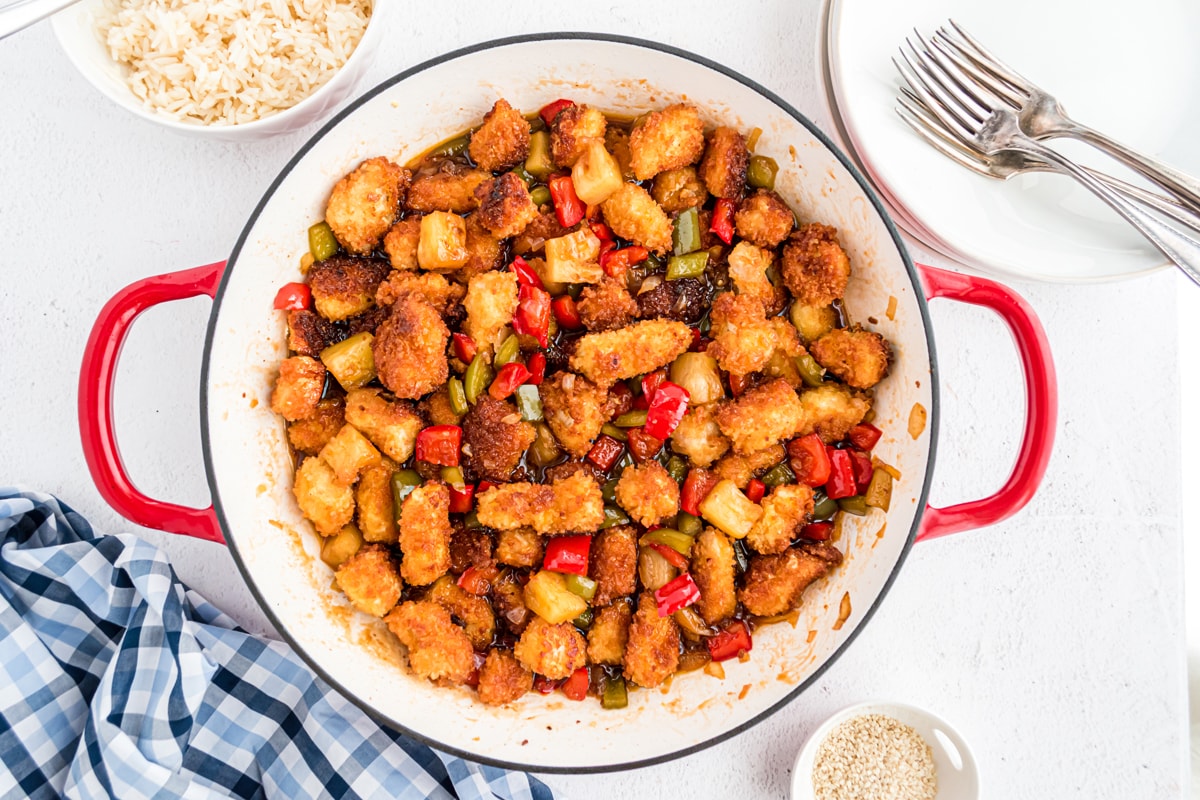
- Coat the chicken in the sauce with everything else. Just the tossing should reheat it without having to let it sit.
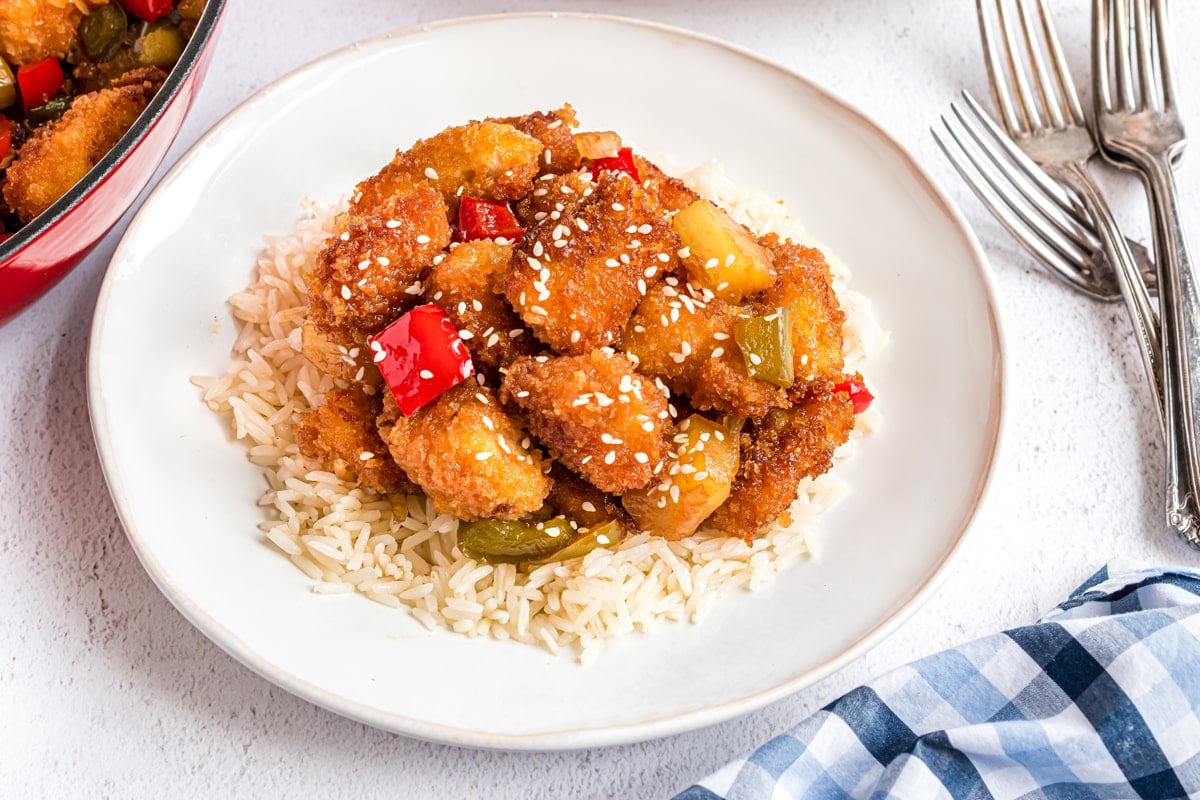
- Serve over a bed of white or fried rice.
Baked Sweet and Sour Chicken
Another benefits to using actual bread crumbs instead of a batter is the option to skip frying and bake. This will take a little more time and make more of a mess, but you’ll save a few calories. Most of the baked sweet and sour chicken recipes still have you fry the chicken in a skillet and then bake it with the sauce, which makes zero sense to me.
- Preheat oven to 400 degrees F. Coat a cooling rack with nonstick spray and place on a baking sheet, this will allow hot air to circulate around each piece of chicken so it cooks fast, evenly and the bottoms don’t get soggy.
- Bread the chicken pieces as you would in the original recipe, but place them on the cooling rack leaving a little space between them (don’t crowd the chicken!)
- Bake for 20-25 minutes, turning half way through or until they reach 165°F. This will depend greatly on how large you cut the chicken pieces.
- While the chicken bakes, make the sauce in a skillet on the stove top. When chicken is cooked, toss baked chicken pieces with sauce and vegetables in the skillet and then serve.
Tips for Perfect Sweet and Sour Chicken
- The chicken should be about halfway submerged in hot oil while frying for best crunch and quick, consistent cook times.
- Don’t overcrowd the pan when cooking the chicken. Fry in two batches if needed. Adding too much at once drastically cools the oil and also doesn’t allow it to freely swim around the chicken resulting in uneven cooking.
- Also, use a deep frying thermometer to measure the oil temperature. Too hot and the breading will burn before the inside cooks and too cool and the chicken won’t cook at all and the breading will fall off.
- After frying, place the chicken on a cooling rack suspended over a paper towel lined baking sheet or plate. This lets the oil drain off without sitting in it and gettings soggy.
- Drain off all but one tablespoon of oil and wipe out excess breadcrumbs from the saute pan after you cook your chicken. You need just a light nonstick surface, but not enough to really saute the vegetables.
- Let the pineapple and garlic saute for only 30 seconds or so before adding the sauce. They just need to lightly heat up, not really cook.
- To ensure your sauce comes together quickly in the pan, mix all the ingredients together in a measuring cup or small bowl before pouring it over the bell pepper mixture. If you try to do this in the skillet, it might not incorporate fully.
- Let the sauce thicken slightly in the pan. This will happen as the sugars simmer and will happen fast, so keep an eye on it. Serve immediately or wait until ready to serve before adding the chicken to make sure it stays nice and crunchy.

Freezing and Storage
While I can’t help you with those iconic takeout boxes, you can keep homemade sweet and sour chicken just as you would the restaurant version. Afterall, it is about to be your new favorite recipe.
The best way I’ve found to reheat it, is in a saute pan on the stove. While I wish I had the magical powers to return the crisp to your chicken, it’s just not part of the deal when you have such a delicious sauce! All the same, it’s absolutely a yummy lunch the next day.
You can freeze this all together, but it will stay best if you freeze the chicken and sauce separately. The chicken will never regain the crunch factor it had when first prepared.
When you’re ready to cook it, first pan fry your chicken from frozen until crispy. Drain off the oil, then add your peppers and sauce to the pan. They’ll thaw and cook together. Then simply add that chicken back in.
More easy chicken recipes:
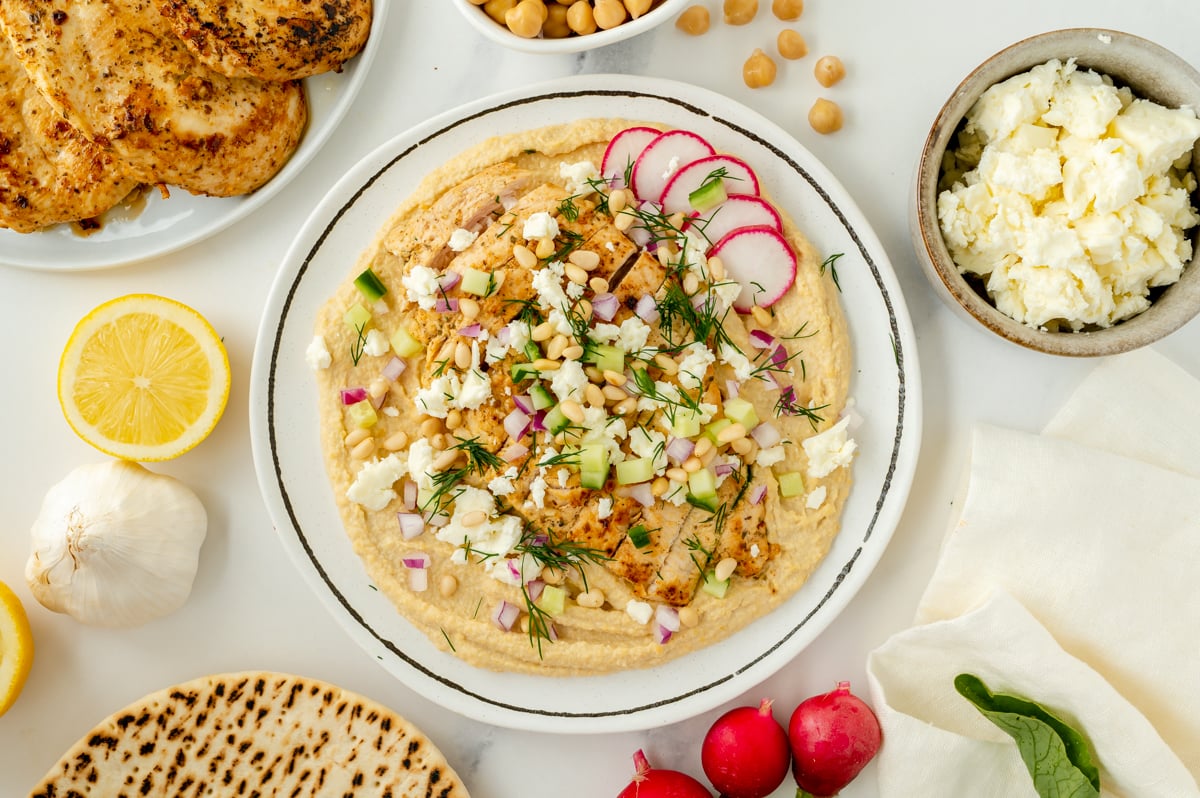
Greek Chicken Hummus Bowl
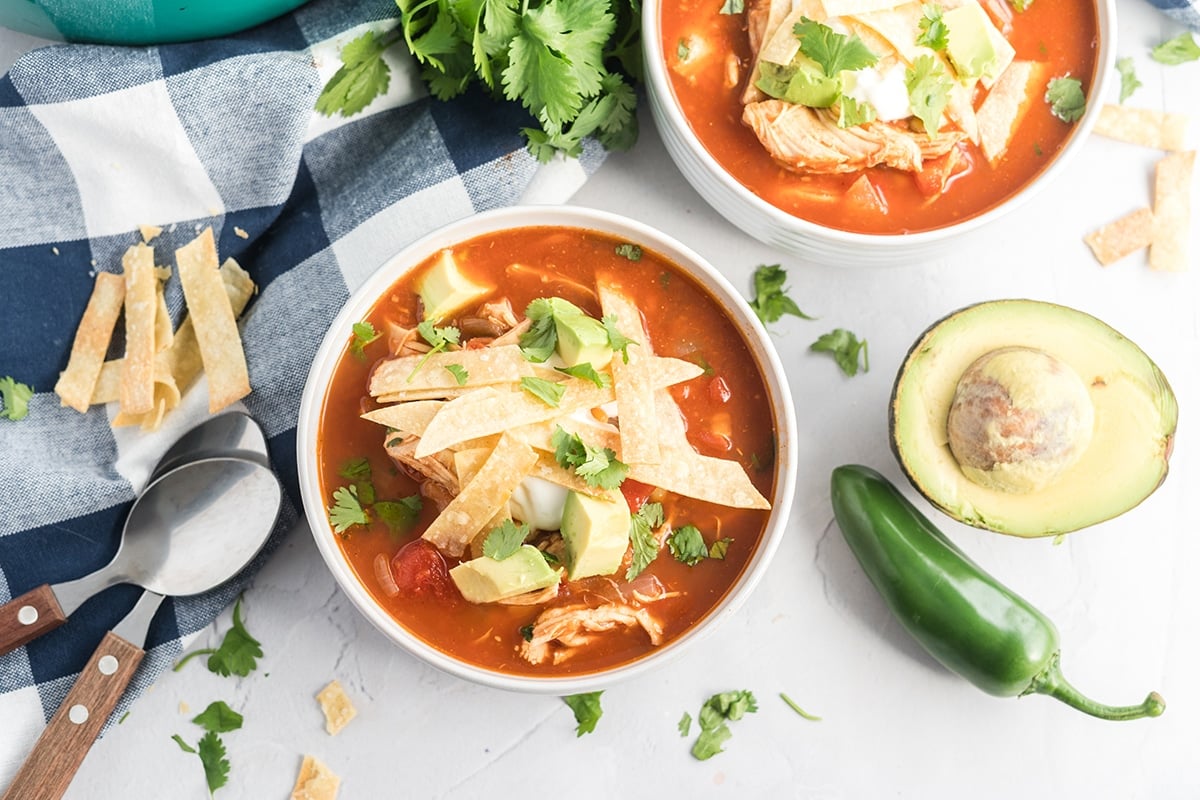
Easy Chicken Tortilla Soup
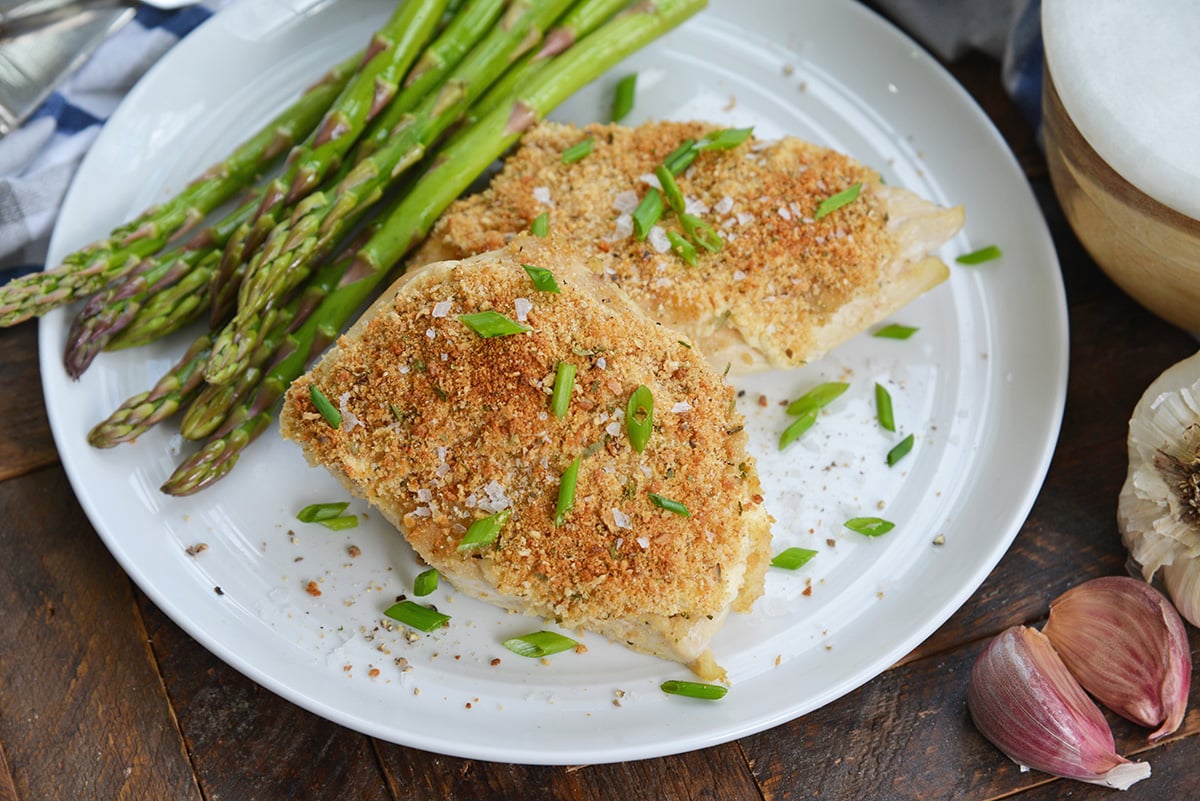
Baked Garlic Parmesan Chicken
Sweet and Sour Chicken
Ingredients
- ½ cup cornstarch
- 2 eggs
- 1 ½ cups panko breadcrumbs
- 2 boneless skinless chicken breasts
- 8 ounces pineapple chunks in 100% juice , drained separating the pineapple chunks from juice
- 3 tablespoons rice wine vinegar
- ⅔ cups brown sugar
- 2 tablespoons low sodium soy sauce
- ¼ cup ketchup
- 1 red bell pepper , diced
- 1 green bell pepper , diced
- ½ yellow onion , diced
- 1 tablespoon garlic , finely minced
- 1 cup vegetable oil
Instructions
- Dice the chicken into 1-inch cubes. Set aside.
- Place the cornstarch, beat eggs and panko in three seperate bowls for breading.
- Begin dredging your chicken with the cornstarch first, then egg and lastly the breadcrumbs. Place the breaded chicken cubes on a plate until all are completed.
- Combine the brown sugar, soy sauce, vinegar, ketchup, and pineapple juice in a bowl or large measuring cup and stir to combine.
- Heat the oil in a large saute pan or skillet over medium heat. When the oil is hot (about 350°F), begin frying the chicken. Cook for 5 minutes, or until golden brown, flipping once halfway through the cook time. Working in batches to not crowd the pan.

- Remove the cooked chicken to a sheet pan lined with a cooling rack to drain.
- Pour off all but 1 tablespoon of oil and remove as much excess breadcrumb from the pan as possible.
- Add the onions and peppers and saute until tender and the onions are beginning to caramelize.
- Add the pineapple chunks and garlic to the pan and stir, cooking for about 30 seconds to one minute.
- Pour sauce over the peppers and stir until the sauce is smooth and beginning to bubble.
- Reduce heat to low and let simmer until it thickens slightly, approximately 2 minutes, then return the chicken to the pan and toss it all to combine. Serve immediately.
- If you've tried this recipe, come back and let us know how it was in the comments or ratings!
Nutrition


The sauce tasted good but did not thicken. I added a tablespoon of cornstarch.
Good to know and thanks for the feedback. We will circle back.
Gotta love a classic Sweet and Sour Chicken! Love how the sauce thickens and coats the chicken. Yum!
This is my favorite to make. Your instructions are so easy to follow.
Yum! Love that crispy coating on the chicken. Such a great weeknight meal with so much flavor.
I love the flavors with this chicken we are just so pleased with the outcome and I will make it again thanks for posting this recipe
Incredible food. This delicious meal is now on my top 10 list for family food.