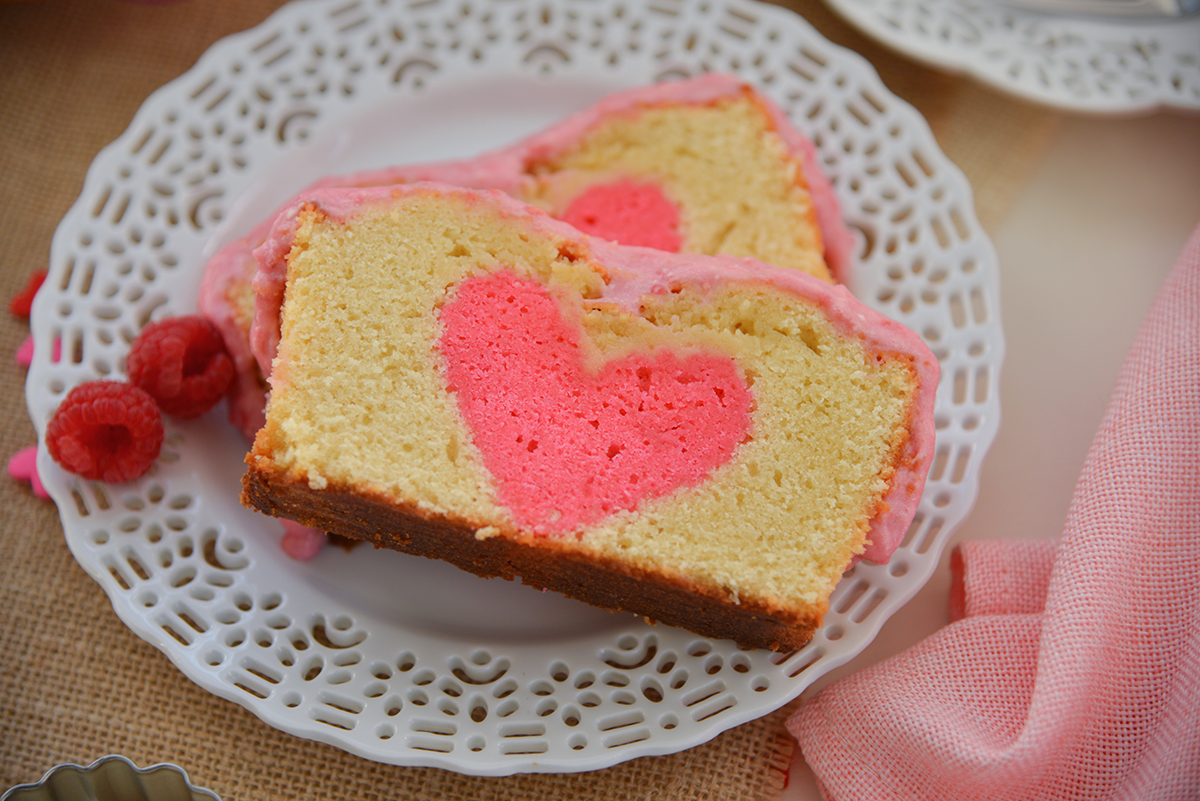
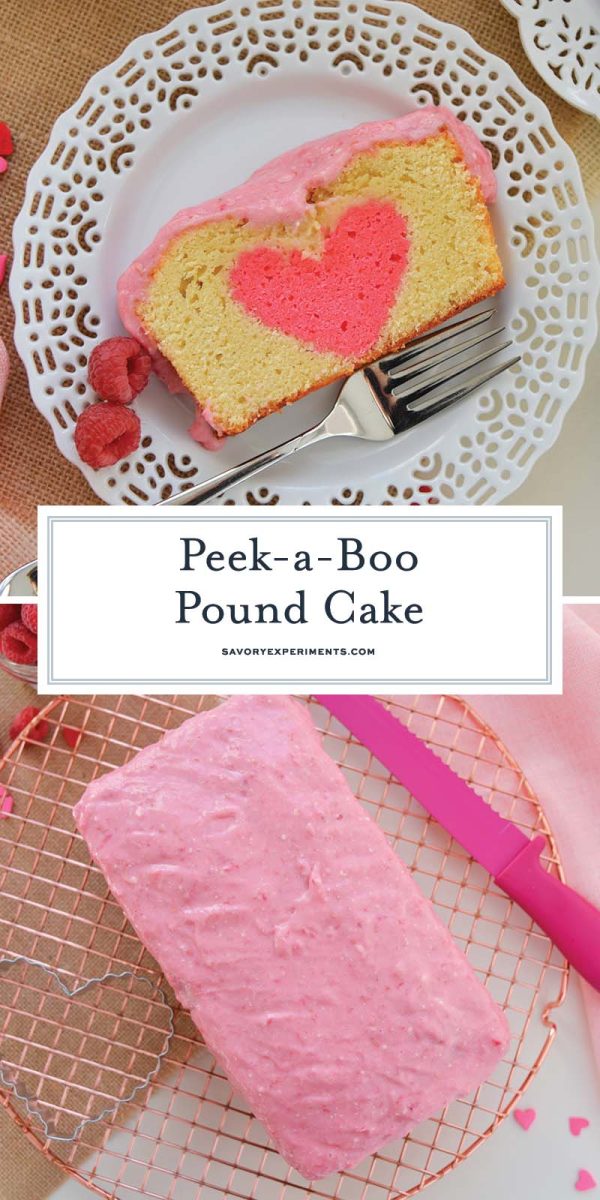
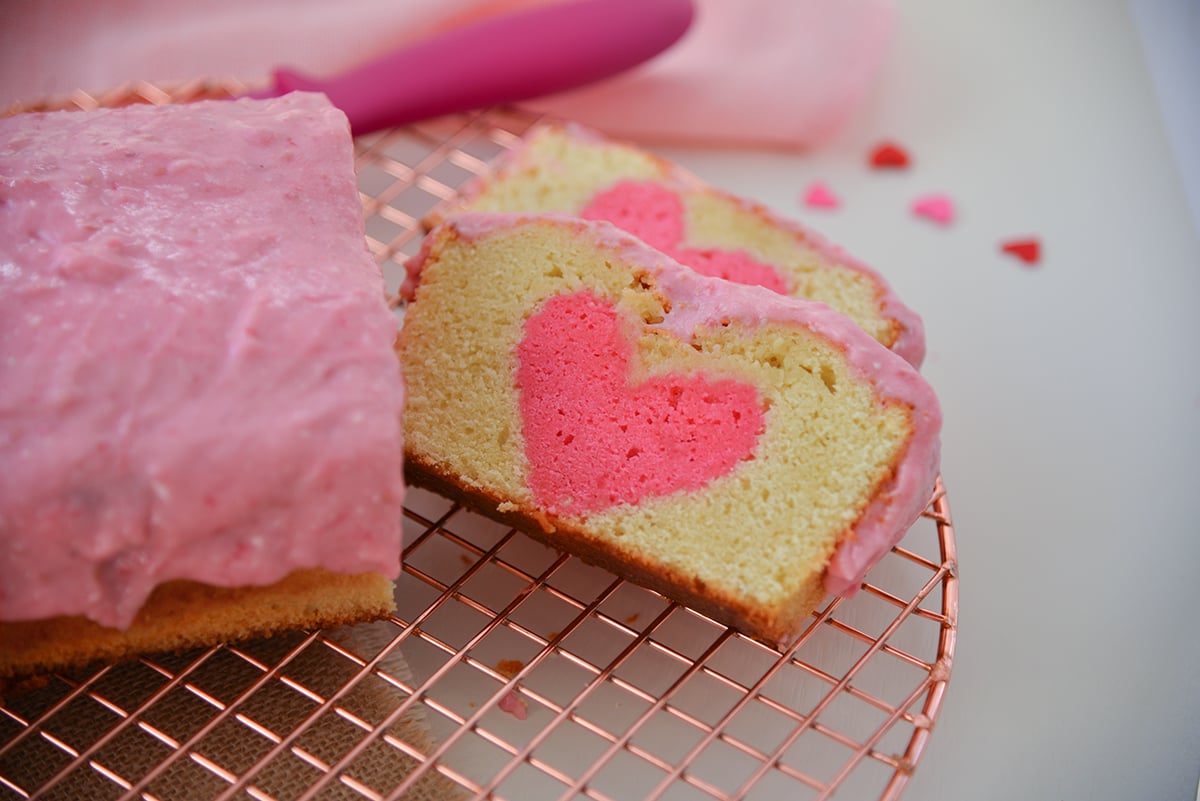
We all know I’m not a huge baker. With the exception of my Danish Pastry Ring, this is probably the most technical I’ll get with baking. I will never be a Duff Goldman or BUddy Valastro. But this cute little raspberry and vanilla flavored pound cake is well worth the time and effort when your family slices in to a lovely heart shaped surprise.
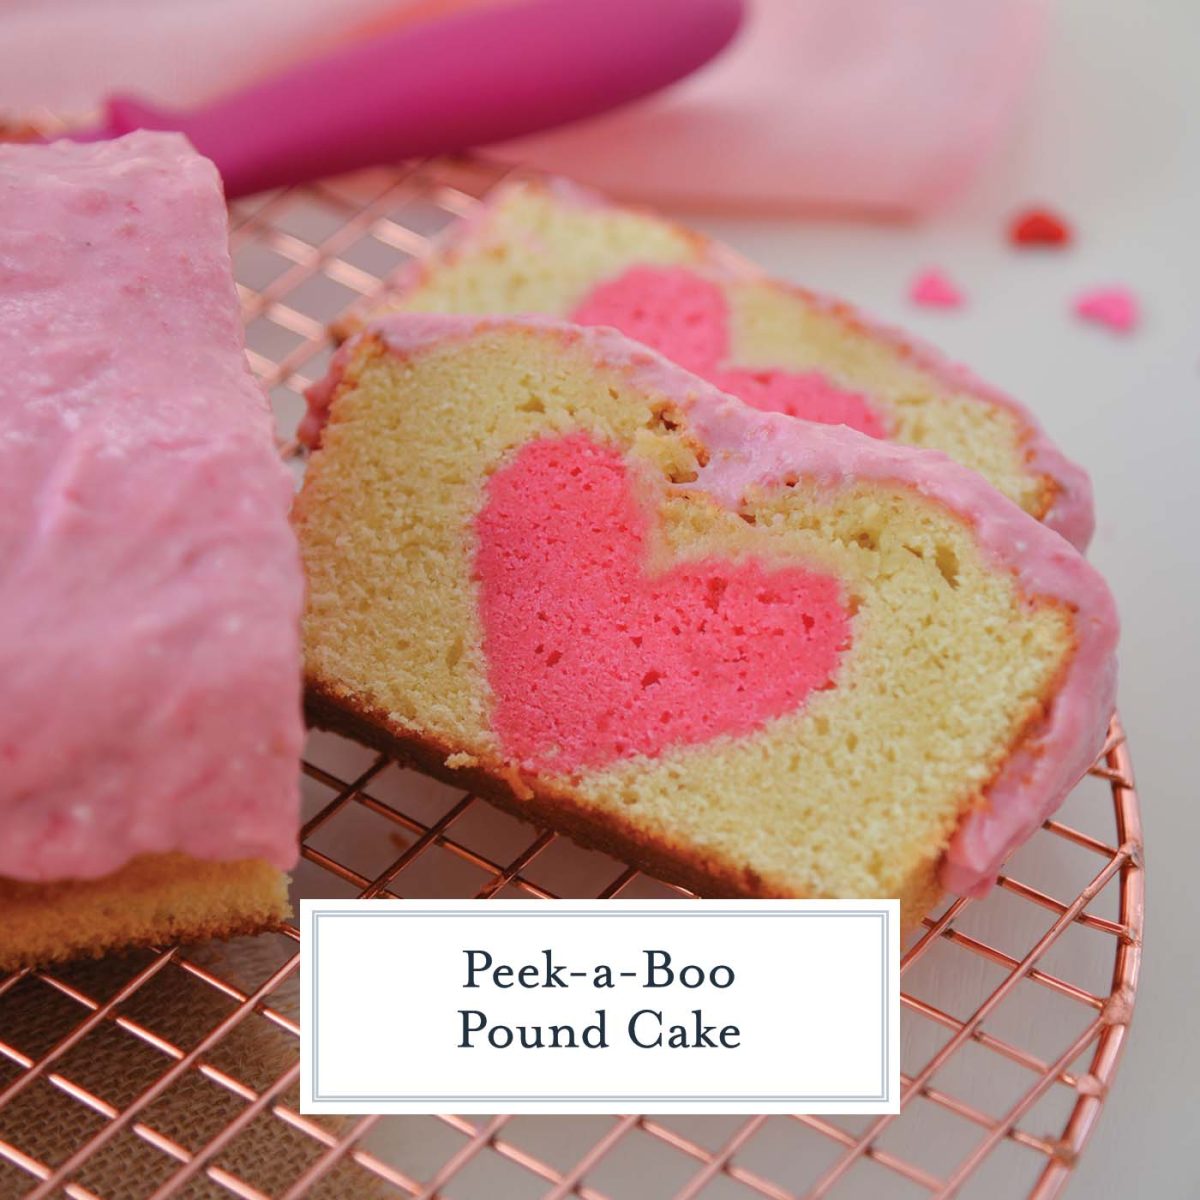
Pair the flavors of raspberry and vanilla cake with a sweet and tart cream cheese frosting glaze blended with raspberries and you have a winning combo.
Peek-a-Boo Cakes
Let’s start off with a little bit of honesty. This is the third time I’ve attempted to make a Peek-a-Boo Pound Cake. All of the posts I have seen on “peek-a-boo cakes” swear it is “so simple” and “easy”.
The chemistry of this cake is not that elementary. So what are the hiccups and issues? Here is what I’ve learned:
- Cut-outs need to be frozen. If they aren’t, they overcook and get rubbery.
- You don’t have to fully flood the cut-outs for the cake to bake around them.
- The cooking time the second time around can be more, not less.
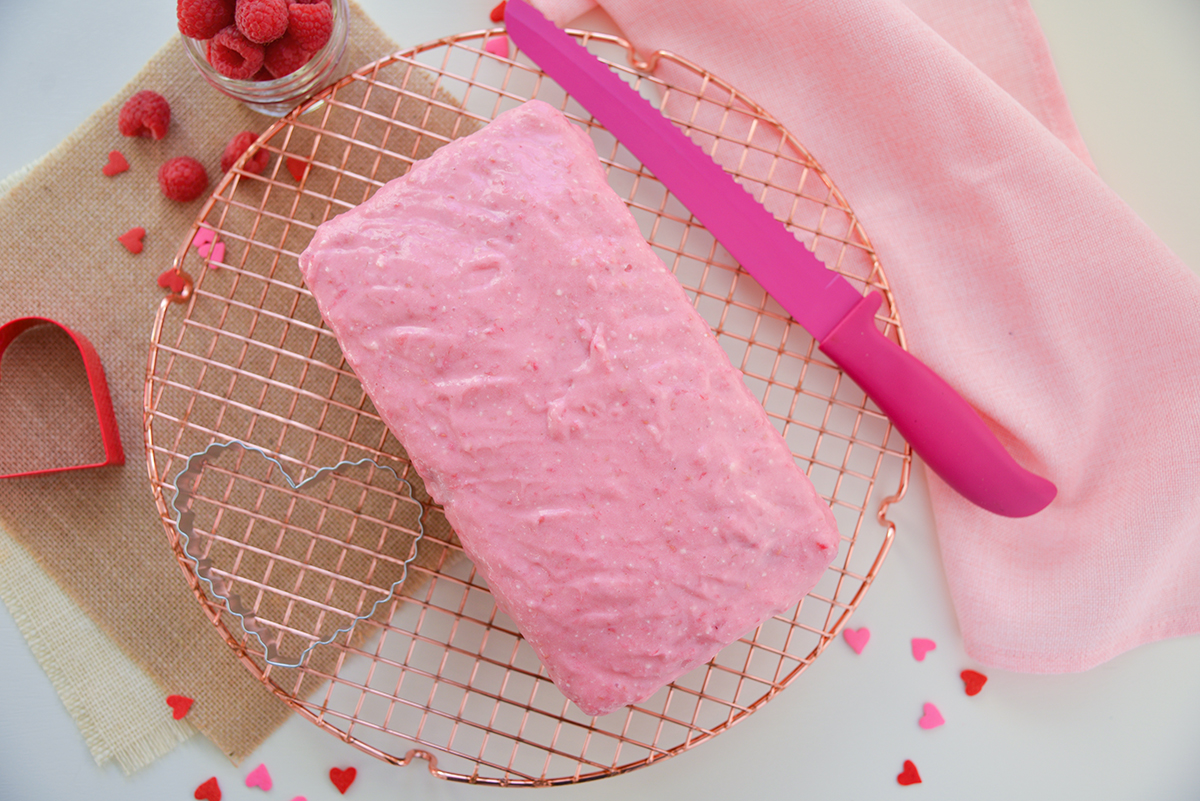
- The top will undoubtedly have some imperfections, make sure you use some type of glaze or frosting to cover them up!
After you’ve done it once, I promise it will get easier and then you can make them for any holiday or occasion.
What You’ll Need
For the actual Cake:
- Cake Flour– Cake flour creates a more tender crumb than all-purpose flour because the protein content is lower and it is ground finer. You can use all-purpose flour, but it will have a traditional dense dense pound cake consistency.
- Baking Powder– A leavening agent to help it rise.
- Fine Sea Salt– Yes, we generally use a coarse grain sea salt, but this is my mother’s pound cake recipe and she’s always used fine, so we stuck with it. If you do use coarse, double the amount to 1/2 teaspoon. It balances and enhances all of the natural flavors.
- Sugar– It’s a cake, foodie friends, it needs to be sweet and no, do not substitute an artificial sweetener. This is not the place to cut calories.
- Unsalted Butter– Unsalted allows use to control the salt levels and draws less moisture from the batter, making the overall cake moister. If you use salted butter, please omit additional salt.
- Vanilla Extract- Swap with almond if you please.
- Eggs– Adds richness to the cake and helps it to rise. Yes, it is a lot of eggs.
- Whole milk- We aren’t making a healthy cake here, so whole milk is the way to go for the ultimate golden cake.
- Raspberry Extract- This one can be challenging to find, we suggest a craft or baking store or ordering it online. It it also totally acceptable to just use vanilla extract and call it a day. With the fresh raspberry topping, no one will realize the hearts aren’t an additional taste.
- Red or Pink Food Coloring- You’ll need some sort of color to make the hearts stand out, but be mindful that red coloring (even when it says flavorless) still has a funky aftertaste, so use sparingly.
How to Make It
After you’ve made it once or twice, the technique is simple and you can start to get super creative!
- Heat the oven. Grease and lightly flour a 9×5-inch loaf pan. I like to also measure and place a piece of parchment on the bottom. It assists further with being non-stick.
- Sift together the dry ingredients and set aside.
- Cream together the sugar and butter until light, fluffy and smooth, this usually takes a few minutes. The mixture will be smooth and not grainy, most people folks to not mix long enough to actually cream these ingredients together. Doing so not only combines the flavors, dissolves the sugar but also introduces air into the batter to make the cake light and fluffy. Add the vanilla and eggs, beating on high speed for 2 minutes. Most of the mixing needs to be done before the flour is added, which can dry out or overdevelop the gluten making cake dry.
- Add the flour mixture into the wet ingredients, alternating with milk, until just mixed.
- Divide the batter into two seperate bowls; one will be for the vanilla cake surrounding and the other is for the raspberry cake cut-outs. Try to do this as evenly as possible using a kitchen scale or just a measuring cup. Cover and place one of the bowls of batter into the refrigerator.
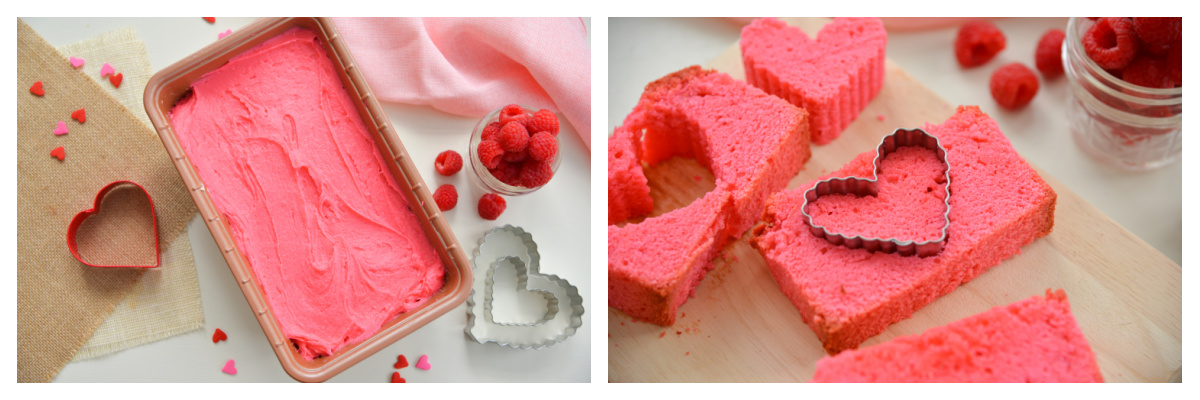
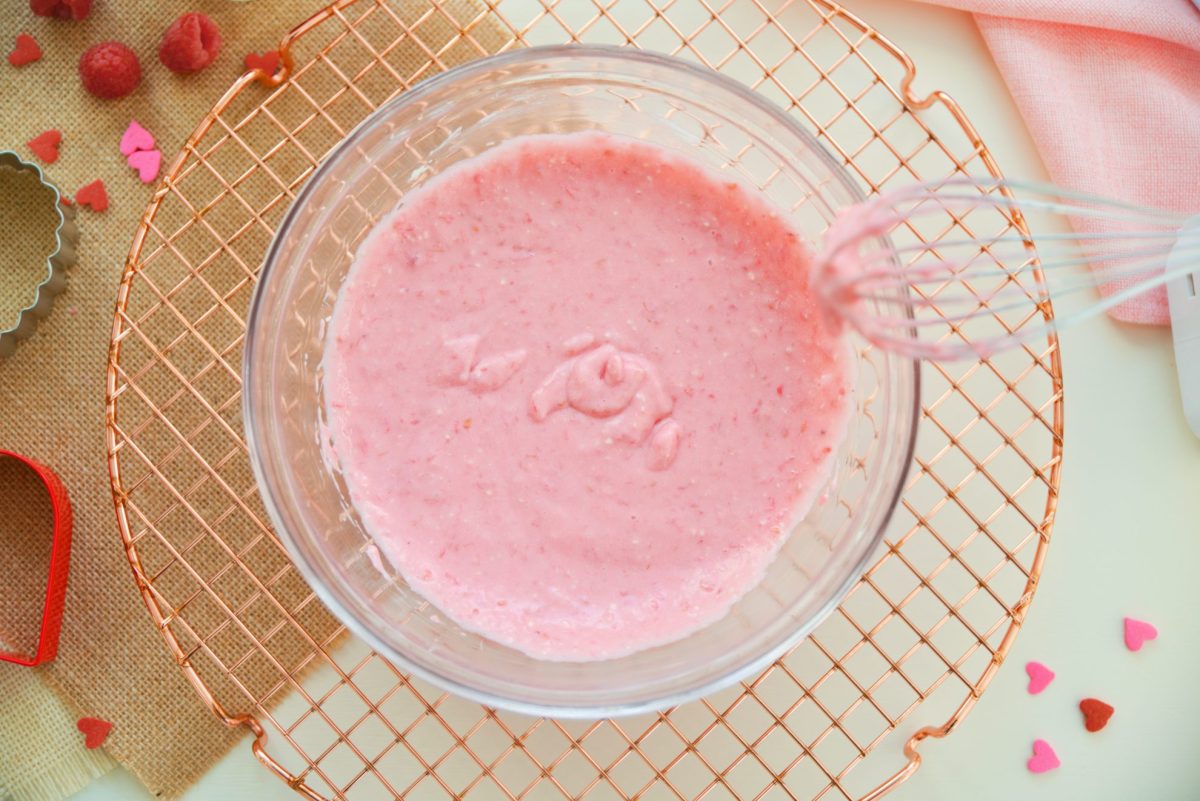
- Add the raspberry extract and red or pink food coloring to the remaining bowl and blend until fully mixed. Pour into the prepared loaf pan.
- Bake for 50-60 minutes or until it passes the toothpick test. Make sure it cools before removing from the pan.
- Cookie cutters between 1 1/2 and 2 inches are best. You might need to cut it on the diagonal to get full shapes. Cut cake into slices equal to the depth of your cookie cutter. Cut each slice and place cut-outs into an airtight plastic bag. Freeze for a minimum of 2 hours. These must be frozen or they will over cook when baked a second time. Use the leftover pieces to make a fun parfait with fresh berries, whipped cream and ice cream.
- When you are ready to make the rest of the cake, preheat the oven and prepare the same loaf pan with cooking spray, flour and parchment paper along the bottom. It’s important to use the same pan so the length of the cutouts match.
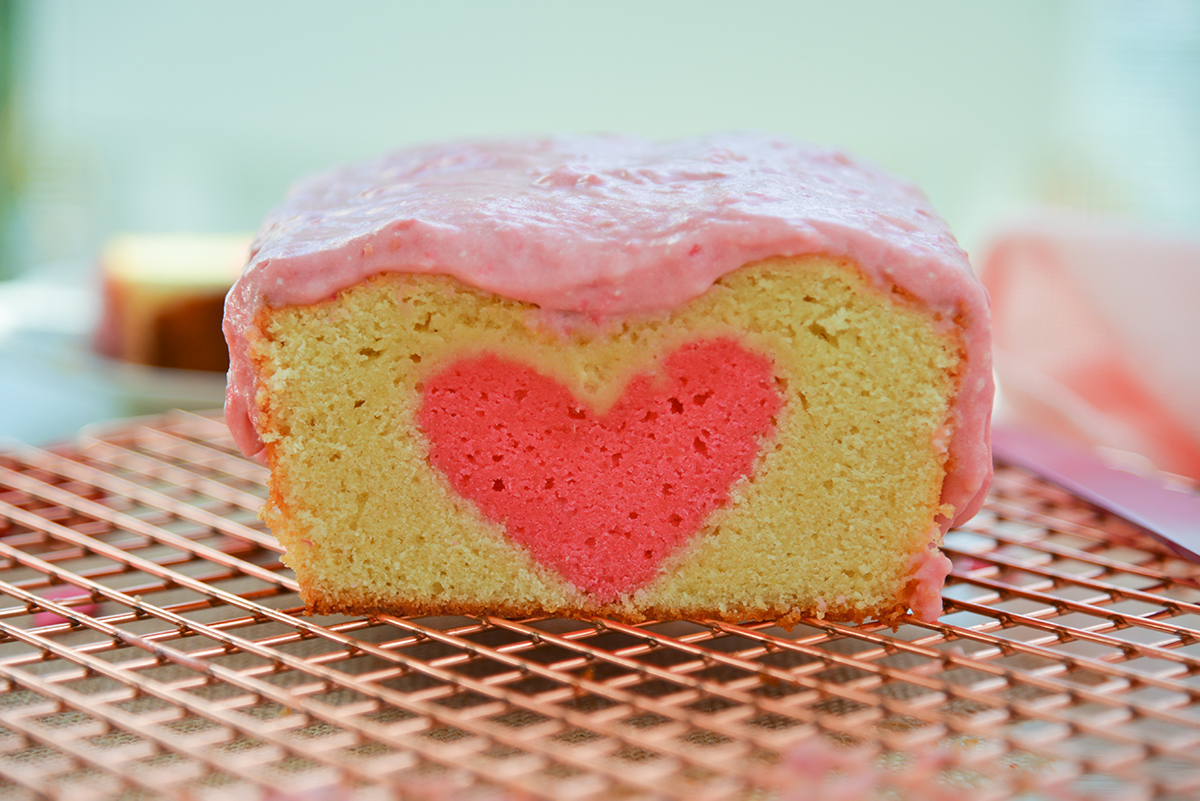
- Spread a cup or so of the vanilla batter into the bottom of the loaf pan and then stick the frozen hearts together down the center. If you have a tiny bit of wiggle room, leave a small space on either end so the batter covers up the ends and hides the surprise in the middle!
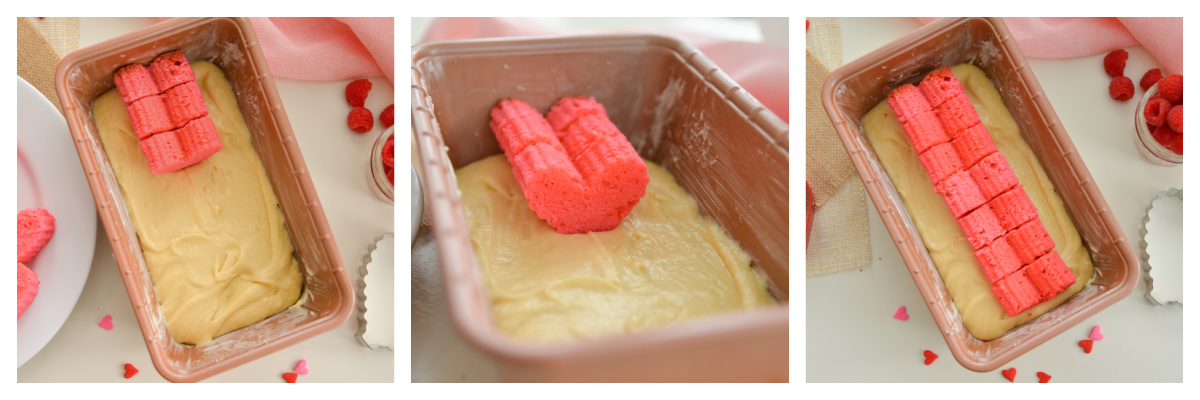
- Spoon the remaining batter over the cut-outs using a knife or spoon, spread so it isn’t too thick over the top. If it is too thick, it has the tendency to not fully cook leaving the top a little doughy. Not the worst thing in the world, but not ideal.
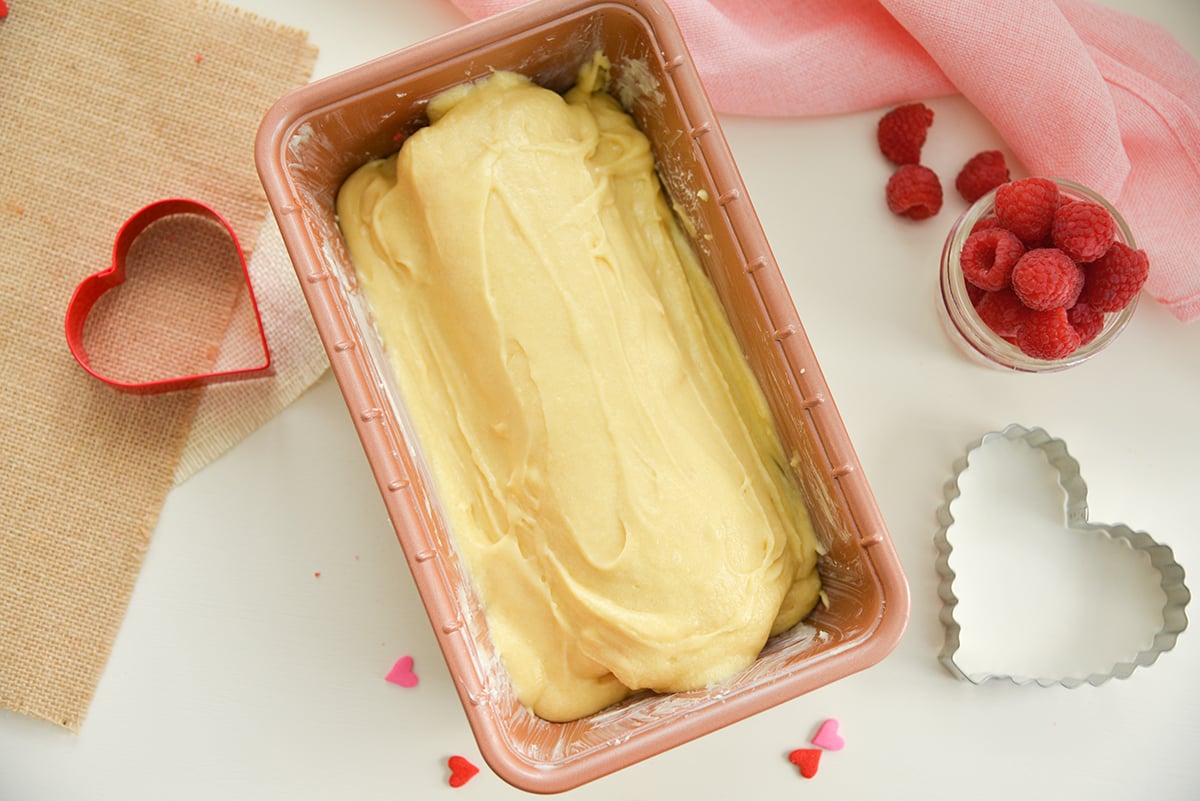
- Bake the pound cake until it starts to lightly brown and passes the toothpick test. Rotating the cake can help to brown evenly, but if it browns too fast, cover loosely with a piece of foil.
- When cooked, allow to cool. Run a butter knife around the edges to loosen it and then place onto a cooling rack until fully cooled. Don’t frost it until the cake is cooled.
Frosting and Alternate Toppings
The cream cheese glaze we used is a tangy and sweet blend of cream cheese and fresh raspberries, so it really gives this cake a unique flavor and texture. The glaze is made from cream cheese (of course), salted butter (if unsalted, add a small dash of fine sea salt), vanilla, powdered sugar and raspberries.
If you choose to use frozen raspberries, allow them to thaw fully and then drain them. Since they are frozen, they have more water content and might also require more powdered sugar to achieve the right drizzle-able consistency.
But if you want other options, here are a few:
- Powdered Sugar- For more of a light flavor to serve with coffee or tea, omit the frosting and dust with powdered sugar.
- Slather with buttercream frosting.
- Use a canned cream cheese frosting and top with fresh raspberries… or leave it plain!

Variations & Celebrations
We served ours around Valentine’s Day, but the same concept can be used for nearly any holiday and with other flavor combinations. Aim to use 2-inch cookie cutters that don’t have too much detail or small pieces for best results.
- Gender Reveal Parties– Use a baby bottle shape, rattle or heart and have the couple slice into the middle.
- Christmas– Use a green tree or red bell for the center and use a peppermint or almond extract. Use a plain cream cheese frosting drizzle or full fledged buttercream.
- St. Patrick’s Day– We liked a spearmint flavor with shamrock shaped center.
- Easter– Pink, yellow or purple easter eggs down the center. Go all vanilla on this one.
Storage & Freezing
Like most cakes, they are best enjoyed the day you prepare them and begin to dry from there on out. The nice icing on this one helps keep the top moist, so this is an added benefit. Store covered at room temperature for up to 5 days.
This pound cake can be frozen before icing. Wrap well in freezer paper or aluminum foil and store for up to 3 months. Thaw at room temperature and frost or top when fully room temperature. Anytime you freeze a cake, the moisture will be slightly depleted.
More cake recipes:
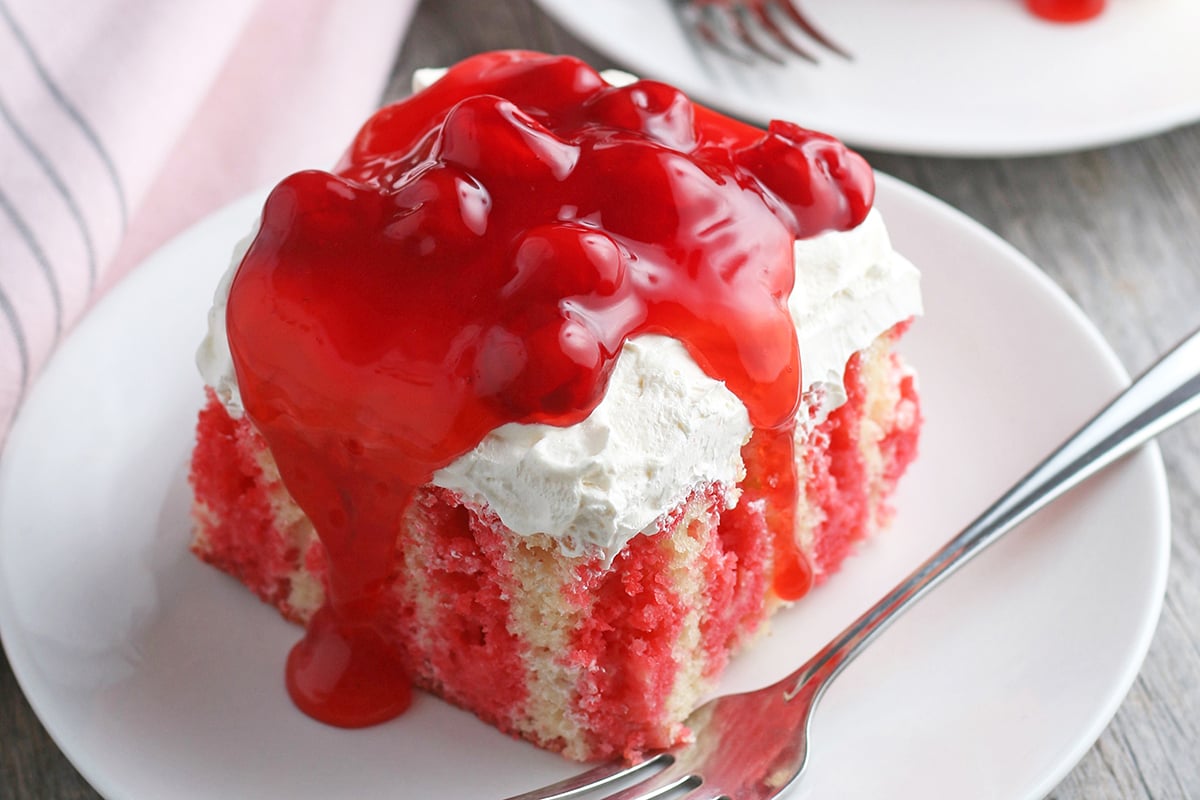
Cherry Poke Cake
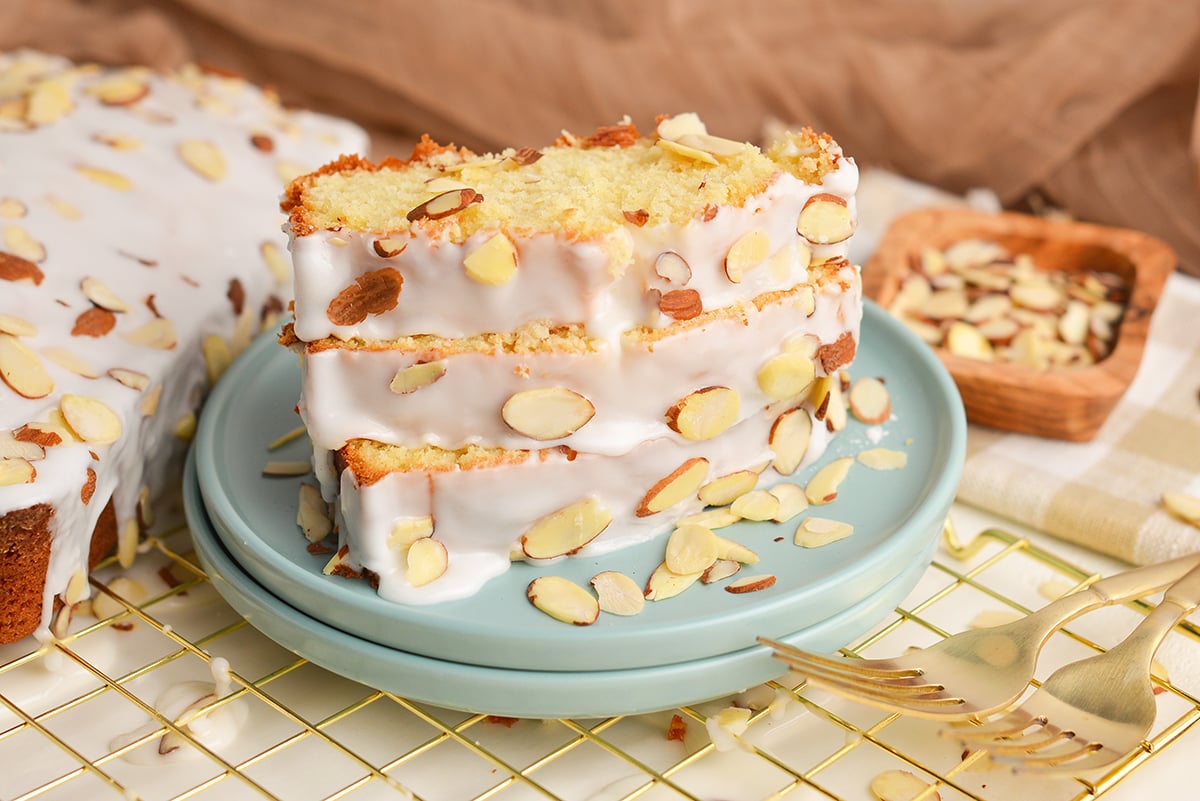
Almond Pound Cake Recipe
No-Bake Chocolate Cheesecake

Peek-a-Boo Pound Cake with Raspberry Cream Cheese Frosting
Equipment
Ingredients
Cake:
- 3 cups cake flour
- 1 teaspoon baking powder
- 1/4 teaspoon fine sea salt
- 2 1/2 cups sugar
- 1 cup unsalted butter , room temperature
- 2 teaspoons vanilla extract
- 5 eggs
- 1 cup whole milk
- 2 teaspoon raspberry extract
- red or pink gel food coloring
Frosting
- 1/4 cup cream cheese , room temperature
- 1/4 cup salted butter , room temperature
- 1/2 teaspoon vanilla extract
- 2-3 cups powdered sugar
- 1/2 cup raspberries
Instructions
Cakes:
- Heat the oven to 350°F. Grease and lightly flour one 9×5-inch loaf pan. Measure and place a piece of parchment paper along the bottom.
- In a medium bowl, sift together the flour, baking powder and salt; set aside.
- In a large bowl or the bowl of a stand mixer fitted with the paddle attachment, beat sugar and butter until light, fluffy and smooth. Add the vanilla and eggs, beating on high speed for 2 minutes.
- Add the flour mixture into the wet ingredients, alternating with milk on low speed, beating just until smooth after each addition.
- Divide the batter into two seperate bowls. Try to do this as evenly as possible using a kitchen scale or just a measuring cup. Cover and place one of the bowls of batter into the refrigerator.
- In the other bowl, add the raspberry extract and red or pink food coloring, blend until fully mixed and transfer to the prepared loaf pan.
- Bake for 50-60 minutes or until it passes the toothpick test. Remove the from the oven and allow to cool fully before inverting onto a cutting board.
- Measure the depth of your cookie cutter (preferably 1 1/2 inches tall). Cut cake into slices equal to the depth of your cookie cutter. Cut each slice and place cut-outs into an airtight plastic bag. Freeze for a minimum of 2 hours.
- When you are ready to make the rest of the cake, preheat the oven to 350°F again and prepare the same loaf pan with cooking spray, flour and parchment paper along the bottom.
- Spread some of the batter into the bottom of the loaf pan and then stick the frozen hearts together down the center. Spoon the remaining batter over the cut outs, letting it drip down the sides. Using a knife or spoon, spread so it isn't too thick over the top.
- Bake for another 55-60 minutes. If it starts to brown, but is not passing the toothpick test, loosely cover with a leaf of aluminum foil.
- Remove from oven and allow to cool. Run a butter knife around the edges and then place onto a cooling rack until fully cooled.
Frosting:
- Blend together the cream cheese and butter. Add the vanilla extract and 2 cups of the powdered sugar.
- Add the whole raspberries and continue to blend until they are pureed into the frosting. Depending on the water content of the fruit, you may need to add more powdered sugar to get a drizzle-able consistency.
- Spoon over the top of the cooled cake and serve!
- If you've made this recipe, come back and let us know how it was in the comments or star ratings.


What an amazing idea! When I saw the pic I was wondering how the heck you made the hearts shaped so perfectly. I’m not a very experienced baker so it’s nice to pick up a few tricks here and there. Thanks for sharing this lovely recipe.
Thanks so much- it takes a little finessing, trial and error, but ultimately it worked!
Oh, my goodness, I wondered how these were made! It turned out beautifully, even if it did take three tries! 🙂 I definitely appreciate your honesty…if I try something, I want to know what to expect! 🙂 Thank you for sharing this at Treasure Box Tuesday!
Thank you for having me!
You are very welcome- if there is one thing I am, it is honest. I’ve posted pictures of train wrecks before. No cook or chef gets it right all the time, we are only human!
Love this post! Love the New Website! Best of Luck with it!! <3
Thank you so much and thank you for stopping by!
When I made my peek-a-boo cake for Thanksgiving, I definitely made it a couple of times but those were just my errors. It’s so fun when it finally turns out though and amen on the icing/glaze, so necessary!
Agreed! Cover up all the imperfections…