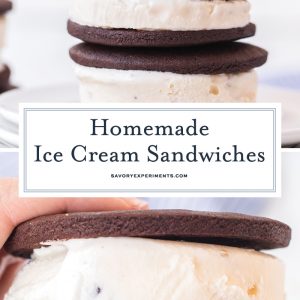
Few things in life bring about the same kind of joy that ice cream does and we all deserve a little treat every now and again. These Ice Cream Sandwiches will come in handy for when you can’t wait for your local ice cream truck to roll by!
This recipe will give you super chocolatey cookies that you can pair with any ice cream flavor (or gelato for that matter) your little heart desires. Choose one, two, or more depending on how many batches you make.
And they are super easy to assemble with my little trick!
Why Make Ice Cream Sandwiches at Home?
A childhood classic frozen treat that you can make right at home- what’s not to love!
- Secret hack making things easy – I have the best hack for making perfectly round ice cream sandwiches every time!
- Switch up the flavors – No need to stick to the traditional chocolate and vanilla- change up the flavors and ingredients however you want with ease! You can even make a different flavor for everyone in the family.
- Stock your freezer – You can make a large batch of these and keep them in the freezer for whenever you have a hankering for one. Wrap individually in freezer paper and pop them out when you want one.
Ingredients
The ingredients needed to make handmade ice cream sandwiches are quite simple. In fact, you might already have most of them on hand.
- Salted butter – You want this to be softened. You can use unsalted instead, just be sure to add a pinch of salt to the dough.
- Sugar – Because we are using unsweetened cocoa powder, we need something to sweeten these cookies. Granulated white sugar is perfect.
- Egg – When baking, always assume a recipe is calling for large eggs. It’s always best to bake with room temperature eggs.
- Vanilla – I like to use a good quality vanilla extract. It adds warmth and flavor to these cookies.
- Flour – We need something to hold these cookies together. All purpose flour is perfect here.
- Unsweetened cocoa powder – This is what gives the cookies their iconic, rich chocolatey taste.
- Baking powder – The baking powder acts as a leavener. It also helps to make these cookies nice and soft.
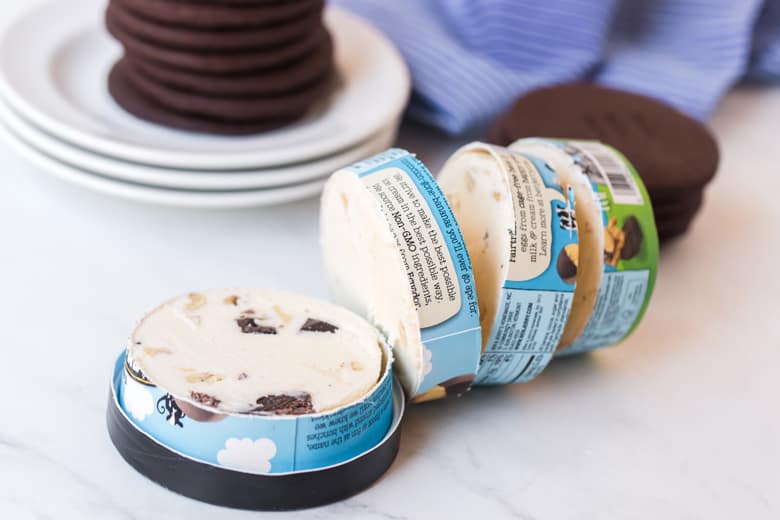
- Individual containers of ice cream – If you want to stick to traditional ice cream sandwiches, use vanilla ice cream. But the options are really endless! You can also use homemade ice cream like Oreo ice cream, pineapple ice cream for even peppermint ice cream.
Toppings
Decorate! Just because this is a sandwich doesn’t mean it can’t have ice cream sundae soul. Try rolling the edges in your favorite ice cream topping.
- Nuts
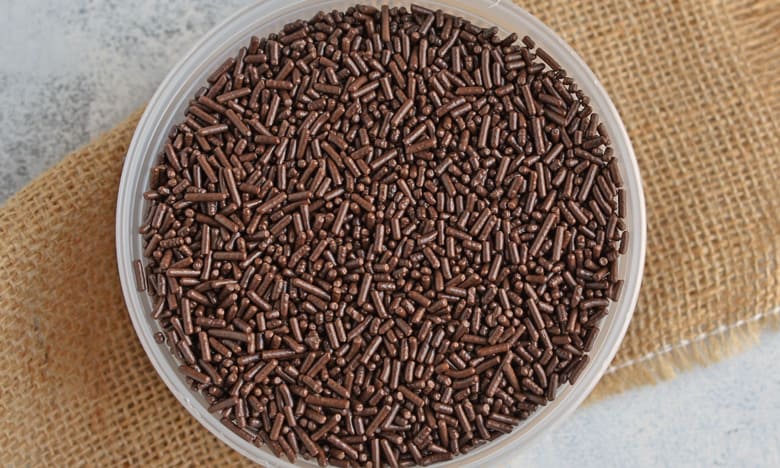
- Sprinkles
- Crumbled cookies
- Little candies
- Chopped up candies
- Mini chocolate chips
If you love a drizzle of caramel or fudge, don’t fret! Give a quick drizzle to the inside of each cookie before you add your ice cream. This is a messier technique, but it does not disappoint. Put your cookie sandwich in a bowl and use a spoon instead!
How to Make Ice Cream Sandwiches
Making a homemade ice cream sandwich has never been easier! My hack makes it so simple.
- Prepare oven and sheet pan. Preheat oven to desired temperature and line baking sheet with parchment paper.
- Wet ingredients. Cream together butter and sugar until light and fluffy. Stir in egg and vanilla.
- Dry ingredients. Pour flour, cocoa powder, and baking powder into the wet ingredients and mix.
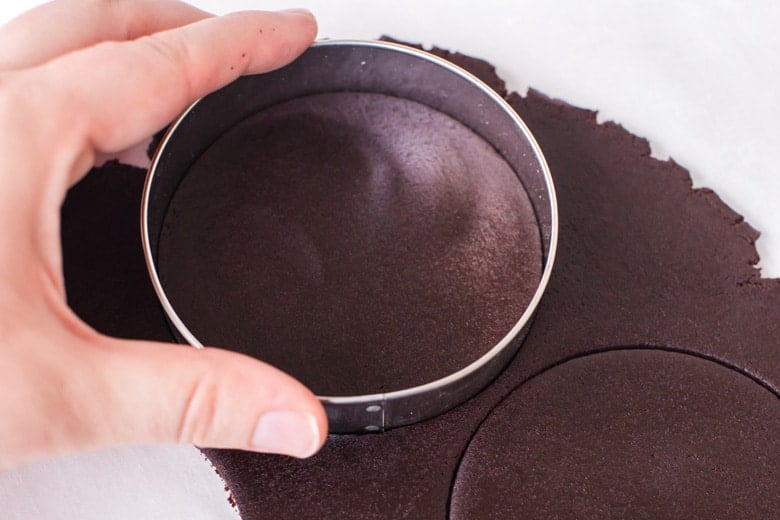
- Roll dough. Divide dough in half. Place each dough half between two pieces of parchment paper and roll dough until ¼ inch thick.
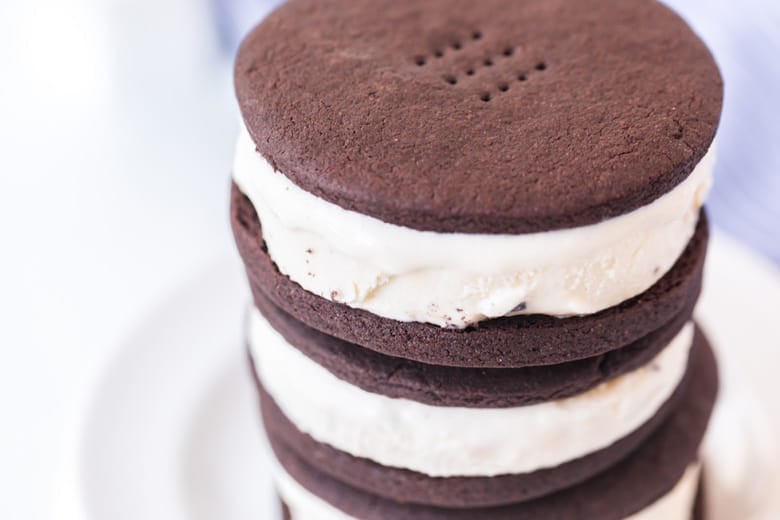
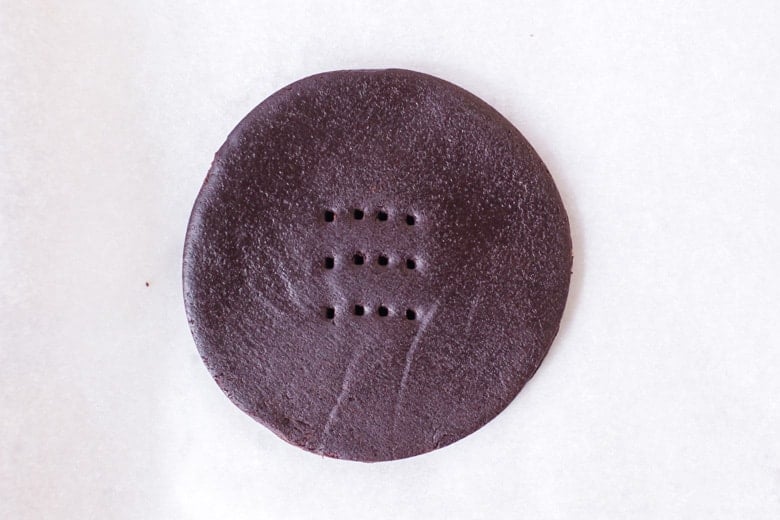
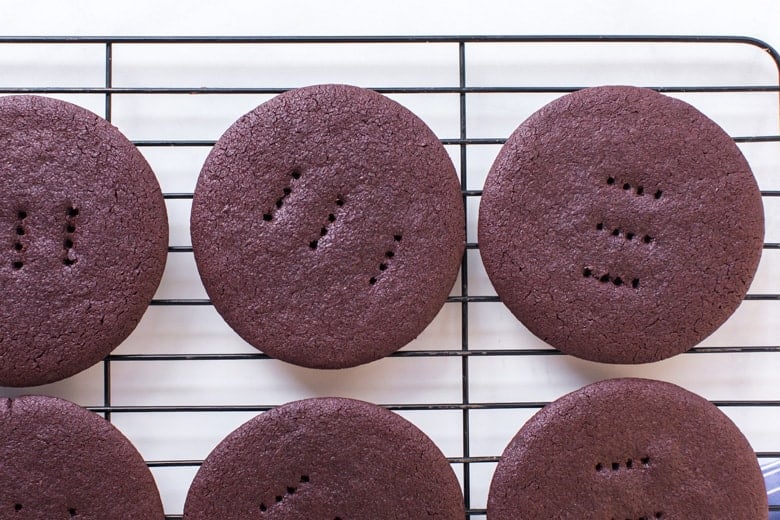
- Cut cookies. Cut dough with a round cookie cutter or a wide mouth jar and poke holes into the dough with a fork.
- Bake. Cook cookies until tops are no longer shiny. Set aside cookies to cool. Cool completely.
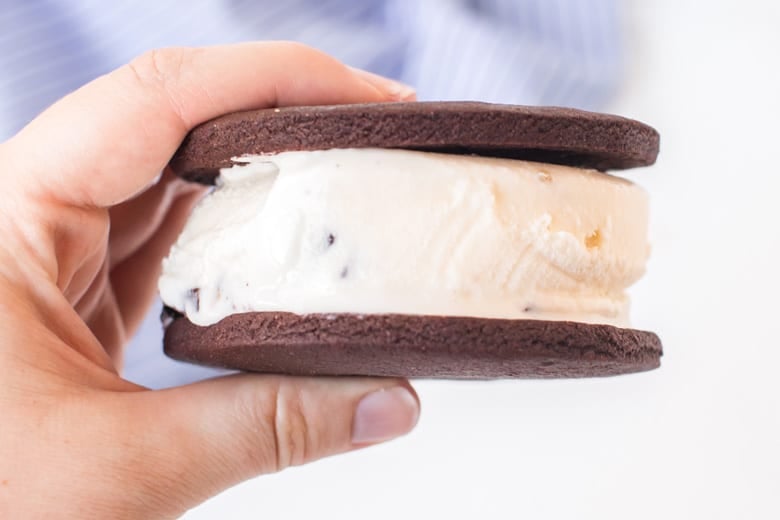
- Cut ice cream. Using a sharp (preferably serrated) knife, cut ice cream (container and all!) into 4 sections.
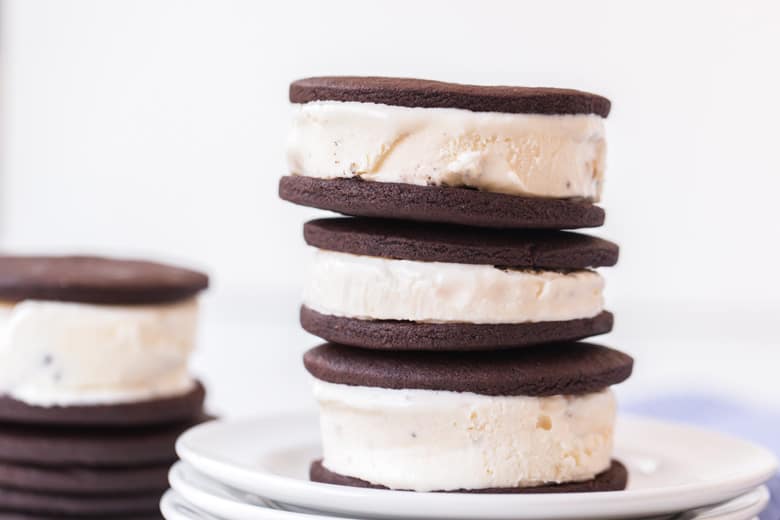
- Add ice cream between two cookies. Sandwich ice cream between two cookies and peel off ice cream paper.
- Freeze. Cover with plastic wrap or freezer paper and place in freezer until the ice cream is completely frozen before enjoying.
Loads of Options!
There are plenty of ways you can make these homemade ice cream sandwiches your own. Here are a few suggestions.
- Fun shapes – You can use different shapes of cookie cutters, round just happens to be the easiest because it fits the pints of ice cream perfectly. If you decide to use different shapes, depending on the size of the cookie cutter you are using, you may need to adjust baking time for the cookie.
- Cookie – Instead of using the iconic chocolate cookies, try different kinds. A chocolate chip cookie would be great for making cookie ice cream sandwiches. Peanut butter cookies would also be great.
- Brownies – If you have a good, dense brownie recipe, use them instead of cookies to make brownie ice cream sandwiches.
- Ice cream – Try mixing up your ice cream flavors! Strawberry ice cream is always a favorite here. Use softened ice cream to spread onto the cookie if you aren’t using the small pints.
- Stuff it – Create a surprise in the middle. Those ice creams with “cores” are all the rage right now. Grab a 1” cookie cutter or simply a spoon and scoop out the center of your ice cream before you put the top cookie on. Fill it with something delicious that would pair well with your ice cream flavor of choice.
Tips & Tricks
While this recipe isn’t complicated, here are a few tips to keep things as stress-free as possible:
- Shine be gone. You will know these cookies are done when they lose that bit of shine they have on top. If you are still unsure, use the back of a spoon and gently press the top. If it holds firm, they are ready to come out of the oven.
- Cool completely. Be sure to let your cookies cool completely before you even think about starting to assemble these. Ice cream is a fickle friend and the clock is ticking as soon as it is out of the freezer.
- Prepare, prepare, prepare. Before that ice cream comes out of the freezer, create an assembly line of sorts with all the tools and ingredients you will need. This will prevent you from ended up with ice cream everywhere.
- Enlist some help. Who doesn’t love a helping hand! Assign someone the task of assembling sandwiches, decorating them (if you decide you want to,) and then packing them up to freeze.
- Grab a Sharpie. If you are creating more than one flavor combination, it is always a great idea to label each individual sandwich accordingly especially if you are making these to enjoy later.
Storage
How to Store Ice Cream Sandwiches
If you have any leftover, and that’s a big if, you will need to store them in the freezer. I suggest wrapping them tightly with parchment paper first. Then you might want to add them to an airtight container as well.
More Frozen Treats
There’s nothing better than a cold homemade ice cream dessert on a hot day. Here are a few of our favorite frozen treats.
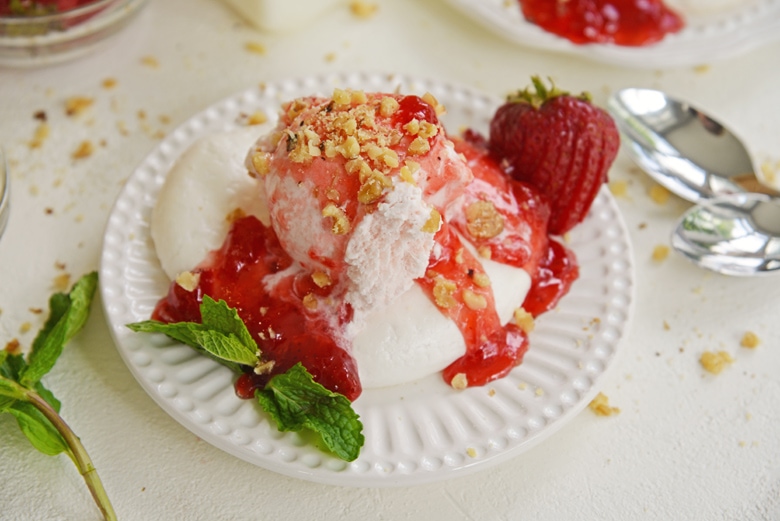
Vanilla Meringue Ice Cream Cups
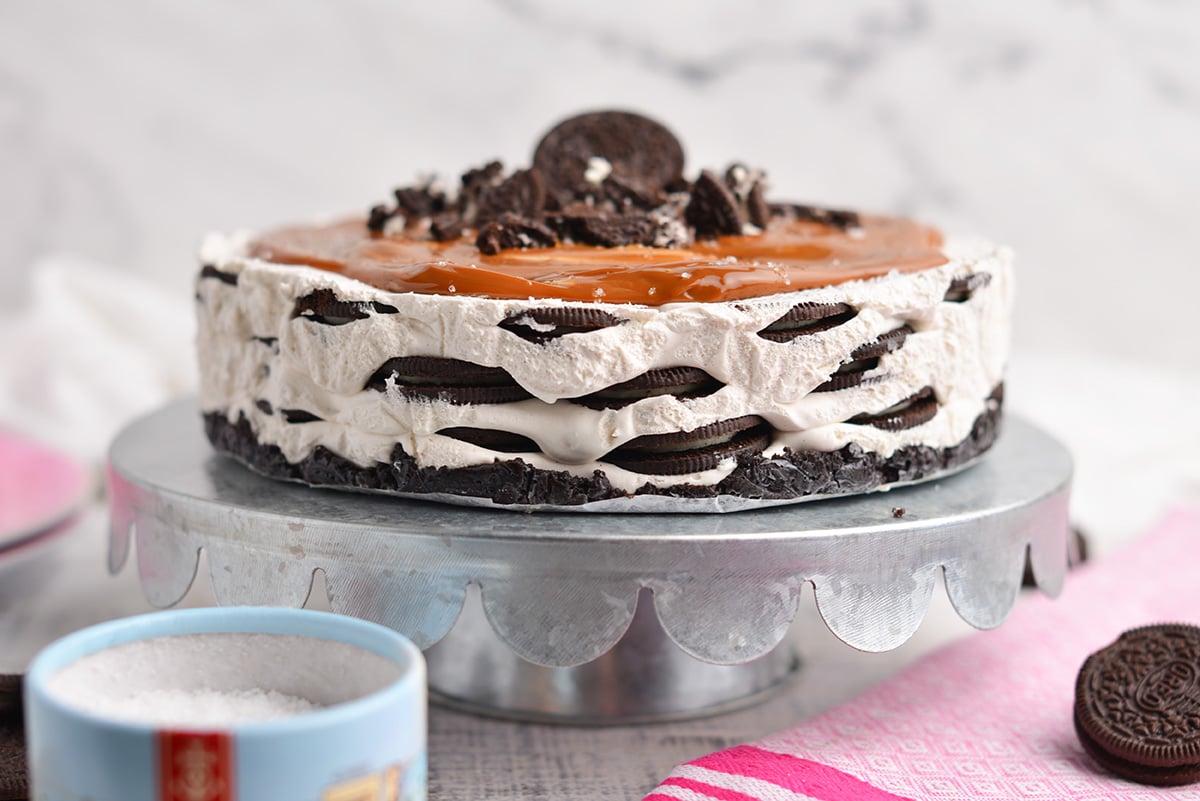
Oreo Icebox Cake Recipe

How to Make Oreo Milkshake
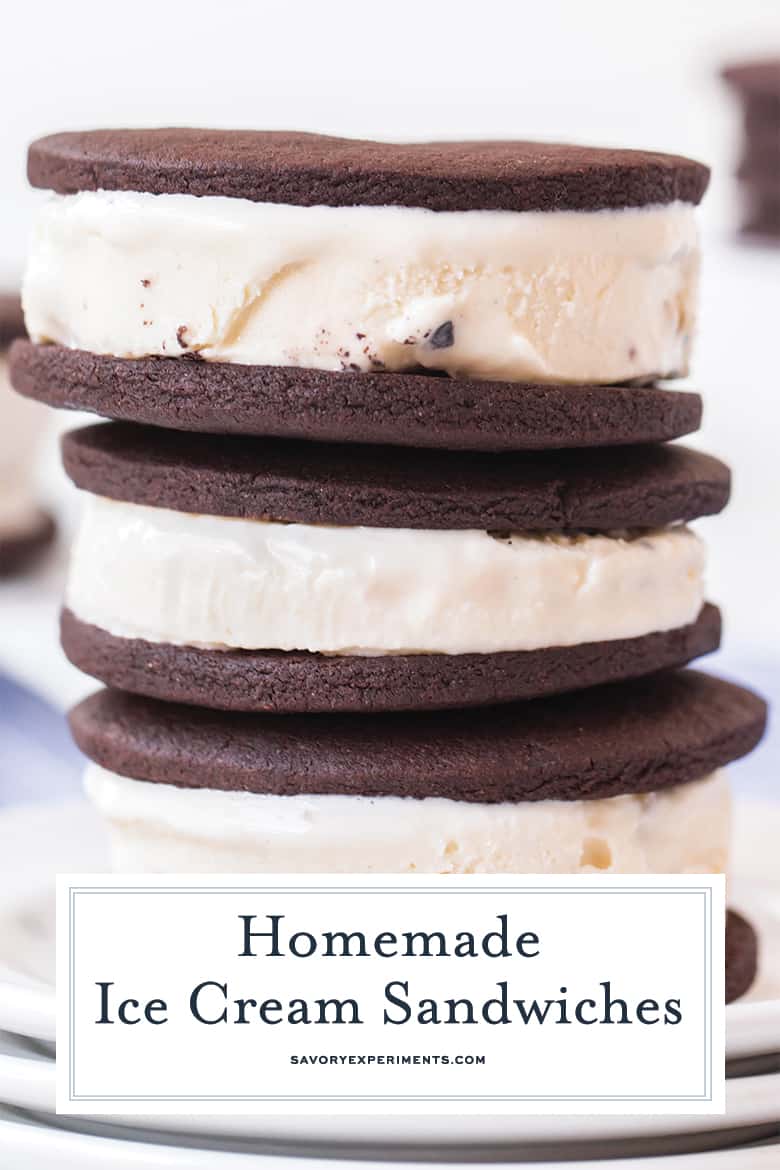
Homemade Ice Cream Sandwiches
Equipment
Ingredients
- ¾ cup salted butter , softened
- 1 cup sugar
- 1 large egg
- 1 teaspoon vanilla
- 1 ½ cups flour
- ¾ cup unsweetened cocoa powder
- 1 teaspoon baking powder
- 2 16 oz individual containers of ice cream (choose your favorite flavors!)
Instructions
- Preheat oven to 350 degrees.
- Cream together butter and sugar until light and fluffy, about 3 minutes.
- Scrape down the sides of the bowl and stir in egg and vanilla.
- Pour in flour, cocoa powder, and baking powder and mix.
- Divide dough in half.
- Place each dough half between two pieces of parchment paper and roll dough until ¼ inch thick.
- Cut dough with a round cookie cutter (I used a 3 ½ inch cookie cutter) or a wide mouth jar and poke holes into the dough with a fork.
- Place cookies on a parchment lined sheet pan.
- Cook cookies for 10-11 minutes or until tops are no longer shiny.
- Set aside cookies to cool. Cool completely.
- Take out containers of ice cream.
- Using a sharp (preferably serrated) knife, cut ice cream (container and all!) into 4 sections.
- Sandwich ice cream between two cookies and peel off ice cream paper.
- You can choose to leave the ice cream sandwich as is or you can roll each sandwich in the decoration of your choice.
- Cover with plastic wrap or freezer paper and place in freezer until the ice cream is completely frozen before enjoying.
- If you’ve tried this recipe, come back and let us know how it was!
Notes
- If using unsalted butter, add in 1/8 teaspoon fine sea salt to the cookies
- If you are in a rush for time, you can make a batch of your favorite cookies and use this ice cream technique to make ice cream cookie sandwiches!
- I used chunky monkey for these ice cream sandwiches, but feel free to use your favorite flavor. It’s much easier to cut into ice cream that doesn’t have many large chunks (think frozen brownies).
Nutrition


Are these a soft cookie? I’m looking for something similar to the ice cream sandwiches you buy.
Yep- as long as you don’t over bake the cookie, they are similar to the ones you buy 🙂
I think this is one of my favorites for ice cream sandwiches. I did make two changes. I added an additional 1/4 cup of butter. And added some baking chips. This batch I used butterscotch chips. Fabulous really these are the best.
this sounds like a super fun way to eat ice cream, even for adults … can i make these 1 – 2 days ahead of time? Thanks for sharing
You sure can!
Can gluten free flour be used?
I would assume that you can use any GF that is a 1:1 ratio, but we have not tested it.
We made them using large cat face shape and star shape cookie cutters, so cute and easy!
LOVE that idea! Thanks for coming back to let us know!
I love how easy these are to put together! So fun to make with the kids!
The cookies look EXACTLY like the Bluebell Ice Cream Sandwiches I grew up eating! I love this so much!
How long can these be stored in the freezer?
Anywhere from 3-6 months, I’d say. Make sure to wrap them well and individually so they don’t get freezer burn.