


These easy caramel apples skip the candy thermometer and use soft caramel candies, with a little vanilla and salt so they taste homemade.
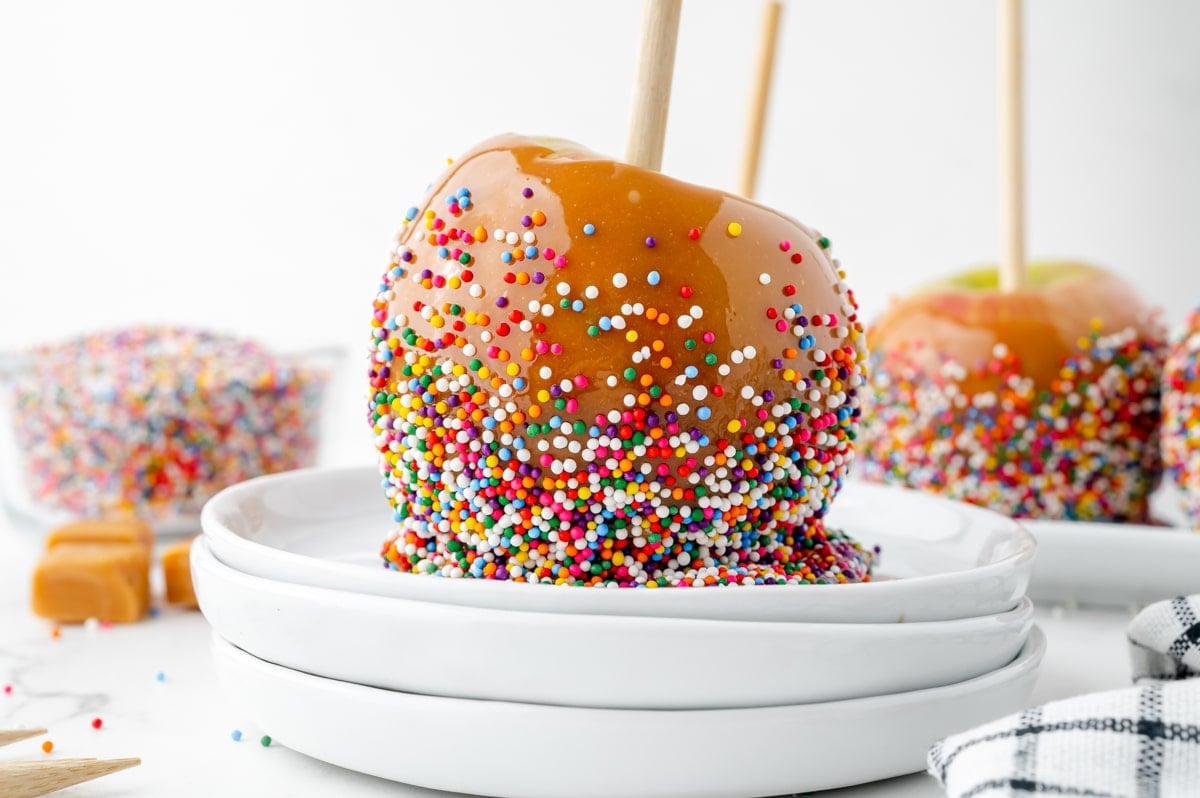
The secret to caramel that actually sticks is a 3 to 5 second dip in boiling vinegar water. The vinegar dissolves the waxy coating that grocery store apples wear, so the caramel has something to grab. Then roll them in any of 29 toppings and you have a full caramel apple bar.
Gourmet caramel apples are one of my favorite things to indulge in during fall. Tart apples dipped in buttery caramel and then coated in extra toppings makes the ultimate fall treat. The end result are the perfect caramel apples.
This guide will walk you through the steps to make easy caramel apples, ensuring a perfect combination of sweet, gooey caramel coating and crisp, juicy apples, PLUS the top 20 caramel apple toppings!

Why Is Our Recipe for Caramel Apples The Best?
But if you’ve ever made caramel from scratch, you know that it is a lot of work and very finicky. It is NOT EASY. Well, this recipe is easy.
- Optional Vinegar Hack: This is an extra step, but ensures the caramel sticks to the apple.
- Actually Easy: We are not making caramel from scratch and messing around with a candy thermometer only to find out that it didn’t reach the right temperature and will now slowly slither off your apple into a puddle of toppings and goo. Instead we use soft caramel candies that are already the perfect ratios.
- Caramel Amplified: But we take the already delicious candies up a notch by adding vanilla extract and salt. Who doesn’t love sweet and salty?
- Toppings: The trick to any caramel apple is looking pretty and having good toppings, so we’ve provided you with over 20 caramel apple topping ideas perfect for making a caramel apple bar at a Halloween party.
What You Need to Make Caramel Apples
It is a lot to read and we recommend reading the whole post before getting starting to troubleshoot the most common issues. You might have 99 problems, but an apple won’t be one!
- Soft caramels: They already have the right mix of sugar, butter, and milk. No thermometer. No guessing. This is a shortcut that earns its place.
- Heavy cream: Melted caramels on their own are too thick to dip. A little cream loosens them into a smooth coat. The fat keeps it rich.
- Vanilla: Bagged caramels can taste a little flat. Vanilla adds warmth, so they taste more homemade.
- Coarse kosher salt: Salt keeps sweet from tasting one-note. It pulls out the deeper, toasty side of caramel.
- Apples: Firm, crisp, and cold. A chilled apple helps the caramel set fast, before it can slide.
- Butter: It never goes in the caramel. It’s your nonstick coat for the tray. Caramel sticks to parchment and wax paper too.

Scratch Caramel vs Caramel Candies
Classic caramel apples start with sugar, butter, and cream cooked to a precise temperature. It’s delicious. It’s also finicky. Humidity, your stove, and a few degrees can all ruin it.
Soft caramel candies skip all of that. The ratio is already right. You just melt, dip, and top.
What Apples are Good for Caramel Apples?
When it comes to making perfect homemade caramel apples, certain apple varieties work particularly well due to their flavor profile and texture which firm and crisp. They can all usually be found at your local grocery store. Here is a list of apple varieties that are commonly used and recommended for caramel apples:
- Granny Smith: Tart granny smith apples provide a nice contrast to the sweet caramel coating. Its firmness also helps the caramel adhere well.
- Honeycrisp: Known for its sweet and juicy nature, Honeycrisp apples offer a delightful flavor combination with caramel.
- Fuji: With a perfect balance of sweetness and firmness, Fuji apples are another excellent choice for caramel apples.
- Gala: Gala apples have a naturally sweet taste and a slightly softer texture, making them a popular choice for caramel apples.
- Pink Lady: These apples have a tangy-sweet flavor and a firm, crisp texture, making them a great option for caramel apples.
- Braeburn: With its mildly sweet flavor and firm flesh, Braeburn apples hold up well when coated in caramel.
- Jonathan: Jonathan apples have a tart and tangy taste, which complements the sweetness of caramel quite nicely.
Remember, personal preferences may vary, so feel free to experiment with different apple varieties to find your favorite combination.

How To Make Caramel Apples
Please read through the instructions and commonly asked questions before getting started!
- Prep Apples. Wash apples and dry them thoroughly with a kitchen towel to get off all of the waxy coating or use my vinegar bath (see below). Remove the stem and spear with a caramel apple stick or popsicle stick. Chill for 2-3 hours before coating. You can also use the vinegar and blanch method, see instructions below.
- Prep Setting Tray. Before making the caramel sauce, prepare a baking sheet with a silicone making mat, wax paper or parchment paper. Rub generously with butter to prevent sticking- yes, caramel will stick to parchment and wax paper too!
- Melt caramel. In a small saucepan over medium low heat, mix together the caramels, cream and vanilla until fully melted. If it is getting clumpy and heating too fast, add 1 tablespoon of water and reduce the temperature. When smooth, add the salt and remove from the heat. Stir continuously to prevent scalding and keep a watchful eye, the process happens fast and burnt caramel is bitter.

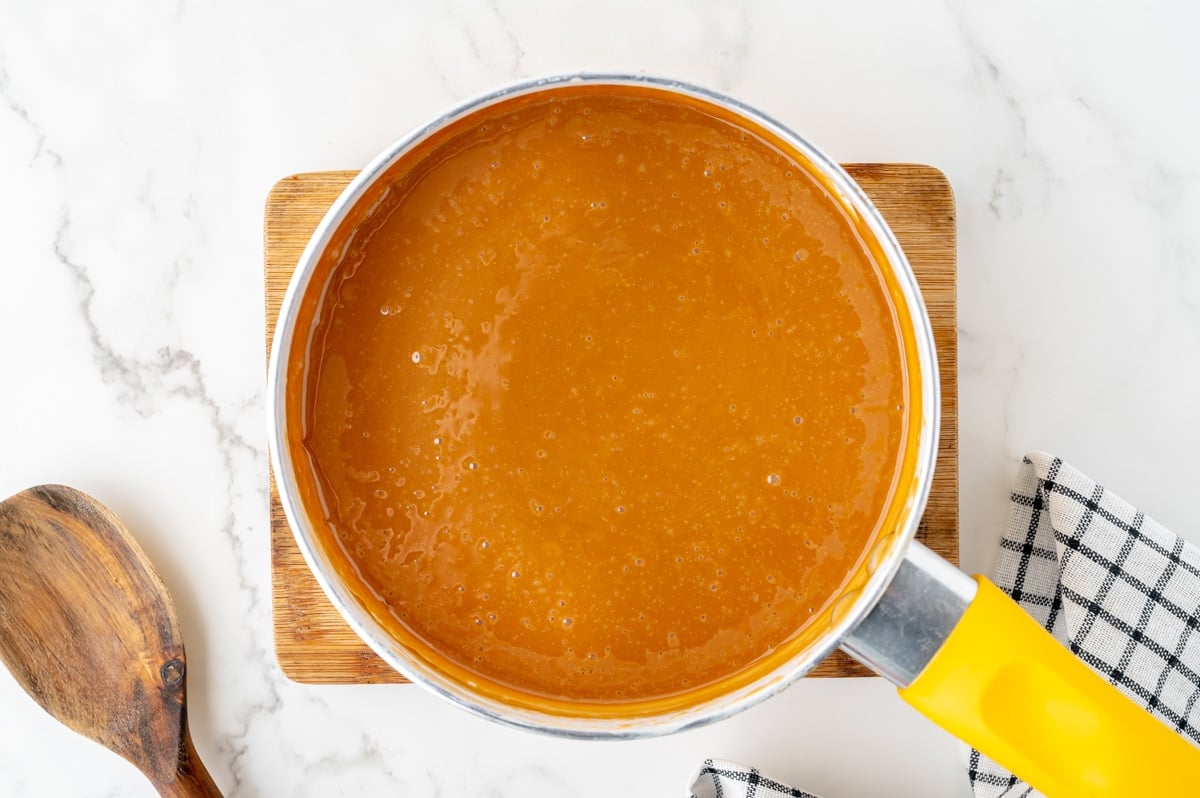
- Dip Apples. Dip each apple into the caramel about 3/4 of the way up, tapping to release excess caramel and then directly into desired toppings (if using). Set onto the prepared baking sheet. If drizzling with chocolate, wait until caramel has set. Some caramel may pool around the bottom- this is my favorite part and is totally normal!


- Set. Allow the caramel to set for about 45-60 minutes. You can also enjoy them warm, just give that caramel a few minutes to cool so you don’t burn your mouth.
How to Make Caramel Stick to Apples
Many people will wash them well and allow them to dry, but there is another method, which involves a quick blanch in vinegar water. The acidity in the vinegar will dissolve the waxy exterior, but can also distort the vibrant colors of the apple. The taste will not be impacted.
- Bring a large saucepan of water to a boil and add 1-2 tablespoons of vinegar.
- Using a spider spoon or slotted spoon, submerge each apple into the water for 3-5 seconds, no more.
- Place on a paper towel to dry. Do not dip into caramel until fully dry.
What Stick Do I Use for Caramel Apples?
There are actually caramel apple sticks, which are just bamboo wooden dowels. You can also use clear acrylic sticks or use sturdy, rustic sticks you find outdoors. Fancy sticks are also available like these silver and gold ones or plain black for a spooky Halloween treat.

20+ Best Caramel Apple Toppings
The list of possibility is endless, but here are a few of my favorite toppings. I’d love to hear some of your favorites in the comments!
- Chocolate: melted chocolate, almond bark, dark, milk, or white chocolate drizzle, mini chocolate chips, white chocolate chips, butterscotch chips
- Candy: Reese’s Pieces, M&M’s, Butterfinger, Snickers, toffee pieces, cinnamon candies (Red Hots), sprinkles, mini marshmallows
- Crunchy and salty: crushed pretzels, popcorn, graham cracker crumbs, crushed Oreos, crushed vanilla wafers, sea salt
- Nuts: crushed peanuts, chopped pecans, walnuts, macadamia nuts
- Other: flaked coconut, cinnamon sugar, frosting decorations (jack-o’-lantern faces)
Keep in mind that the heavier the toppings, the more apt they will be to slide off. Not a horrible thing, but something to be aware of when choosing toppings, especially for presentation.

How to Serve Caramel Apples
There are a few ways to present and enjoy them depending on where you’ll be serving. Here are some suggestions on how to serve caramel apples whether you are at a party or just enjoying them with your kids.
- Stick Presentation: Arrange them upright on a platter or in a decorative container. This presentation allows guests to easily pick up and enjoy their caramel apples while holding onto the stick. Place them on a sheet of parchment or wax paper that has been basting with a light coating of butter to prevent sticking.
- Slice Presentation: Another option is to slice the caramel apples before serving. Use a sharp knife to cut the caramel-coated apples into thick slices. Arrange the slices on a serving platter or individual plates. This method allows for easier eating and portion control, especially for young children or those who prefer bite-sized pieces.
- Caramel Apple Bar: You can enhance the caramel apple experience by offering a variety of toppings and allowing guests to make their own apples. Place the caramel dip in a slow cooker on “keep warm and let guests dip, top and enjoy a warm apple.
- Gift or Party Favors: Caramel apples make wonderful gifts or party favors. Make sure apples have ample time to set and cool before packaging. Wrap individual caramel apples in clear cellophane or treat bags, tie them with colorful ribbons or twine, and add a small gift tag or personalized label. You can also get these fun clear boxes to stack them. They can be handed out at parties, weddings, or special events, or given as thoughtful treats to friends and loved ones.

How Do You Store Caramel Apples?
Storing caramel apples properly is important to maintain their freshness and prevent the caramel from becoming too soft or sticky. Here are some guidelines for storing caramel apples:
- Refrigeration: Caramel apples should be stored in the refrigerator to keep them fresh and maintain the caramel’s texture. Place them in a container or wrap them individually in plastic wrap to prevent the caramel from sticking to other foods or absorbing any odors.
- Separation: It’s essential to keep the caramel apples separate from each other during storage to avoid them sticking together. You can place them on a tray or use wax paper or parchment paper between the apples to create a barrier.
- Moisture prevention: Moisture can cause the caramel to become sticky or create a watery texture. To prevent this, make sure the apples are completely dry before applying the caramel. Additionally, keep them away from areas of high humidity or moisture in the refrigerator.
- Consume within a few days: Caramel apples are best enjoyed within a few days of preparation. Over time, the moisture from the apples can soften the caramel coating, affecting its texture and taste. It’s recommended to consume them within 2-3 days for the best quality.
Remember, caramel apples are perishable, and their shelf life depends on various factors like apple freshness and storage conditions. Remove them from the fridge and let them come to room temperature for a more pleasurable eating experience.

Are Candied Apples and Caramel Apples the Same Thing?
Nope- you’ll sometimes see them used interchangeably because caramel is candy, technically speaking, but a candied apple is coated in a sugar candy layer similar to Red Hots candy, but without the cinnamon. The iconic candy apple is bright red; reminiscent of Snow White’s poisoned apple.
Whereas caramel apples are just that, covered in ooey, gooey caramel and sometimes rolled in a variety of goodies or drizzled in chocolate.
Both are visually stunning and can be eaten or merely displayed. A cinnamon stick or rustic stick handle adds to the appeal and staging. While toppings can also be added to a candied apple, they are most iconic on caramel apples.

Caramel Apple Troubleshooting
- Caramel slides off: The apple is waxy, wet, or warm. Wash off the wax, dry it completely, and chill it before dipping.
- Caramel is too thick to dip: Add more cream, a little at a time. Stir until it’s smooth and coats a spoon.
- Caramel is too thin and runny: Let it cool for a few minutes before dipping. It thickens as it cools.
- Caramel tastes bitter: It scorched. Burnt caramel can’t be saved. Start over on lower heat and keep stirring.
- Toppings won’t stick: Roll the apple right after dipping, while the caramel is still warm and tacky.
- Toppings slide down: Heavy toppings are more likely to slip. Go lighter, or press them in gently by hand.
Commonly Asked Caramel Apple Questions
The most common problem is caramel sliding down the sides and not sticking. This is usually due to not adequately washing the apple (and getting rid of the waxy coating), not fully drying the apple (any excess moisture will prohibit sticking) and not chilling (cold apples will help the caramel stick and set faster).
Sure! I just find there is a higher tendency for it to burn. Place the caramels, cream and vanilla in a microwave safe bowl and heat at 30 seconds intervals, stirring between each. It will take 3-4 minutes to get a smooth, dippable caramel.
Yes, to preserve the apples and prevent bacterial growth, they need to be kept chilled.
More Apple Recipe Ideas
We love recipes that use apples and here are a few more favorites!


Easy Caramel Apple Recipe
Ingredients
- 8 apples , washed and chilled
- 8 caramel apple sticks*
- 22 ounces soft caramels (such as Kraft) , unwrapped (2 bags)
- 2 tablespoons heavy cream
- 1/2 teaspoon vanilla extract
- 1/4 teaspoon coarse kosher salt
- unsalted butter , for setting, storage and display
Instructions
- If using the vinegar bath (see notes below, this is optional), do it now or wash the 8 apples and dry them thoroughly with a kitchen towel to get off all of the waxy coating. Remove the stem and spear with a caramel apple stick or popsicle stick. Chill the apples for 2-3 hours before coating.
- Before making the caramel sauce, prepare a baking sheet with a silicone baking mat, wax paper or parchment paper. Even though it is non-stick, rub it generously with butter to prevent sticking.
- In a small saucepan over medium low heat, mix together the unwrapped 22 ounces soft caramels (such as Kraft), 2 tablespoons heavy cream and 1/2 teaspoon vanilla extract until fully melted. If it is getting clumpy and heating too fast, add 1 tablespoon of water and reduce the temperature. When smooth, add the 1/4 teaspoon coarse kosher salt and remove from the heat. Stir continuously to prevent scalding and keep a watchful eye, the process happens fast.
- Dip each apple into the caramel about 3/4 of the way up, tapping to release excess caramel and then directly into desired toppings (if using). Set onto the prepared baking sheet. If drizzling with chocolate, wait until caramel has set.
- Allow the caramel to set for about 45-60 minutes.
- If you've tried this recipe, come back and let us know how it was in the comments or star ratings!
Notes
- Bring a large saucepan of water to a boil and add 1-2 tablespoons of vinegar.
- Using a spider spoon or slotted spoon, submerge each apple into the water for 3-5 seconds, no more.
- Place on a paper towel to dry. Do not dip into caramel until fully dry.
Nutrition











Great tutorial. I know people complain about all the writing in blog posts, but I found this one to be super helpful- especially with the waxy coats.
Thanks- I appreciate that!
Since reading reviews I decided to boil 6 C of water with 1/4 teaspoon of white and dip each apple for 4 seconds to remove wax then refrigerate them well prior. They turned out perfect.
Excellent! Glad to hear that!
It’s so much easier using caramel candies and I love all the topping ideas. Thank you!
I agree, I was making the sauce from scratch for a while, but so many folks had issues that I switched the whole post over the soft caramels.
Yum! We loved these. This was my first time making caramel apples and it was so much easier than I would have expected. Definitely plan on making these again this fall. Thanks for the tips on prepping the apples.
You are very welcome!
I haven’t made caramel apples in years, but I stumbled across your recipe and can’t wait to try them!
I have been thinking about an easy dessert that both kids and adults would enjoy. This caramel apple recipe check all the boxes! I like the sprinkles, too!
These caramel apples were the best! Easy to make and my kids loved them! Thank you so much
So glad your family enjoyed!
If you will use unwaxed apples, the caramel will not slide down the apple. Commercially sold apples are usually waxed to make them shiny, but this causes caramel not to stick. Get them from a farmer’s market or from a u-pick farm.
Hi Denise, agreed, but not everyone has access to the farms, that is why we included the bit about vinegar.