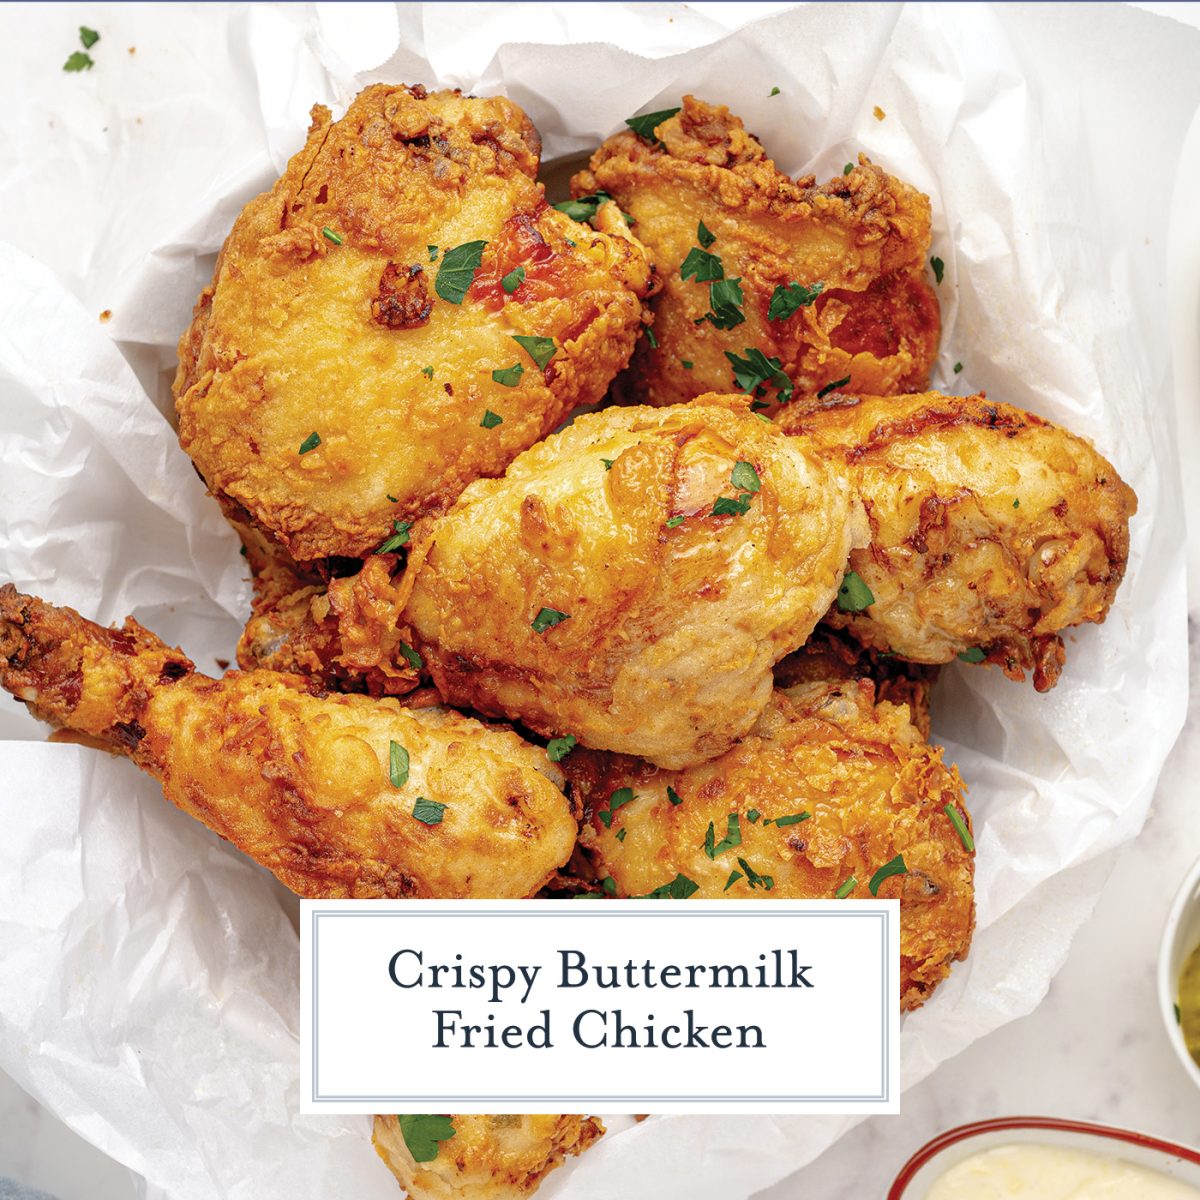
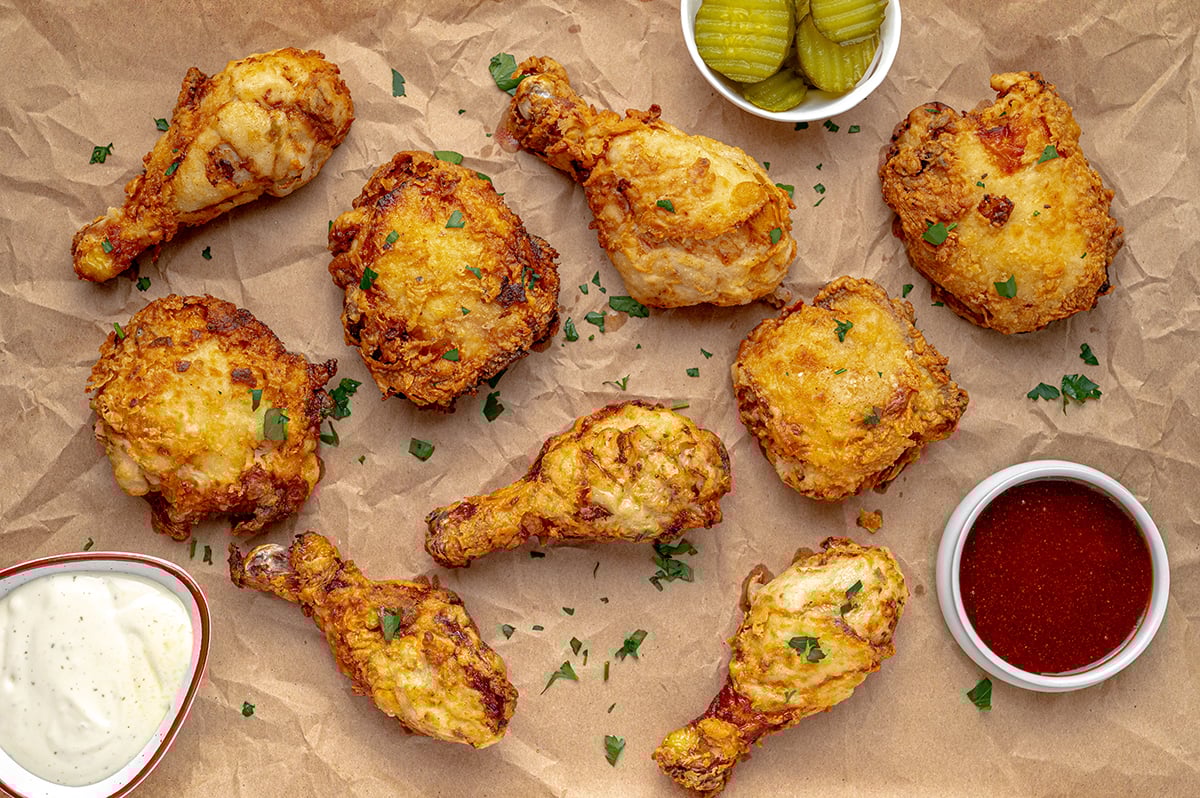
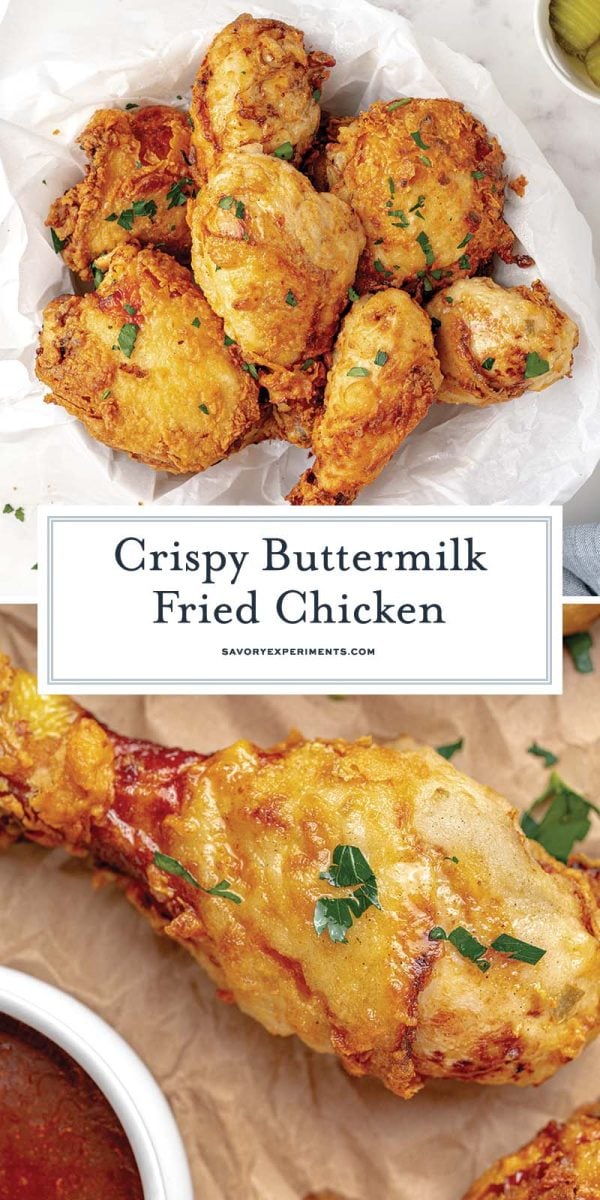
I’m not sure there is a meal more comforting than fried chicken. I probably only eat it once a year, but when I do, it hits the spot. The problem is that a good southern fried chicken recipe is not a quick and easy dinner solution.
Between brining, setting and frying, the process is quite lengthy, albeit also rewarding and totally worth it. Frying alone can be intimidating and even more challenging if you aren’t armed with the right rools, so read the whole post to get your fair share of fried chicken insight.
This chicken recipe is a blend of a brining technique from a famous local chef, my mother’s fried chicken, Thomas Keller’s Ad Hoc Chicken and some insight from J. Kenji López-Alt from Serious Eats. The result was a crispy exterior with a juicy and flavorful inside. So good that I made it into popcorn chicken for my book club meeting the following weekend.
Why Brine Fried Chicken?
I will tell you! Brining is a method similar to marination. In brining, the objective is osmosis (haven’t heard that since middle school, huh?) where the goal of marinating is to infuse.
Brining is the process of allowing a food to sit in a liquid, most commonly water, with salt (and sometimes other spices and herbs) to suck up moisture by filling all of the cells with as much fluid as they can hold. The process is called denaturation.v
Meats will absorb the liquid, therefore losing less while cooking, resulting in a plump, juicy and moist meal. Plump and juicy buttermilk fried chicken, that is.
Keep in mind that after brining the meat will be at its heaviest and will feel firm and dense; one might perceive it as tough. The truth is that it is jam packed with liquid… about to burst! It will resume to normal texture while cooking.
Ingredients
This recipe starts with a buttermilk brine, which is a little different than water-based brines because it doesn’t get heated to let the salt to dissolve. It will still do its job to infuse with herby flavors and a tangy tart you can only get from thick buttermilk. The mixture also serves as the glue to cling to the breading.
- Celery Salt- I bet you’ve never seen seeds in celery, yup, me either. But wild celery has seeds that are dried and ground to make celery seed. This is combined with table salt to make celery salt. Feel free to use just the seeds if you are trying to cut back on sodium.
- Dried Rosemary- Grinding this spice will help bring out the natural flavors. As with all ground or flaked spices, make sure it is under 1 year old for best results.
- Ground black pepper– or white pepper if you prefer a milder pepper flavor.
- Dried Bay Leaves– commonly used in soups and stews, they are also excellent for adding herby flavor to brines.
- Fresh Garlic and Onion– I like to grate my garlic and onion so it gets pulpy. Doing this breaks membranes and lets the natural juices loose giving you a ton of flavor. Since we don’t rinse the brine before breading, it also prevents large chunks remaining on the chicken.
- Buttermilk– Full fat or low fat is fine. Adds moisture, but also that unique zing.
- Coarse Kosher Salt- While it takes a little more to dissolve, it gives a clean flavor without being salty.
- Sugar- Sugar always seems like an odd brine ingredient, but many blends that have high acidity and salt need something sweet to balance them.
- Chicken Pieces– For fried chicken, I prefer bone-in thighs and drumsticks.
Next comes the seasoned breading, or dredge. There will still be flavor in the buttermilk mixture used to adhere the breading, so we used coordinating flavors.
- All-purpose flour– The standard when frying chicken. I haven’t tried to use gluten-free alternatives, but if you have, please let us know how they worked in the comments.
- Cornstarch- This (and the baking powder) were newly learned tips to help the crust be super crunchy, but not heavy, and also help it stick to the chicken better without creating a gap.
- Onion Powder– I like to complement the garlic powder with onion, but garlic can work too.
- Sweet Paprika- Or smoked. Spicy paprika can be used, but I generally make this for a lot of folks and try to keep the spice level at a minimum.
- Celery Salt- This is the ingredient most people “can’t put their finger on”- use just celery seed here too, if needed.
- Baking Powder– Fried chicken is a funny thing- you want it to be super crispy and robust, but also light and fluffy. Baking powder helps achieve the delicate balance.
- Ground White Pepper– Or black pepper, I just prefer to not have black flecks in my breading.
- Oil- You’ll need a large amount of a neutral oil with a high smoke point. Vegetable or peanut oil have the highest, but canola comes in just below.
How to Make Fried Chicken
Frying chicken is a cooking technique that many struggle with, but hopefully using these techniques, you’ll be a pro in no time at all!
- Using a mortar and pestle, spice grinder or a plastic bag and a rolling pin, combine together the celery salt, rosemary, pepper and bay leaves. Crushing the dried herbs exaggerates the flavors, penetrating the chicken better. Pour mixture into a large airtight freezer bag. Set freezer bag into a medium bowl to help it stand up right.
- Using a microplane or small food processor, grate or pulse garlic and onion to a pulp, adding it to the bag. Breaking it down gives the maximum amount of garlic and onion flavors. Add the buttermilk, coarse salt and sugar, using a fork or small whisk, mix well. .
- Rinse chicken pieces with cold water and add them to the buttermilk brine. Massage brine into chicken. Place the bowl, with freezer bag and all contents, into the refrigerator for 24 hours to brine. You can do this for as little as 12 hours (overnight or in the morning if you plan to fry at night), or up to 36 hours, but not longer. Brining too long can actually have the opposite effect and result in tough chicken.
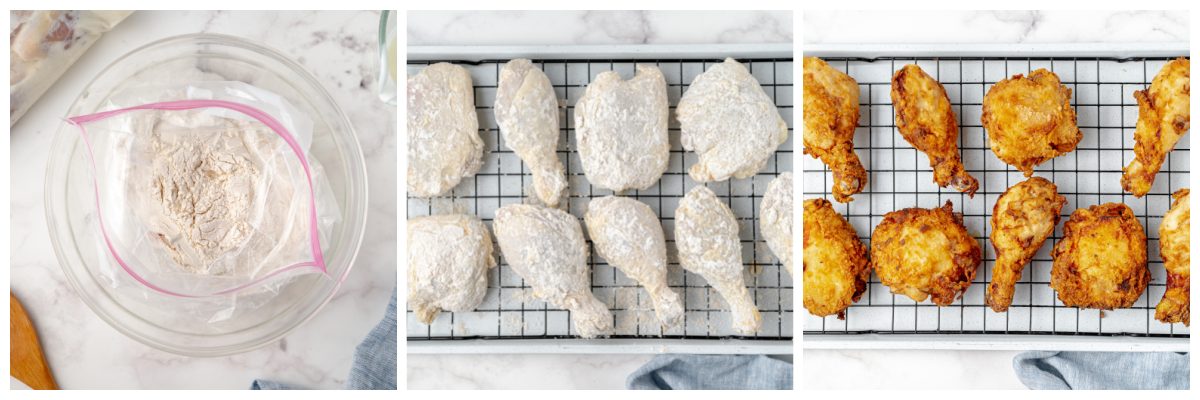
- When you are ready to fry the chicken, in another freezer bag combine the flour and seasonings, mix well to get it evenly distributed.
- About one and a half hours before serving, remove the chicken from the brine, discarding any large pieces of herb and tapping to remove any excess buttermilk.
- Working in batches (2-3 pieces at a time), add the chicken pieces to the flour mixture and shake it like a Polaroid picture!
- Place pieces on a wire rack and allow to cure and set for 30-60 minutes. Setting the breading aside lets the chicken juices hydrate the flour, making it stick better and giving it less likely to come off while frying. Some old school southern cooks even let it sit in the fridge, breaded, for 4 hours to overnight.
- Preheat the oven to 300°F degrees, this will be to let the cooked chicken stay warm while making the rest.
- Heat the vegetable oil in a large frying pan or cast iron skillet over medium-high heat. I highly suggest using a deep fry thermometer to keep an eye on the temperature. Wait until the oil is at 350°F. After the cold chicken is added, it will dip to 300°F, which is where you’ll want to maintain it for the duration of cooking. Here the chicken won’t burn and will have enough time to cook thoroughly. Oil will start to have a sheen when it is fully heated.
- Carefully add the chicken pieces, working in batches to not overcrowd the pan. Leave at least an inch around each piece of chicken. I like to use metal tongs or a fry spoon. Resist the urge to touch or move the chicken until it’s been frying for at least 4-5 minutes or you’ll run the risk of losing some breading.
- Fry for 12 minutes, turning throughout the process to browned and crisp fully. Larger pieces might need a little longer. Remove a chicken piece to take the temperature using a digital read thermometer, which should be between 160°F-165°F. If it’s a little under, don’t be too concerned, carryover cooking will likely bring it up to the desired 165° and also being in a hot oven.
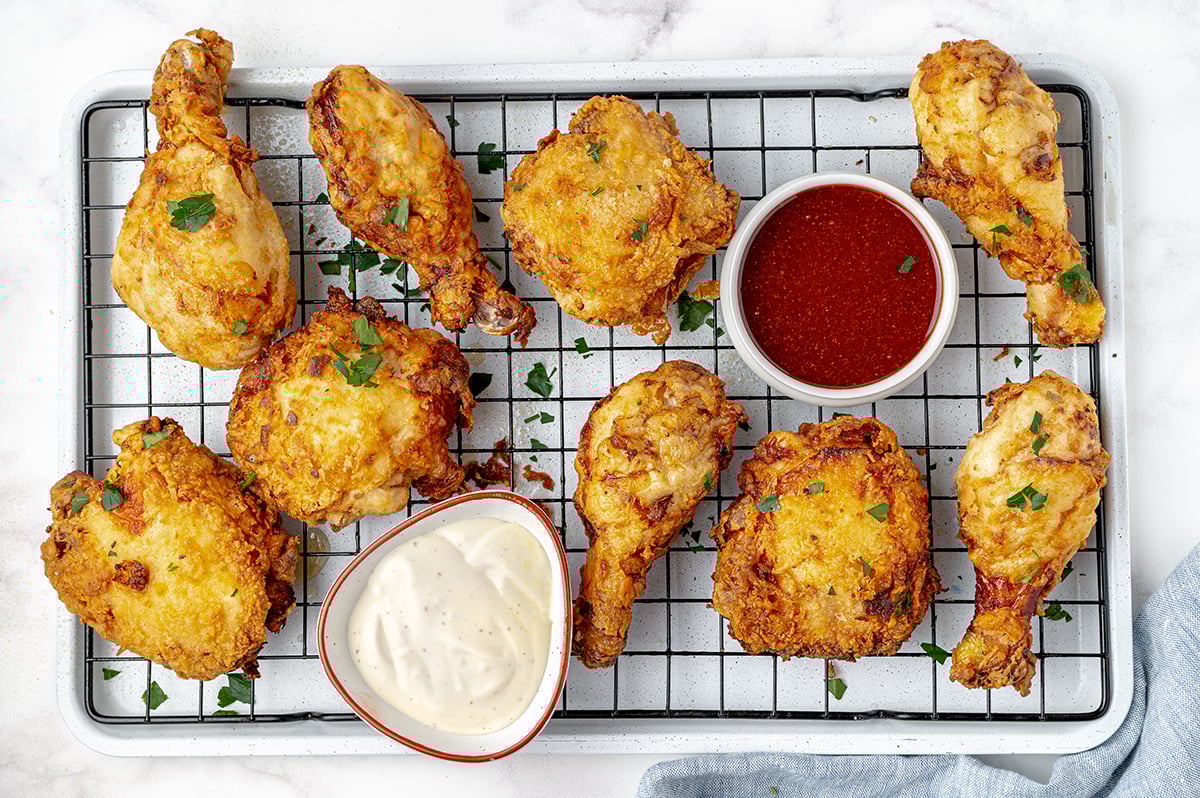
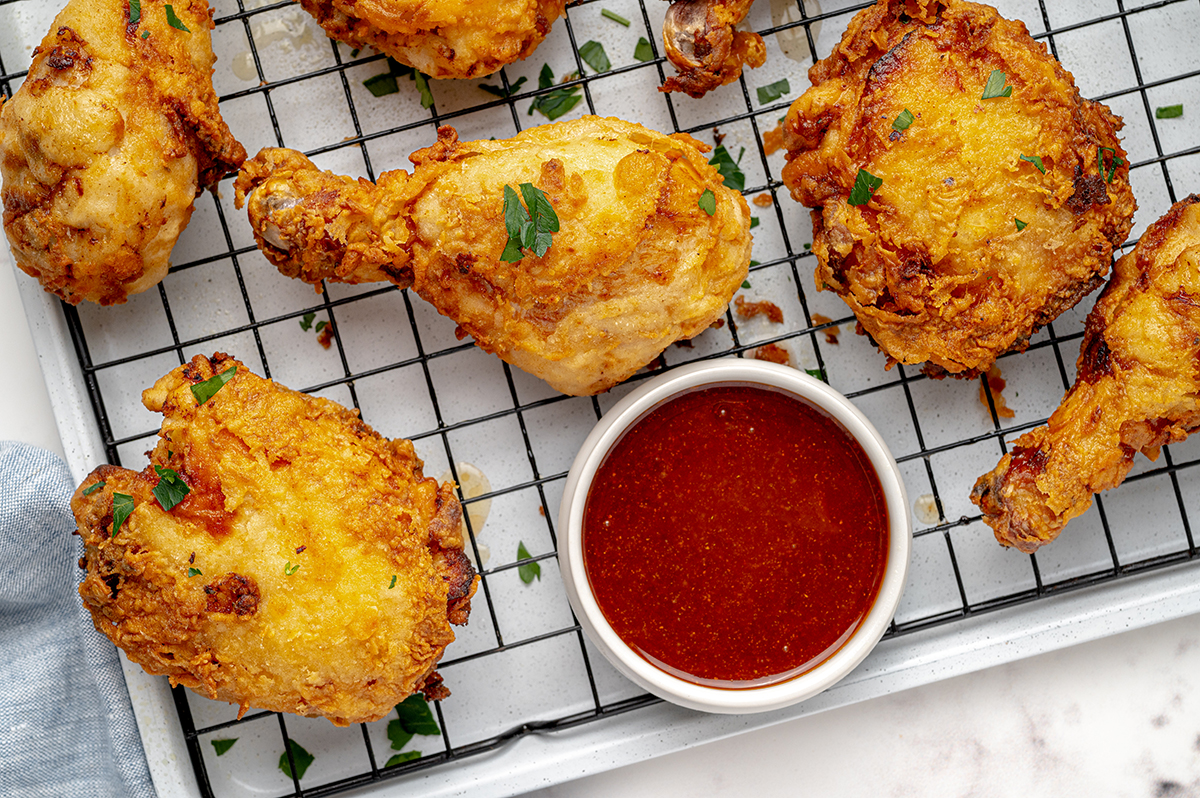
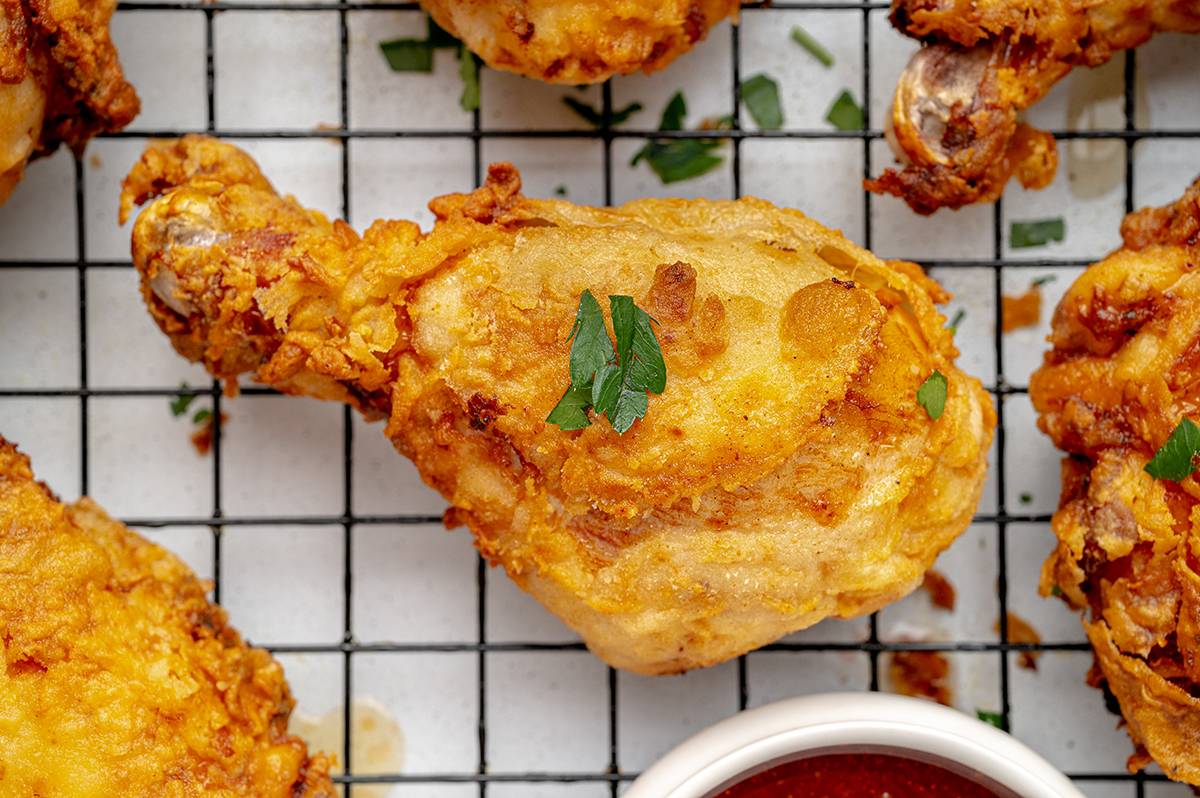
- Remove the chicken pieces to a wire rack so any excess oil can drip, but it isn’t sitting on a paper towel lined baking sheet, which can result in the bottom getting soggy. Place wire rack over an oversized baking sheet and into the warm oven while completing other batches.
- Repeat until all the chicken is fried. After you finish frying, serve immediately or reduce oven to “warm” or 200°F for up to an hour.
- When ready to eat, take it all out of the oven and let it rest for 10 minutes before serving and be careful, it’ll be hot!
Sauces to Serve with Fried Chicken
Although the chicken is bursting with flavor on its own you can serve it with creamy honey mustard , chipotle pepper aioli or a spicy Nashville Hot Chicken Sauce or even hot honey.
More Easy Chicken Recipes
We love chicken dinners and here are some more favorites!
- Nashville Hot Chicken Sliders
- Garlic Parmesan Chicken
- Oven Fried Chicken
- Chicken Kiev
- Dutch Oven Chicken
- Brine Chicken then Roast It!
Pressure Cooker Indian Butter Chicken
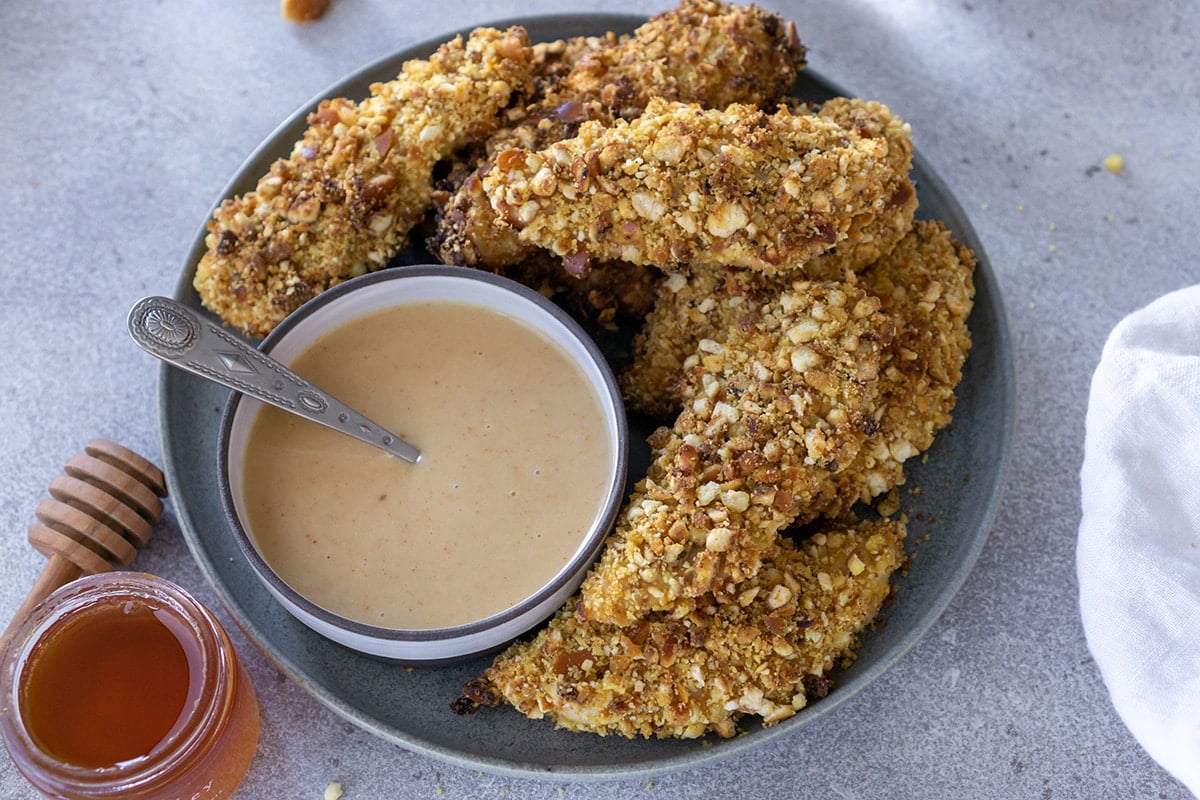
Pretzel Crusted Chicken
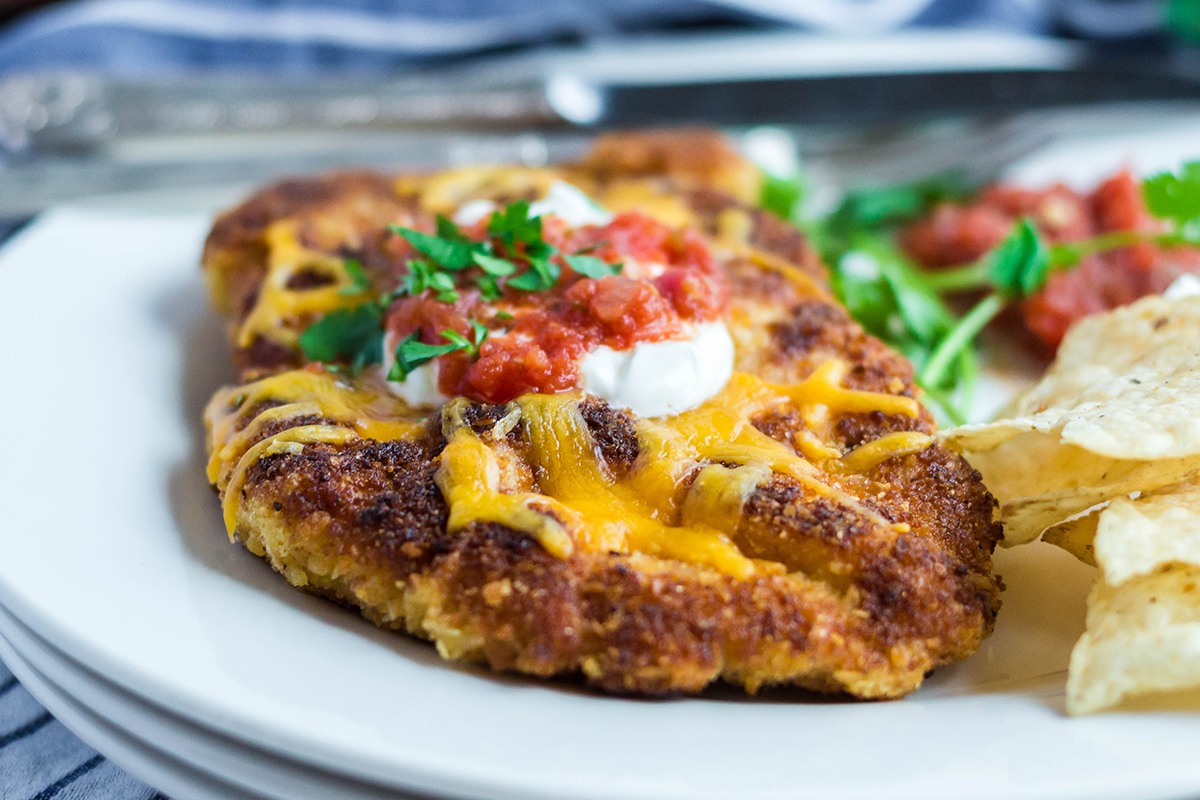
Crispy Mexican Chicken
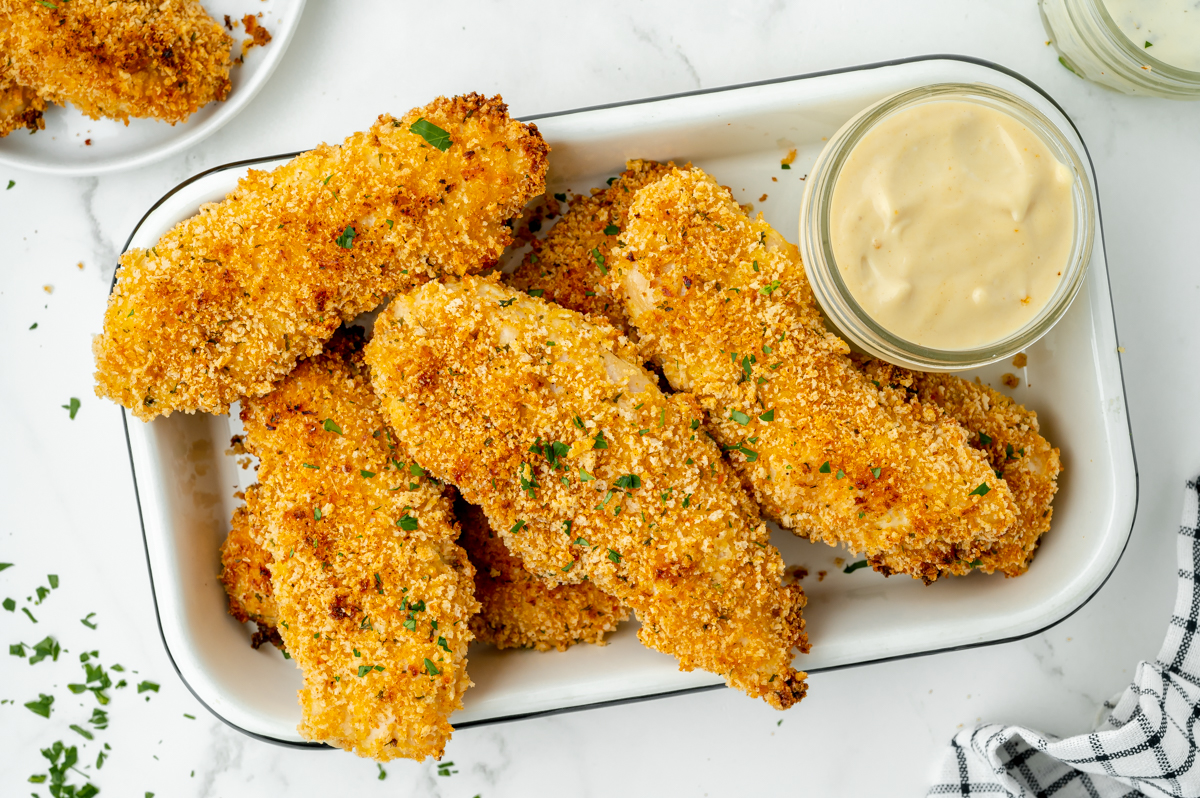
Crispy Baked Chicken Tenders Recipe
Tools for making this fried chicken recipe:
- Mortar and Pestle or Spice Grinder– this might not be an item to use often, but it is handy to have around and can be displayed when not in use.
- Heavy Bottom Frying Pan or Cast Iron Skillet- this will be one of your most used kitchen tools. Having something that is heavy bottom will distribute heat better and prevent burning whether you are using an electric or gas range.
- Splatter Screen – For frying anything, a splatter screen will prevent burns and stains.
- Wire Rack – use it for baking or curing fried chicken!
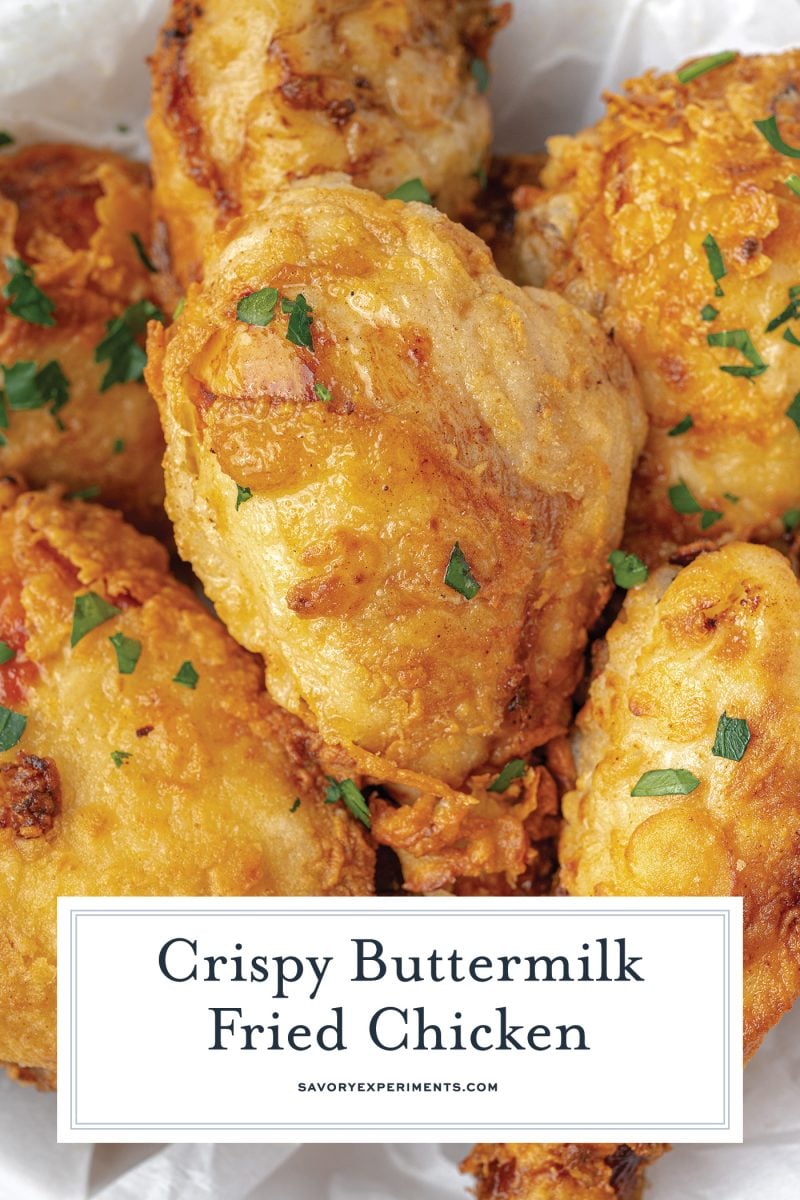

Buttermilk Fried Chicken
Equipment
Ingredients
Buttermilk Brine:
- 1 teaspoon celery salt
- 1 teaspoon dried rosemary
- 1/2 teaspoon ground black pepper
- 2 dried bay leaves
- 2 cloves garlic
- 1/2 medium white onion
- 2 1/2 cups buttermilk
- 1 1/2 tablespoons coarse Kosher salt
- 1 tablespoon sugar
- 2 pounds chicken pieces , drumsticks and thighs
Chicken Dredge:
- 1 1/2 cups flour
- 1/4 cup cornstarch
- 1 tablespoon onion powder
- 2 teaspoons sweet paprika
- 1 teaspoon celery salt
- 1 teaspoon baking powder
- 1/2 teaspoon ground white pepper
Frying oil:
- Vegetable Oil/Peanut Oil/Canola Oil enough to fill 1 1/2 inches up the side of your frying pan
Instructions
- Using a mortar and pestle, spice grinder or placing all ingredients into a plastic bag and rolling with a rolling pin, grind together the celery salt, rosemary, pepper and bay leaves. Place the mixture into a large airtight freezer bag. Set freezer bag into a medium bowl to help it stand up right. You can also put it right into a large bowl, it needs to be big enough to accommodate the chicken and buttermilk mixture.
- Using a microplane or small food processor, grate or pulse the garlic and onion to a pulp. Add to the brine mixture along with the buttermilk, salt and sugar. Mix together with a fork or small whisk.
- Rinse the chicken pieces and add to the brine, tossing or massaging the brine into the chicken. Place the mixture into the refrigerator for 12-24 hours.
- In another airtight plastic bag combine the flour, cornstarch, onion powder, paprika, celery salt, baking powder and white pepper.
- One and a half hours before serving, remove the chicken from the brine, discarding any large pieces of herb and tapping to remove any excess buttermilk. Some left on it will be fine to adhere the breading.
- Add chicken pieces to the flour mixture bag and shake until coated.
- Place the chicken pieces on a wire rack and back into the fridge, allowing them to set for 30-60 minutes.
- Preheat the oven to 300°F degrees and fix another wire rack over an oversized baking sheet.
- Heat the oil in a large cast iron skillet or frying pan until 350°F. Oil will start to have a sheen when it is fully heated, but we suggest using a deep fry thermometer. When the chicken is added, it will drop to 300°F, try to maintain it at this temperature for the duration of cooking.
- Working in batches, add several pieces of chicken to the skillet keeping 1-2 inches between each piece to not overcrowd the pan. Do not move for at least 4-5 minutes or else the batter could fall off. Fry for about 12 minutes, shorter or longer depending on the size of the piece of chicken, turning just once throughout the process to browned and crisp fully. Remove from the oil to test temperature, internal temperature of the chicken should be between 160°-165°F.
- Place cooked chicken on the wire rack over a baking sheet and into the oven to stay warm until you are done frying the rest.
- Repeat until all the chicken is fried. Serve immediately while hot or reduce oven temperature to "warm" or 200°F for up to an hour. Remove chicken and allow it to rest for 10 minutes before serving.
- If you've tried this recipe, come back and let us know how it was in the comments or ratings!


I had never fried chicken on my own until I found this recipe. I feel like a pro now! The buttermilk provides an amazing crunch!
Can I use without skin
Sure~
My family loves this recipe. So good! Thanks for sharing
I think I can taste the crunch. New twist on an old classic. Excellent!