
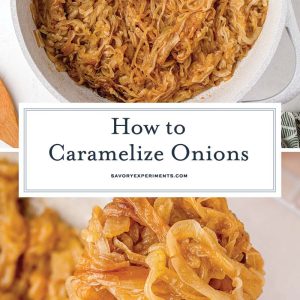
Super simple and absolutely delicious, if you’ve ever wondered how to caramelize onions, here’s your chance to learn!
You will love this Caramelized Onions Recipe
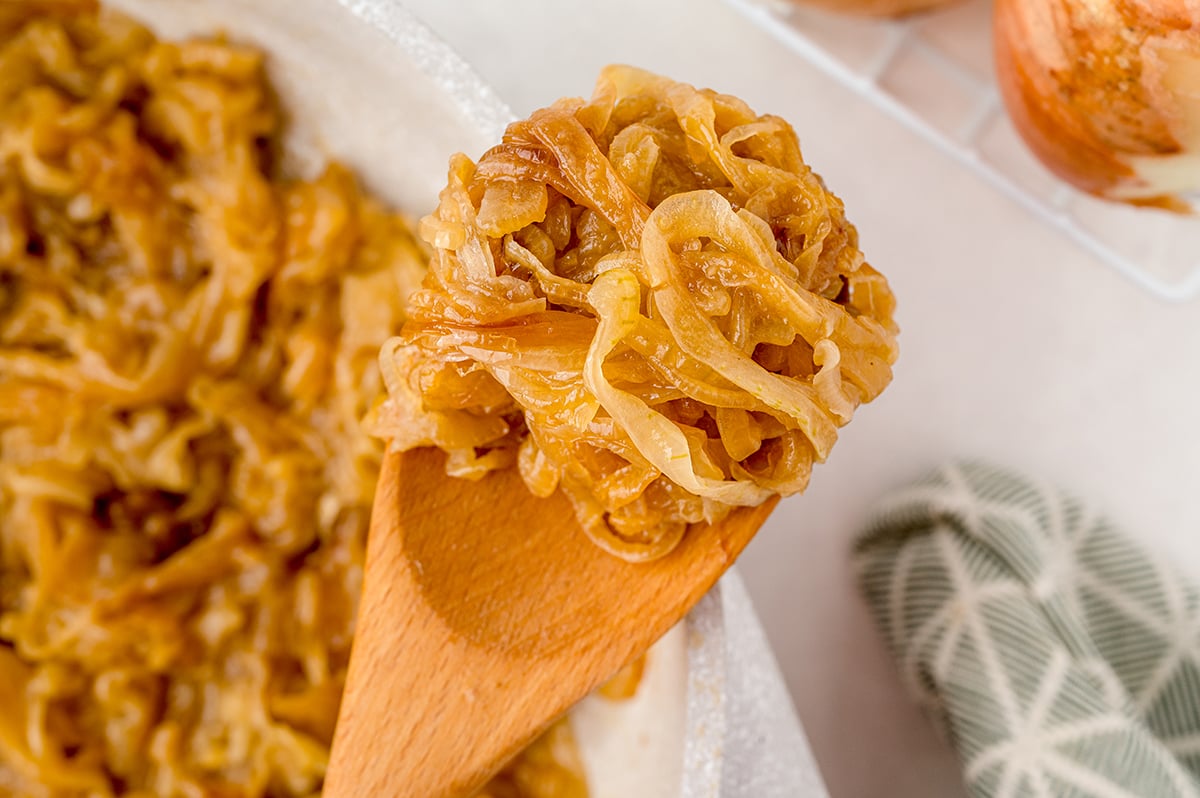
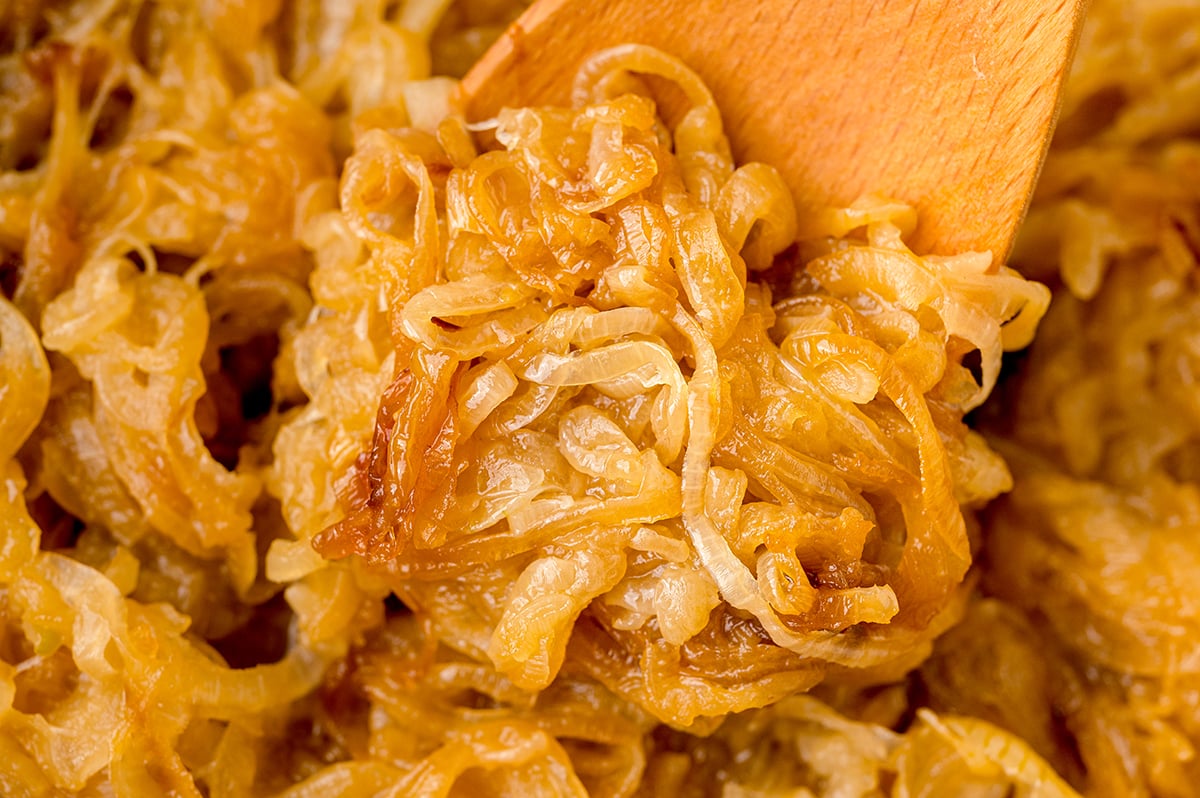
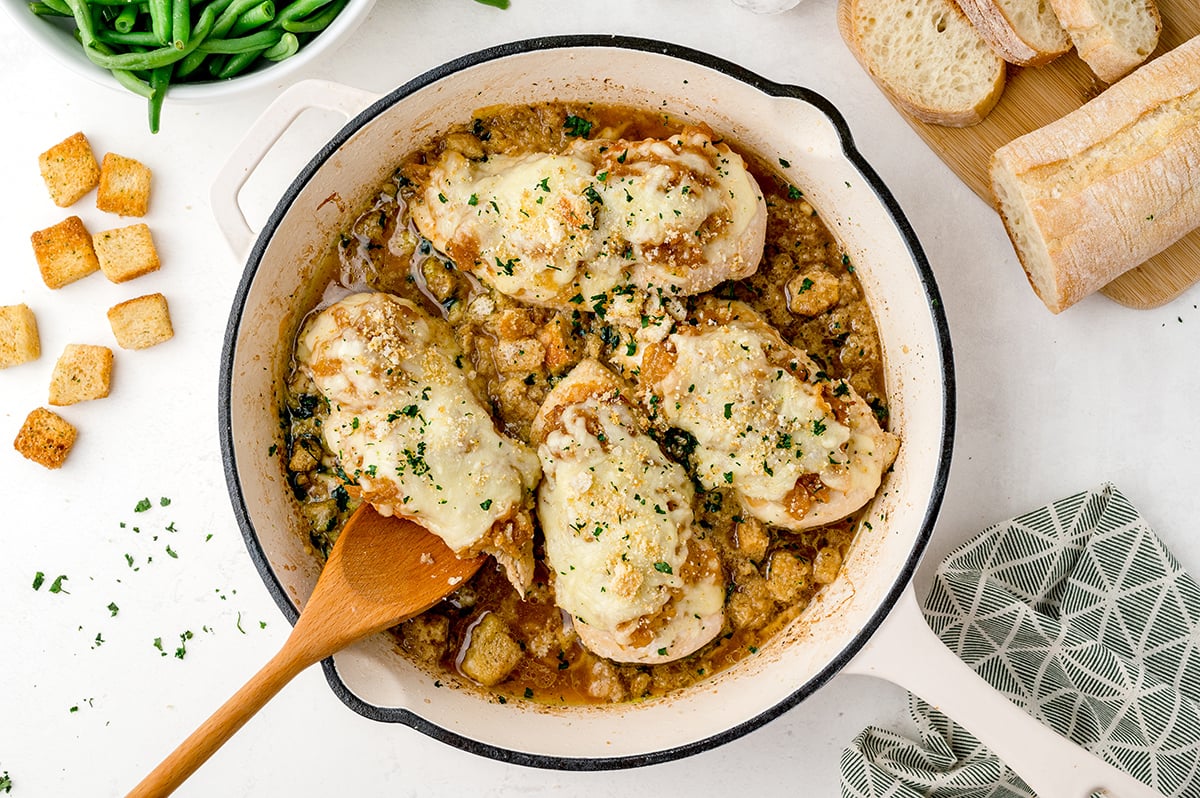
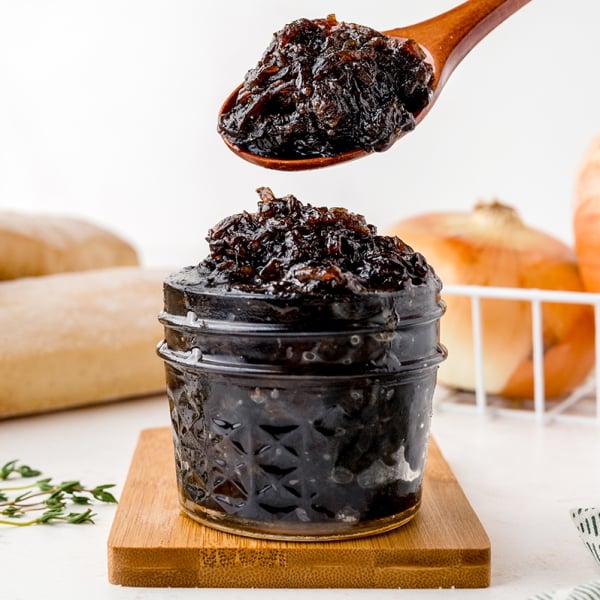
Deeply flavored and golden in color, caramelized onions have a sweet flavor paired with a savory flavor. They are the perfect addition to salads, sandwiches, chicken quesadillas in the oven, french onion soup … the list goes on and on! Think of them as little flavor bombs.
Caramelized Onions vs Sauteed Onions
Caramelized onions are one of those things you eat at a restaurant and think, I should make these at home. They are pure magic in a pan. And they are not, I repeat, not just sautéed onions. They are so much more! And let it be known, they are easy for home cooks to make.
To put it simply but technically, caramelization is the result of something called the Maillard reaction. This is a product of a chemical reaction between amino acids and sugar heating up. It is just a matter of cook time and a low temperature or a medium temperature.
Surprisingly onions, already have some natural sugars in them, but to really drive that chemical reaction home, a small amount of sugar is added.
Why Add Butter to Caramelized Onions?
A small amount of butter is added for two reasons. Fat = flavor and butter is one of the best ways to get great flavor.
Secondly, the milk solids brown as the onions cook over a long period of time to get that roasty, rich flavor these onions are known for. It is also added for its amino acids to help with the maillard reaction we were chatting about.

Caramelized Onion Recipe ingredients
- Onions – You can’t make caramelized onions without…onions! Also known as an allium, onions are relatives of scallions and garlic, and chives. Any onion variety with a bulb will absolutely work just keep in mind each one with a slightly different flavor and end result.
- Butter – Is there anything butter can’t do?! For this recipe it is imperative to the process. You can use salted or unsalted, but I strongly suggest, using unsalted so you can salt to taste at the end of the process. The onions will cook down a ton and you don’t want them to be overly salty.
- Sugar – White sugar or regular cane sugar are best for this recipe. Brown sugar (dark or light) both have molasses in it which might burn before the onions get to the stage you want them to be.
- Salt – Everything needs a touch of seasoning, but adding salt here helps to start to draw out the moisture in the onions to get them well on their way to caramelization.
- White Wine – A dry white wine is best – think sauvignon blanc or even a pinot grigio. It will add a touch of flavor and all the alcohol will completely burn off. If you don’t want to use wine, a 1 or 2 tablespoons of water will do just fine. This added liquid helps to pull any brown bits off the bottom of the pan. These are also flavor.
What Onion Makes the Best Caramelized Onion
Any type of onion with a good-sized bulb can be caramelized, as they all have sugar, but white onions or yellow onions are the fan favorites. I tend to use sweet onions, purely because that is what I have always used, but it is not necessary.
- White Onions
- Yellow onion
- Shallots
- Red onions
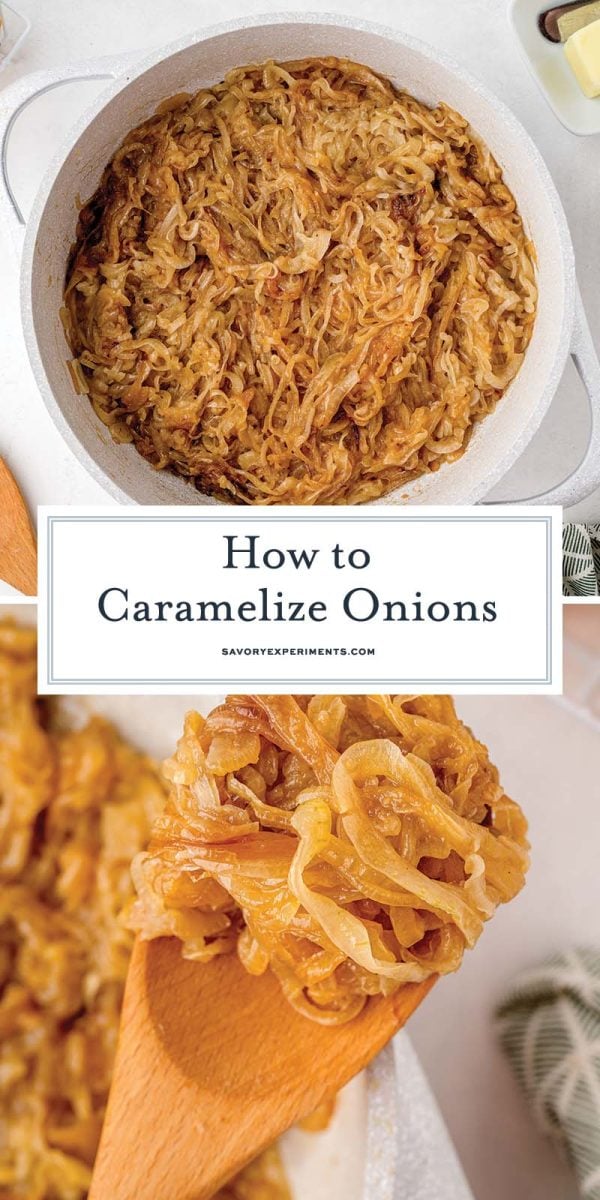
How to Caramelize Onions (Step-by-Step)
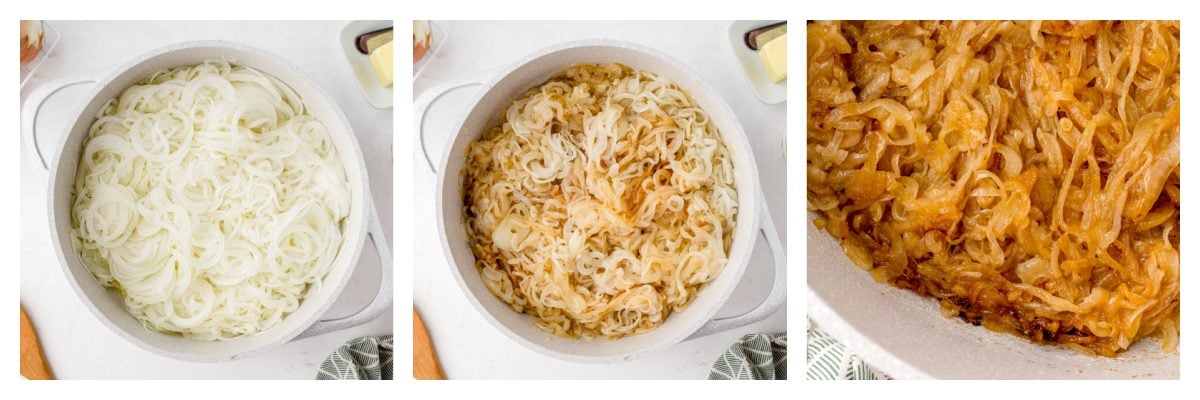
- Melt butter. Melt a small amount of butter in large skillet over medium-low heat. Remember, slow and steady wins this race. You don’t want your butter to brown, just to get nice and foamy.
- Add onions. Add sliced onions, the sugar, and the salt and toss to coat lightly in melted butter. Try to get all the surface area of the onions evenly. This will ensure a good and even cook.
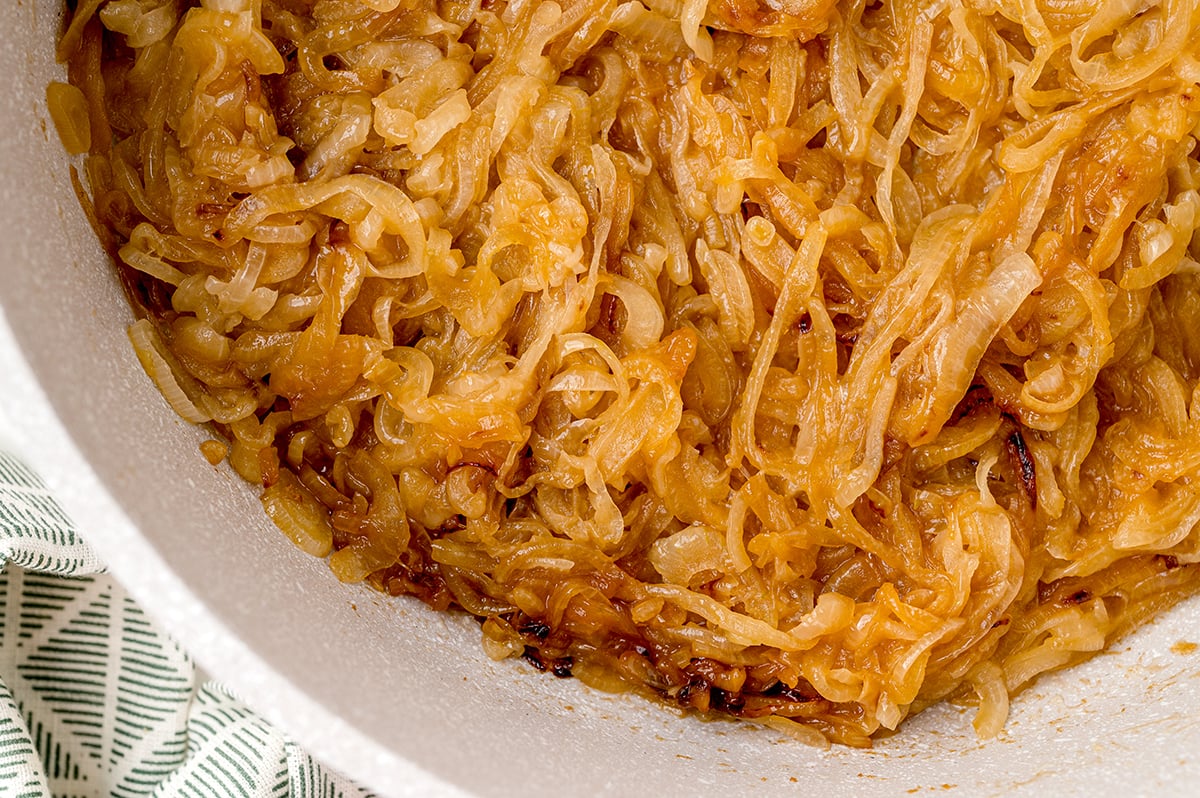
- Brown onions. Now you wait – this is the most important part. Continue heat at medium-low, toss every 5-10 minutes. If nothing is happened, increase heat slightly. If they are cooking too fast, reduce heat. They will start to brown, continue to cook, stirring to toss, slowly cooking until they are a golden brown.
- Let onions reduce. Onions will start to reduce. They are made mostly of water and as the water releases and evaporates, the onions will start to deflate and reduce in size.
- Check for caramel color. At around 20 minutes, in you will start to see your first hint of that “caramel” color you are are aiming for.
- Taste test. At 45 minutes, you will have a nice brown batch of onions. Depending on your taste buds and how you intend to use your onions (or how much time you have!), you can stop at any point in time. Do a taste test first to make sure they are nice and sweet.
What Is The Best Pan for Caramelizing Onions?
In terms of the caramelization process, you can choose any pan. I have a few friends that swear by a stainless steel pan or even a cast iron, but a good non-stick saute pan is my choice as it is the most forgiving while you are cooking. The important thing is more the low, steady heat.
I have seen these made in a slow cooker, but the stovetop method is the best in my opinion. Who doesn’t want their kitchen smelling like jammy onions?
How to Caramelize Onions in the Oven
You sure can. In fact, some people prefer it to having to tend to them on stove.
You’ll need a good amount of heat, so set the oven to 375 degrees. Drizzle with olive oil, then bake for 30-40 minutes, stirring every once and while. You won’t get the same flavor as direct contact with a searing hot saute pan, but it will come close.
Caramelized Onions Recipe tips
Tips from a chef- check these out so you don’t make the same mistakes I have!
- Ideally, you would like your onions to all caramelize at the same pace. Cut the onions into uniform slices. Thicker onions take longer to cook, thinner less time to cook.
- This is a slow process. Trying to speed it up with produce sautèed onions, but they will lack the sweet taste you are trying to achieve. Be patient.
- Use a large frying pan, preferably with a heavy bottom. This provides the largest amount of cooking surface and allows you to better control the temperature.
- Don’t stir too much. Doing this will result in mushy onions. Use more of a tossing maneuver to rotate onions. You will need to toss more towards the end of cooking.
- I add a teaspoon of sugar to my onions, but many do not. Your choice, you can leave it out using only the sugar naturally produced by your onions.
- Depending on your pan, you may have some sticky, brownish bits stuck to the bottom of the pan. No worries, you didn’t burn your onions. Just de-glaze with a splash of white wine and scrape them up.
- Caramelized onions freeze well and can be kept in the refrigerator for up to 4 days.
How to Serve Caramelized Onions
Caramelize onions can be the star of the show on a crostini, piece of bread or a cracker, but they are commonly served as part of a recipe.
Use them on sandwiches like patty melts, cheesesteaks, paninis, burgers and hot dogs. Pile them on top of grilled chicken, steaks or pork chops. They are excellent as a pizza topping or calzone stuffing and also weave wonderfully into salads. Blend them into hummus or other dips.
The uses are endless, which is why you better make a double batch.
How to Store Caramelized Onions
You can absolutely make your caramelized onions ahead of time. (They are fairly time consuming after all.) Feel free to cook these any where from 3-5 days in advance just be sure to allow them to cool to room temperature and transfer them to an airtight container before putting them in the fridge. Doing it this way will allow them to add caramelized onions to any of your favorite dishes.
They are also freezer friendly. I like to package them in sandwich bags so they are measured out into 1 cup for easy thawing. Some folks even freeze them in smaller portions using ice cube trays. Freeze them, pop them out and put them all in one bag.
Chef’s Tip
Slicing the onions to the same width helps them cook more evenly. The easiest way to do this is with a mandolin slicer.
FAQs on How to Make Caramelized Onions
Truly caramelizing onions (opposed to sauteing them) will take anywhere from 30-45 minutes depending on the size of the pan, heat and how many onions you are working with. It takes so much longer because the process of caramelizing (letting natural sugars melt) takes this long.
Patience is the number one trick to caramelize onions. It is not a fast process. If you try to speed it up, you’ll get fried onions, which is fine, but if sticky, sweet onions is your goal, you’ll need to slow it down.
There shouldn’t be too much liquid while caramelizing. At the correct rate, any water evaporation should happen at the same speed as cooking. However, if you do find yourself with liquid, it is fine to drain it off.
More Recipes That Use Onions
Caramelized Onion Recipe
Ingredients
- 2 tablespoons unsalted butter
- 3 large onions thinly and uniformly sliced, ends removed
- 1 teaspoon sugar
- 1/2 teaspoon salt
- Splash of white wine only if the pan requires de-glazing
Instructions
- Melt the2 tablespoons unsalted butter in large frying pan over medium-low heat. Remember, slow and steady wins this race.
- Add the uniformly slices 3 large onions, 1 teaspoon sugar and 1/2 teaspoon salt, toss to coat lightly in melted butter. Now you wait. Continue the heat at medium-low, toss every 5-10 minutes. If nothing is happens, increase heat slightly. If they are cooking too fast, reduce heat.
- The onions will start to reduce. They are made mostly of water and as the water releases and evaporates, the onions will start to deflate and reduce in size. At around 20 minutes in you will get your first hint of the "caramel" color you are seeking.
- At 45 minutes you will have a nice brown batch of onions. Depending on your taste buds and how you intend to use them, you can stop at any point in time. Do a taste test first to make sure they are nice and sweet.
- If you've tried this recipe, come back and let us know how it was in the comments or star ratings.
Video
Notes
Nutrition


Taste great and easy!
I had no idea it was so simple! Thanks for the tips on storage too! I love that I can make them ahead for a cookout birthday party we’re having
That golden color is so enticing!
I loooove adding caramelized onions to my pizza so this is the perfect method to get jammy onions every time! Thanks for the step by step instructions!
Love caramelized onions and love how easy this post is to follow. I’ll probably caramelize some onions to eat with my pasta tonight!
These were amazing with hot dogs, and so easy to make too.
So when do you add the sugar & salt?
Updated~ Sorry about that, John!
How long do the caramelized onions last in the freezer?
HI Natalie- great question. About 3-4 months in an airtight container or plastic bag. I’ve gone longer- about 6 months, but the standard is 3-4 months.
This is an excellent set of instructions for a basic technique. Thanks for sharing.
Wishes for tasty dishes, Linda