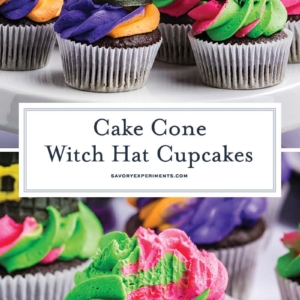
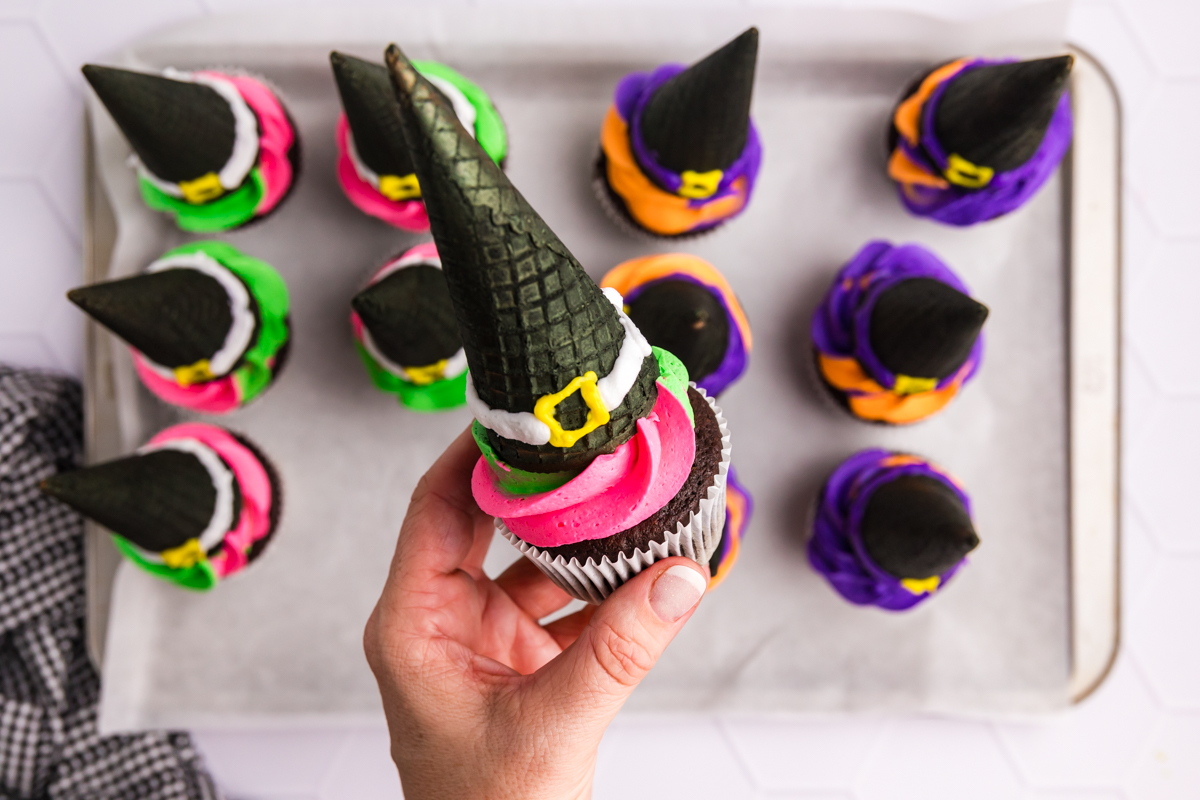
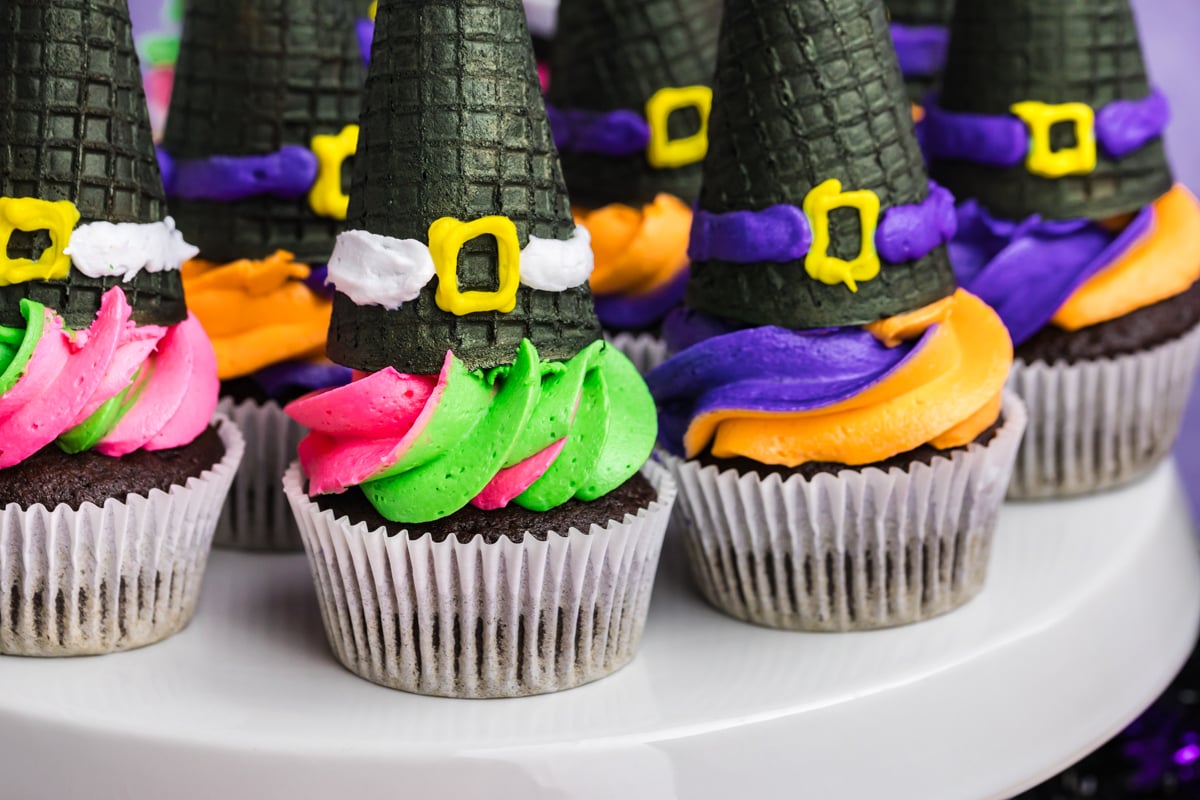
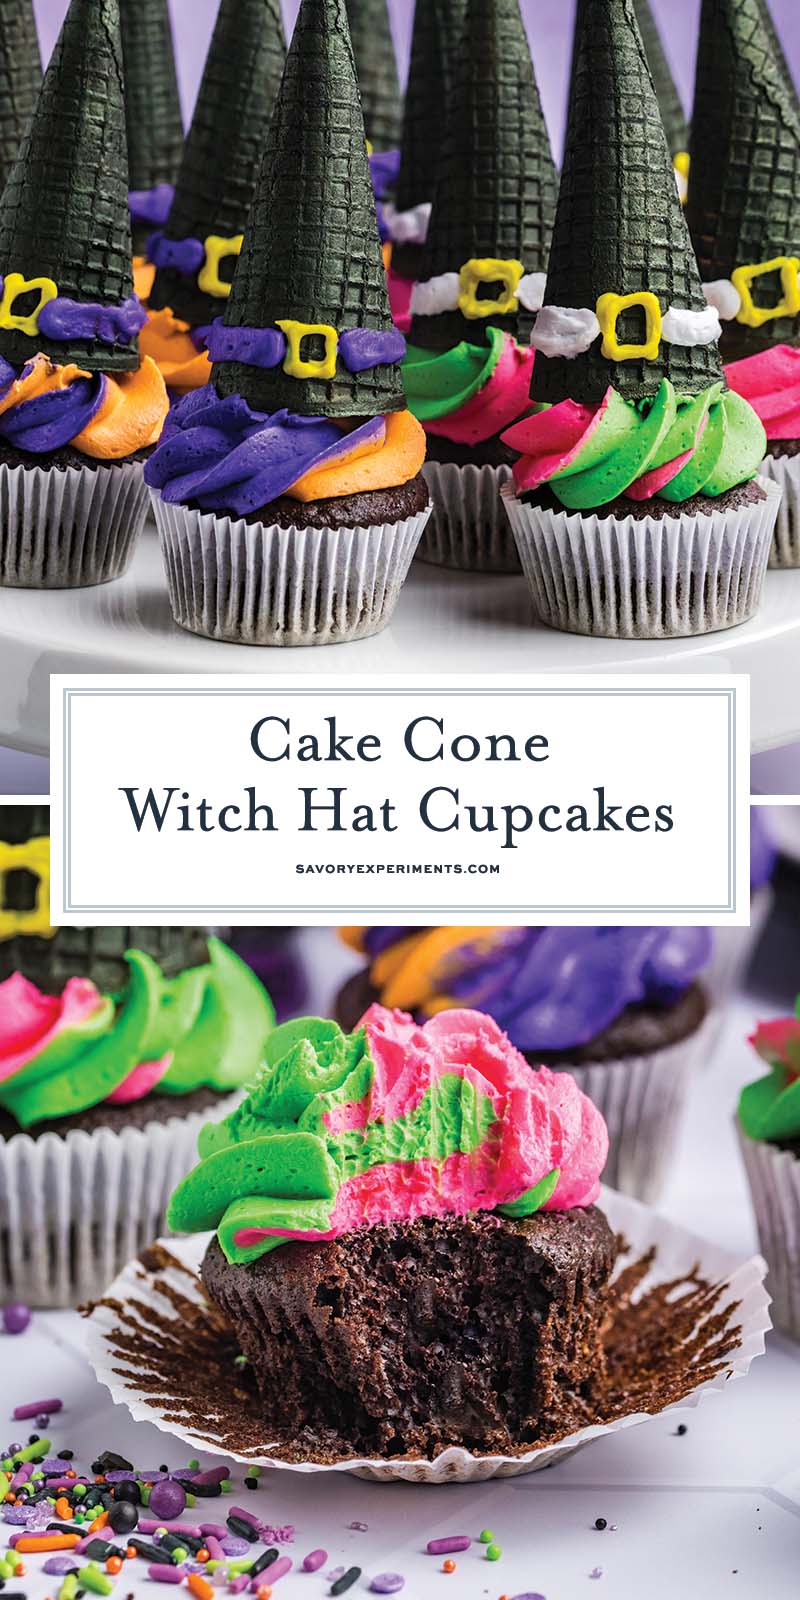
Witch Hat Cupcakes are a Halloween treat that doubles as a fun activity to do with the kids. Everyone will love getting to make and decorate their own cupcake cone … as well as getting to eat it!
Why You’ll Love These Witch Hat Cupcakes
Easy cupcakes that are fun to decorate and great for kids- what’s not to love!
- Easy for kids to help – These Halloween cupcakes are a great project for kids to work on either at a school party or at home!
- Make them your own – From decorations to colors, these cupcakes are easy to customize to your liking.
- Made with a box mix – The easier the better is always my motto when it comes to baking, and what could be easier than a boxed cake mix?
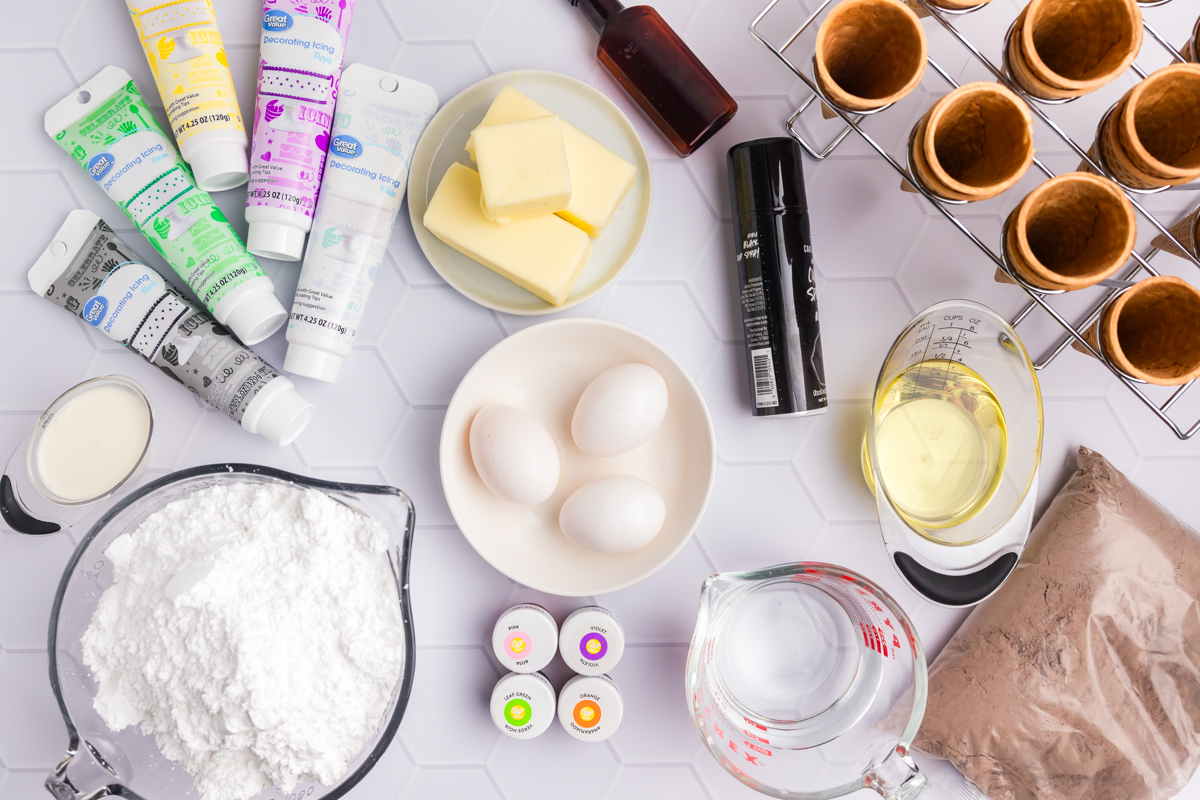
Ingredients
You can easily find all of these witch hat cupcakes ingredients down the baking aisle of your local grocery store.
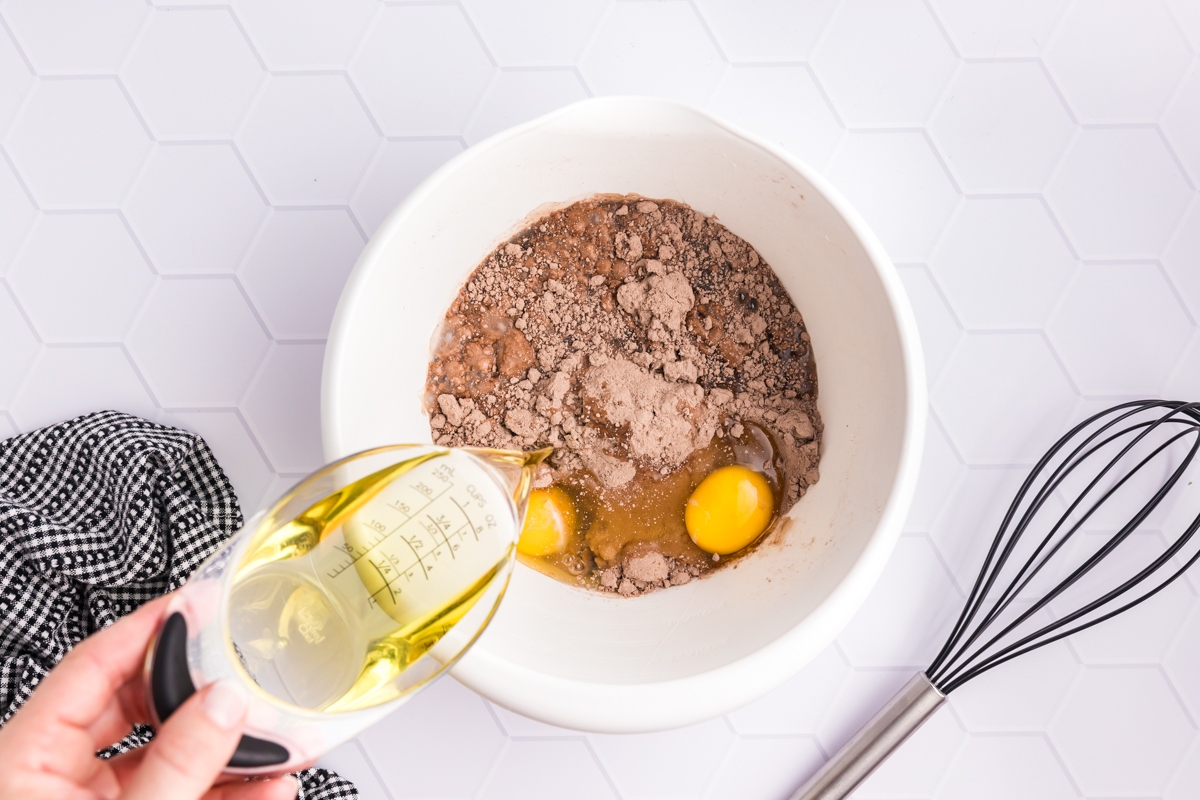
- Box cake mix – You will also need the ingredients listed on the box. This is usually a large egg and oil. But feel free to use your favorite homemade cake mix too! Choose from chocolate, vanilla, funfetti or any of your favorite cake flavors.
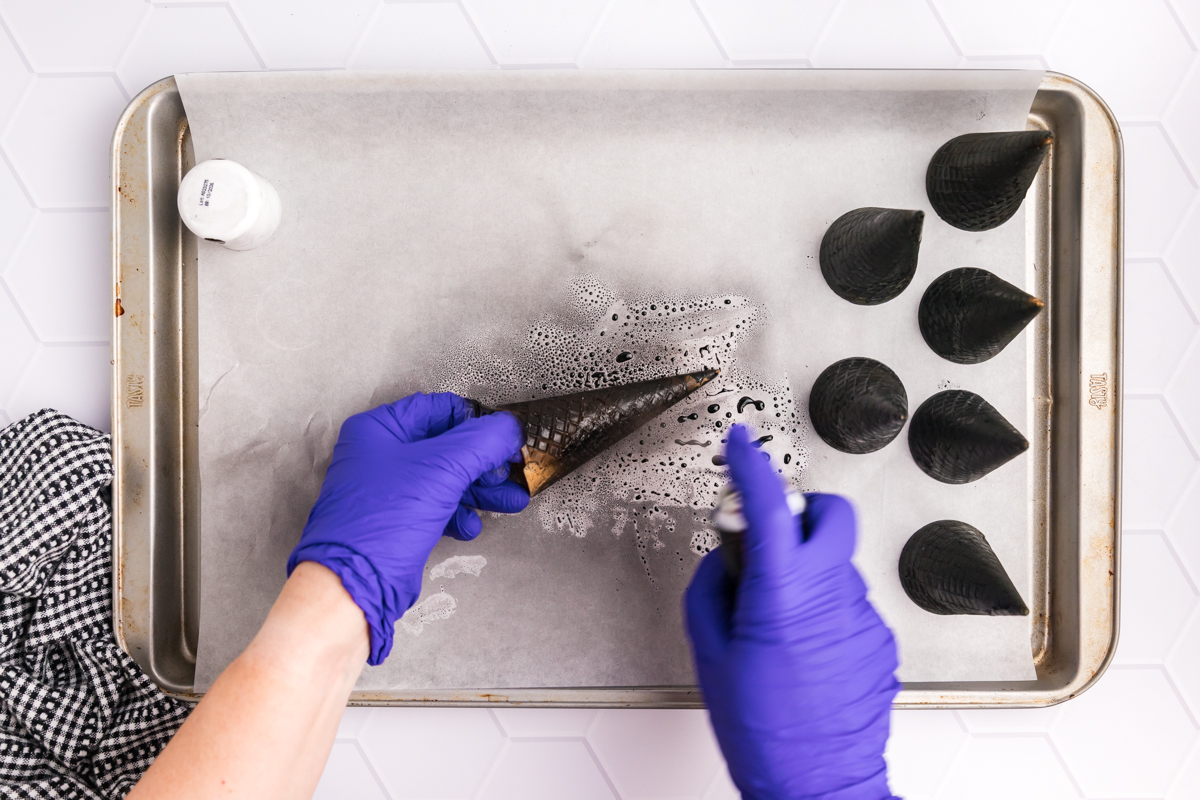
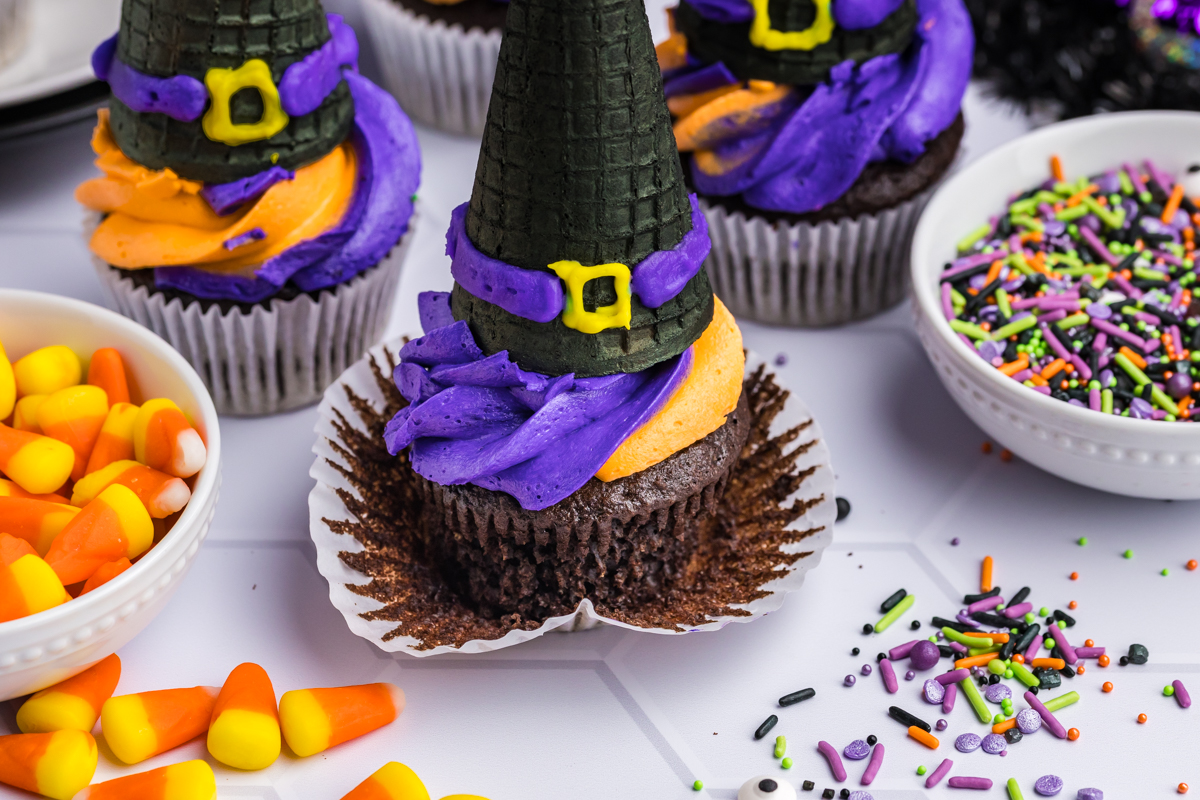
- Waffle cones – I like the texture and flavor that waffle cones have, but you can also use sugar cones. The traditional cake ice cream cone doesn’t give the right shape.
- Wilton black food color mist – This is optional, but it’s an easy way to color your cones fast. Use any color you’d like, or multiple colors.
- Tubes of frosting – I used yellow, purple, green and white frosting. But you can use any Halloween colors that you like!
- Desired sprinkles/embellishments – We didn’t use any for these cupcakes, but Halloween colored sprinkles would definitely be fun to add! You could also add your favorite Halloween candy too.
- Butter – This is what will be the base of our buttercream. Make sure it is softened for easier mixing. I prefer to use unsalted butter to control the salt content.
- Powdered sugar – We need something to sweeten our frosting! Powdered sugar makes it super smooth and perfectly sweet.
- Heavy cream – This helps to thin our frosting out to the perfect piping consistency.
- Vanilla extract – I like to use clear vanilla extract to preserve the color of the frosting, but regular vanilla is fine as well.
- Food coloring – I used both purple and green gel food coloring, but you can use any Halloween colors you like!
How to Make Witch Hat Cupcakes
Grab the kids or your friends to help you make these fun cupcakes!
Cupcakes
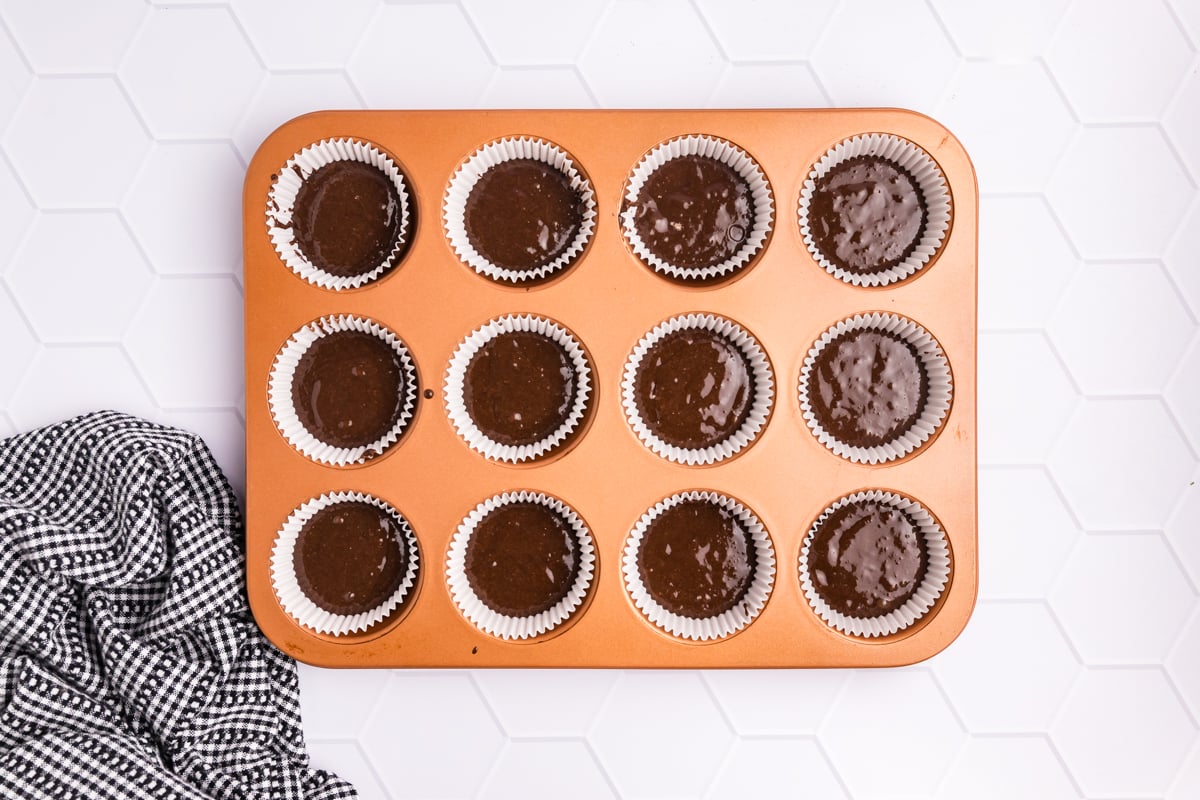
- Prepare oven and cupcake pan. Preheat the oven and line cupcake pan with desired cupcake liners. Set aside.
- Make cake mix. Prepare the box cake mix according to package directions and bake according to package directions. Allow to cool fully on wire rack before decorating.
Witch Hats
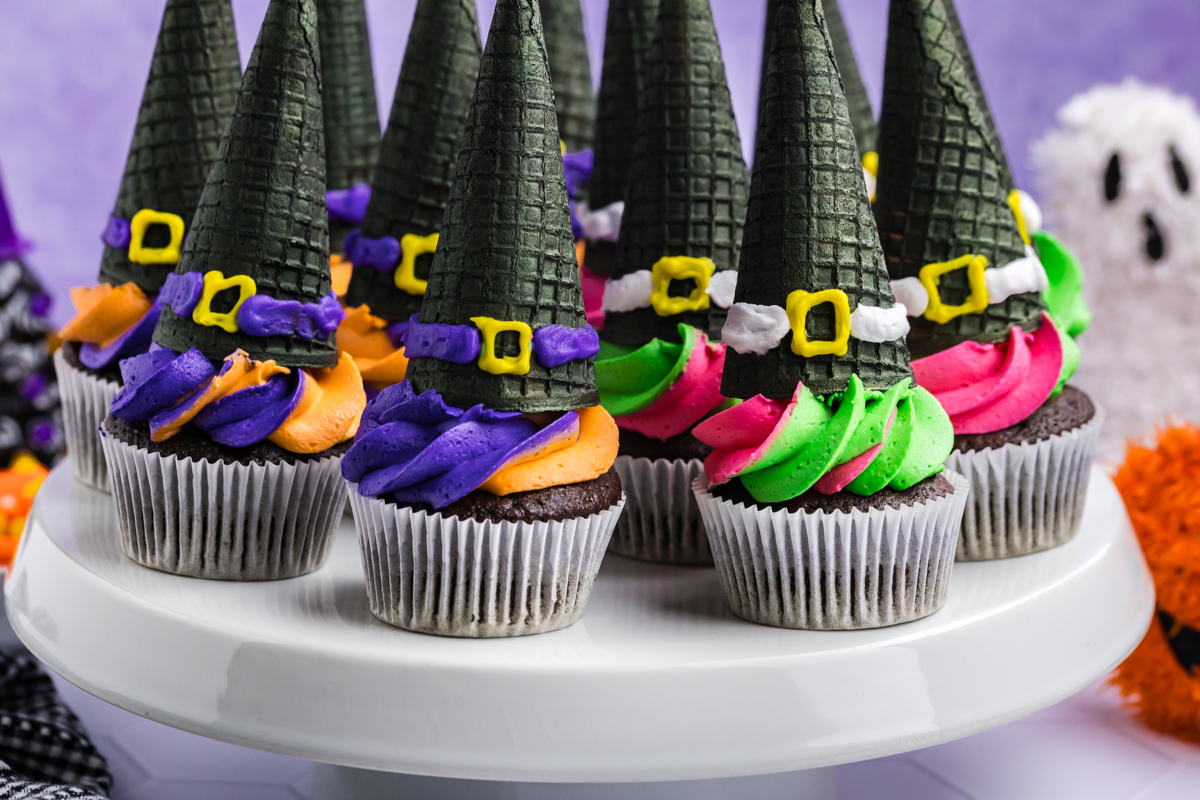
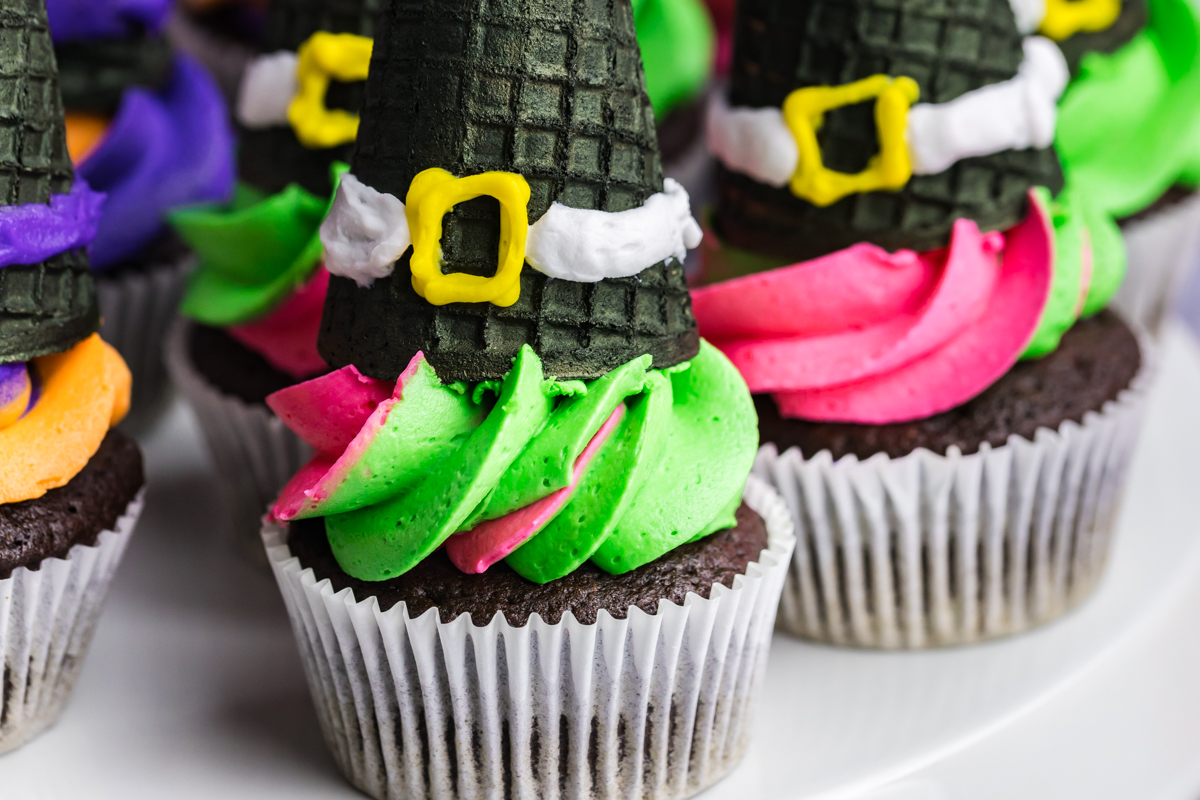
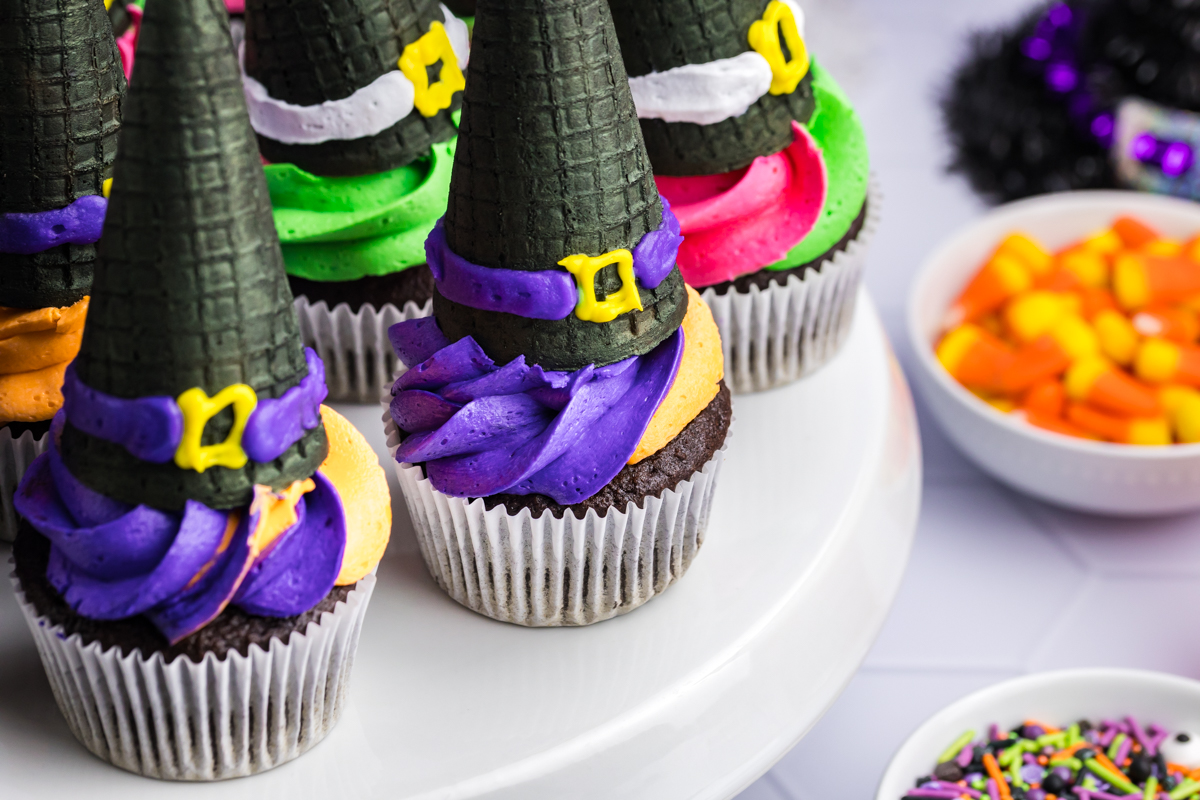
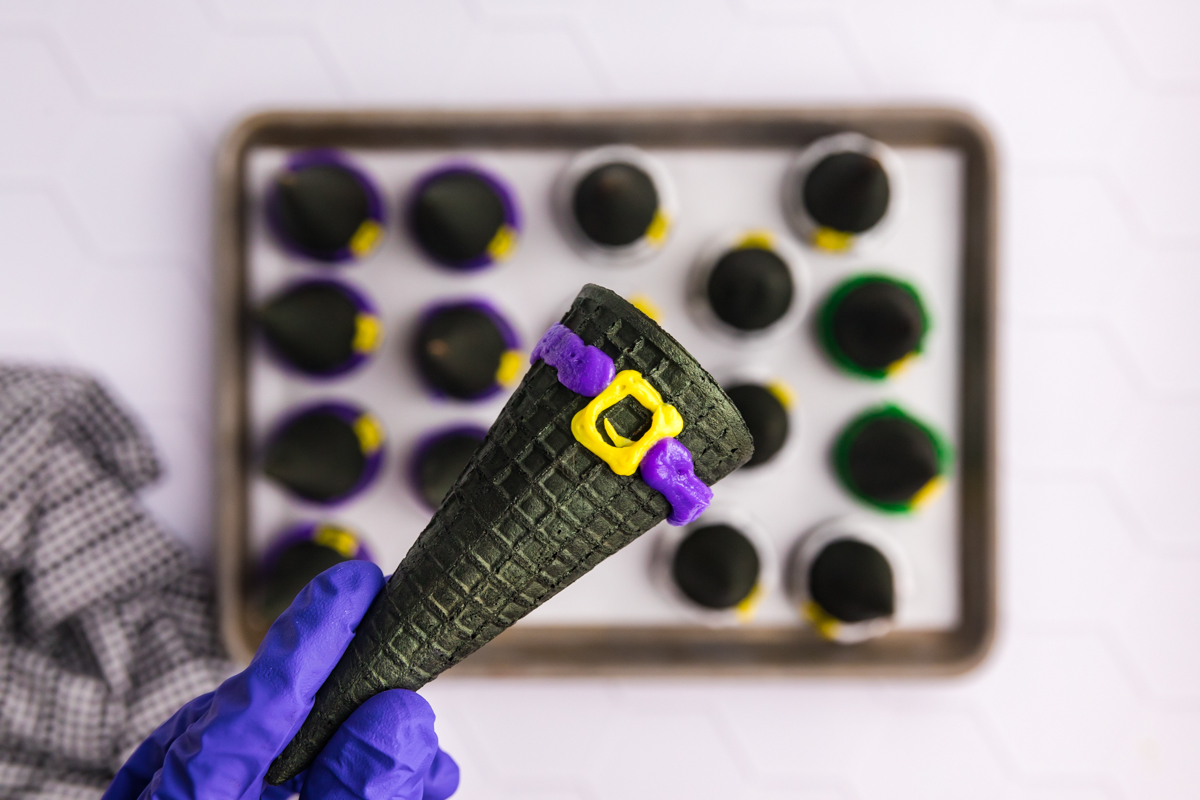
- Coat cone with spray. Hold a waffle cone on one finger and spray with Wilton food color spray. I used black, but you can also use purple, green or orange. Place them into a cone baking rack to dry or use a rimmed baking sheet lined with parchment paper.
- Decorate hats. When dry, using the frosting tubes and a fine tip, create a buckle and decorate with other Halloween sprinkles or embellishments, if desired. Wear food safe gloves to prevent your hands from also becoming Halloween colors.
Frosting
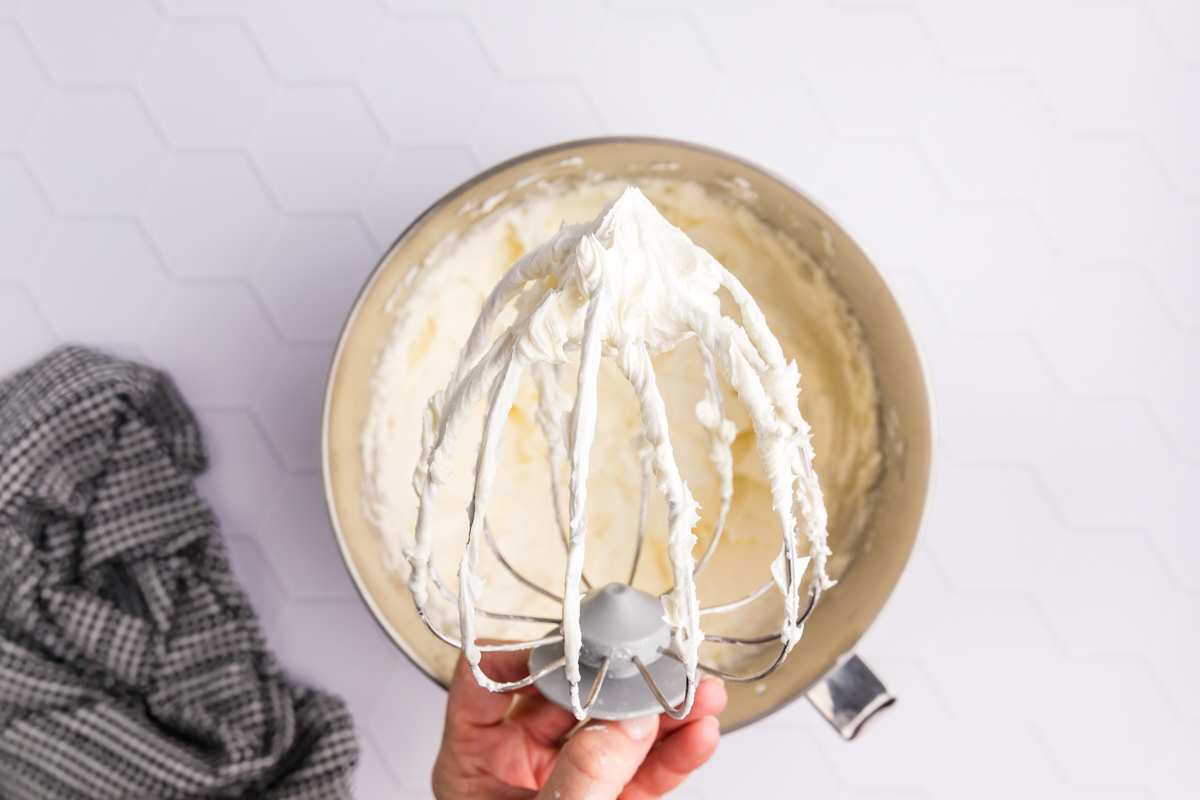
- Make frosting. In a large bowl, beat the butter until smooth with paddle attachment with stand mixer. Add the powdered sugar, heavy cream and vanilla extract and blend until smooth and thick.
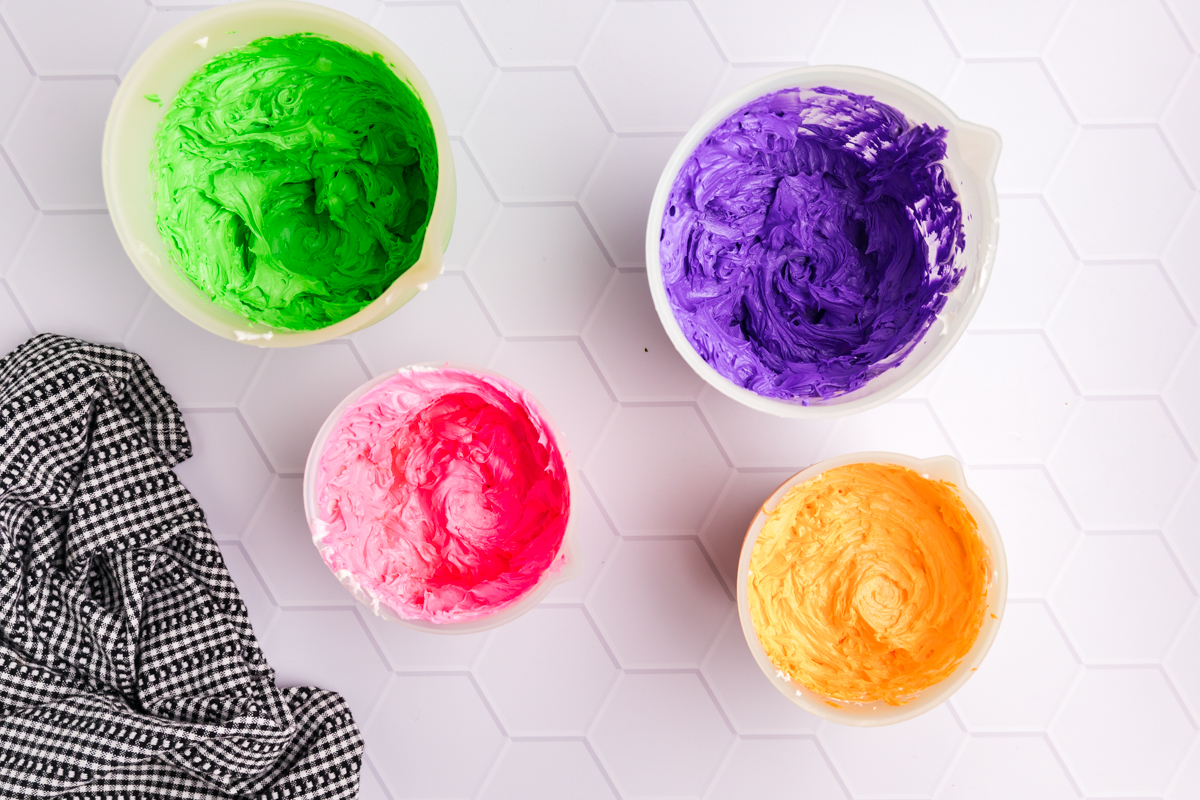
- Color frosting. Divide the frosting evenly. Add a few drops of purple food gel to one batch and repeat with the second batch using the green food coloring to make green frosting. Orange and black are also good choices. Or you can do just one color.
Assemble
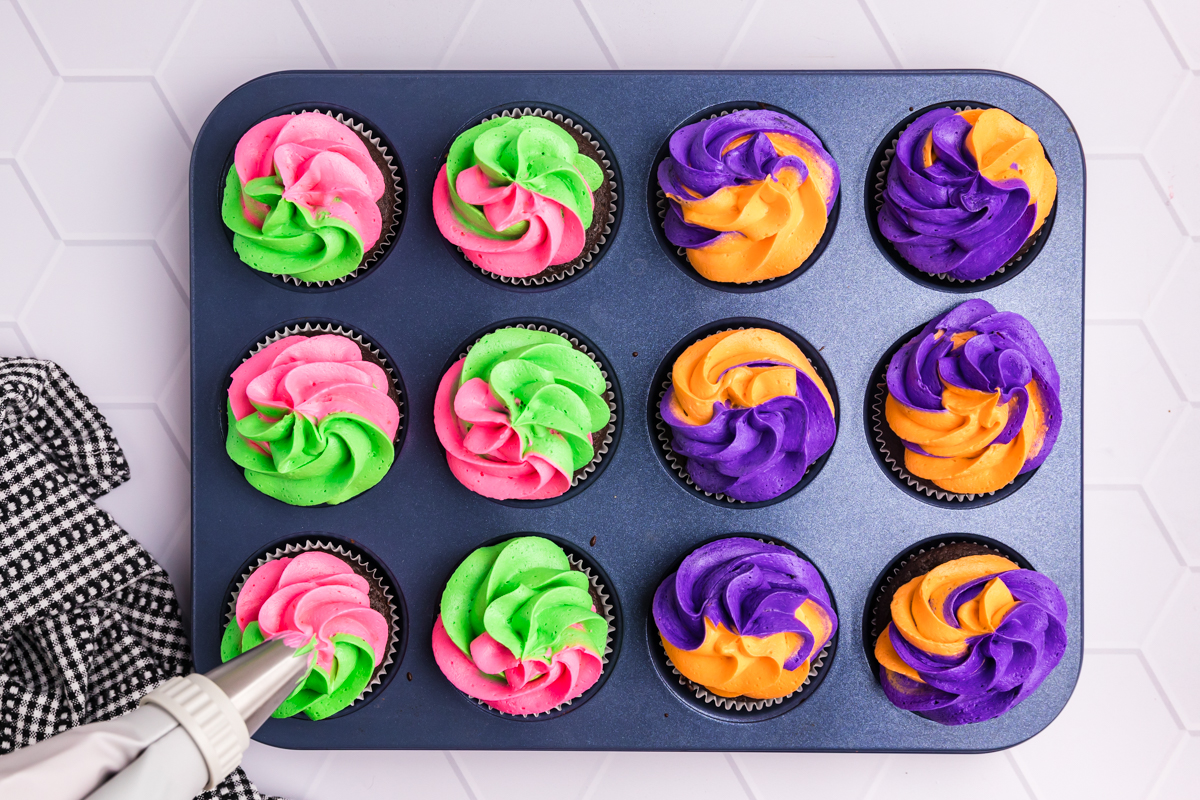
- Add frosting to piping bag. After reaching desired color, add frosting to bags. If doing two colors, use a two-toned piping bag or parchment paper, putting each color on one side and pipe onto cupcakes using a large star tip.
- Add witch hats to top of cupcakes. Top each with a decorated waffle cone watch hat.
Storage and Freezing
How to Store Witch Hat Cupcakes
You can store any leftover cupcakes in an airtight container at room temperature. No need to put in the fridge.
Can I Freeze Witch Hat Cupcakes?
You can freeze the cupcakes without decorating or the cone on top. Thaw at room temperature and then start with instruction #1 in decorating the cones.

More Fun Halloween Desserts
From cupcakes to cookies and everything in between, these fun Halloween desserts will be perfect for all of your Halloween parties!
Hocus Pocus Cupcakes
Ingredients
Cupcakes:
- favorite box cake mix or homemade recipe , plus ingredients needed for mix
Cones:
- 24 waffle cones
- Wilton black food color mist
- Yellow frosting tube
- Purple frosting tube
- Green frosting tube
- White frosting tube
- Desired sprinkles/embellishments
Frosting*:
- 1 1/4 cup butter , softened
- 4 1/2 cups powdered sugar
- 1/4 cup heavy cream
- 1 teaspoon clear vanilla extract
- Purple gel food coloring
- Green gel food coloring
Instructions
Cupcakes:
- Preheat the oven and line cupcake tin with desired cupcake liners. Set aside.
- Prepare the box cake mix according to package directions and bake according to package directions.
- Allow to cool fully before decorating.
Cones:
- Hold a waffle cone on one finger and spray with Wilton food color spray. I used black, but you can also use purple, green or orange. Place them into a cone baking rack to dry.
- When dry, using the frosting tubes and a fine tip, create a buckle and decorate with other Halloween sprinkles or embellishments, if desired. Wear food safe gloves to prevent your hands from also becoming Halloween colors.
Frosting:
- In a large mixing bowl, beat the butter until smooth. Add the powdered sugar, heavy cream and vanilla extract and blend until smooth and thick.
- Divide the frosting evenly. Add 3-4 drops (or until it reaches the desired color) of purple food gel to one batch and repeat with the second batch using the green food coloring. Orange and black are also good choices. Or you can do just one color.
- If doing two colors, use a two-toned frosting bag, putting each color on one side and pipe onto cupcakes using a large star tip.
- Top each with a decorated waffle cone watch hat.
- If you’ve tried this recipe, come back and let us know how it was in the comments or star ratings.
Notes
Nutrition


This is such a fun and easy activity to do with the kids! They love being able to customized thier own and all ages can get in on the fun!
We made this the other day and everyone loved it. Going to make it again for a family gathering this weekend!