Pumpkin spice season is fun and all, but let’s talk about the unsung hero: homemade pumpkin puree. If you’ve only ever grabbed a can off the shelf, you’re in for a treat. Learning how to make pumpkin puree from scratch takes a tiny bit of time, but you’re rewarded with velvety, naturally sweet, true pumpkin flavor.
This tutorial walks you through pumpkin puree from scratch step-by-step, how to pick the right pumpkin, roast it, blend it, and freeze it, so you can stash it away for pies, breads, soups and about a hundred other cozy recipes.
Why You’ll Love Homemade Pumpkin Puree
- Real Pumpkin– For starters, it’s made with real pumpkin. Canned pumpkin only needs to be some sort of squash and is sometimes butternut or acorn and lacks flavor.
- Control Over Texture– You get control over the texture and moisture content.
- No Additives– Canned pumpkin is stuck in a lined can. Some brands tend to taste metallic. You’ll avoid this issue making your own.
Pumpkin Puree vs Pumpkin Pie Filling
It is simple cooked pumpkin that is blended until it is smooth. It can then be used in sweet or savory recipes. It is labeled pumpkin, but in the US the canned stuff only needs to be something from the squash family and is rarely actual pumpkin.
Pumpkin pie filling is pumpkin puree sweetened and blended with warm fall spices so it is ready for sweet fall recipes. Sugar and pumpkin pie spice can be added to the puree for a filling if that is what the recipe calls for.
Best Pumpkins for Puree
Not all pumpkins are invited to the puree party. There are three main types you’ll see: ornamental, carving and pie (sugar) pumpkins.
Ornamental and carving pumpkins are bred to look cute on your porch, not to taste amazing – they’re usually watery, stringy and pretty bland.
For the best homemade pumpkin puree, you want pie pumpkins, sometimes labeled as “sugar pumpkins.” They’re small (about the size of a cantaloupe), naturally sweeter, and have denser, flavorful flesh that roasts up beautifully. Toss the stringy bits before roasting, but don’t skip the seeds – they make a delicious snack when roasted.
Pro Tip
If your store or farm stand has bins of pumpkins with confusing labels, look for the smaller, round varieties marked as “pie” or “sugar.” When in doubt, ask the produce team.
How to Make Pumpkin Puree (Step-by-Step)
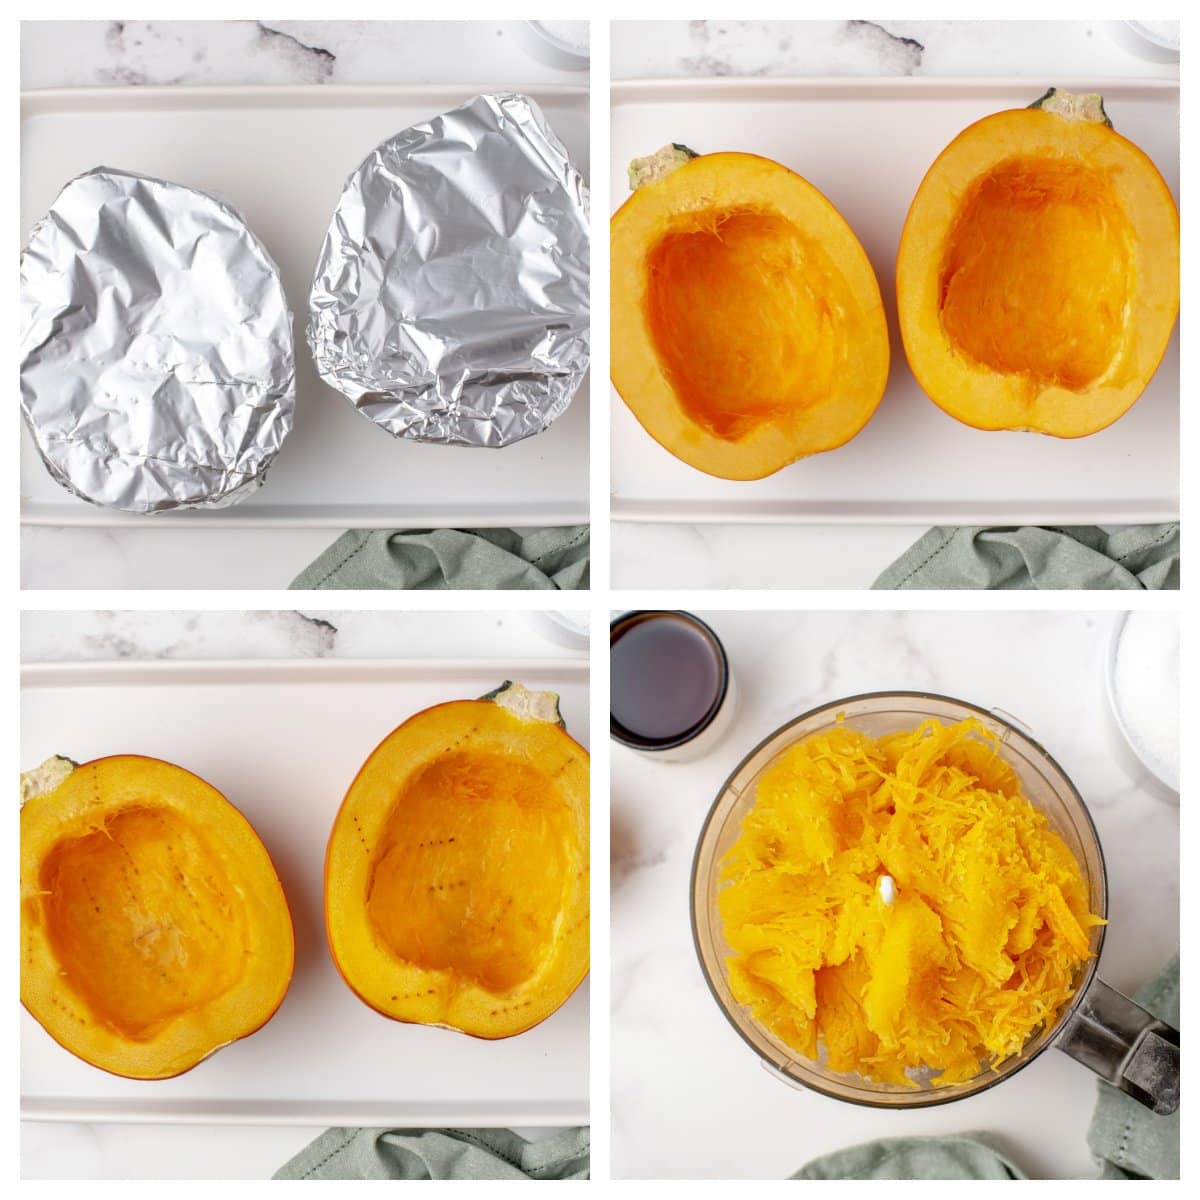
- Preheat the oven and line a rimmed baking sheet with aluminum foil for easy clean up. Cut the 3 pound pie pumpkin in half, stem to base. Scrape out the seeds and stringy pulp. Reserve seeds to make baked seeds, if desired.
- Place the halves, meaty side up, on a rimmed baking sheet. Pro tip- cut a small slice off the bottom of the shell so they sit flat without rolling.
- Cover each half with aluminum foil. Bake for 45 minutes so they steam. This helps retain moisture and not dry out while stilling cooking. Remove the aluminum foil and roast for another 15 minutes or until the flash is fork-tender. This gives you the roasted flavor and lets the natural sugars develop.
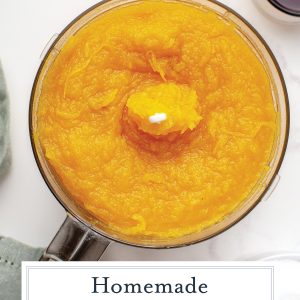
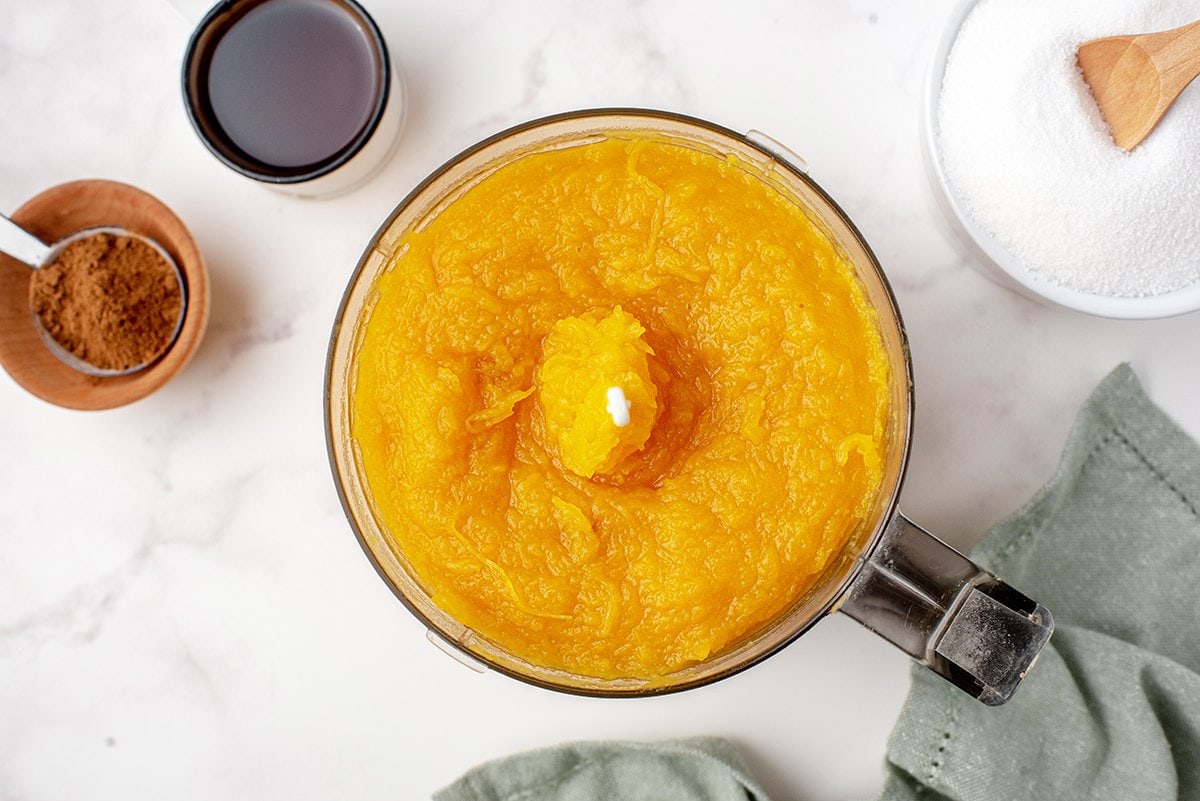
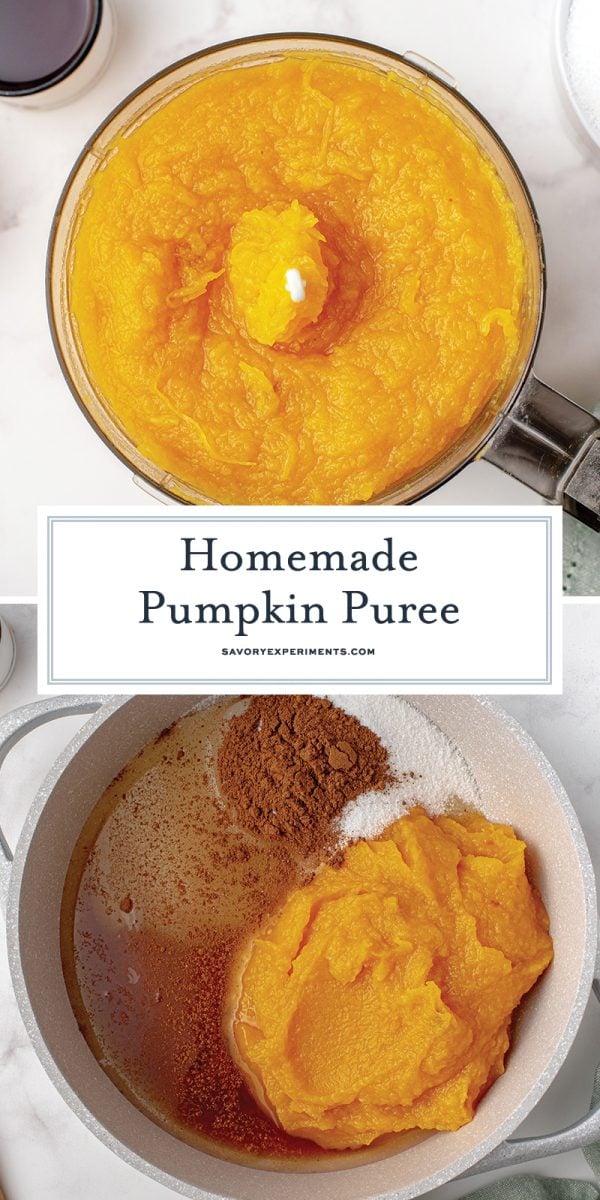
- Remove and allow the pumpkin to cool slightly. Scrape the pumpkin flesh from shell halves and puree in a food processor or high powered blender.
- You might need to add just a little water to make it a “blendable” consistency. On the other hand, some are watery and need to be drained to be the right moisture level as canned pumpkin, which is fairly thick. Drain in a fine mesh sieve for 20-30 minutes to release extra liquid. The drain will be slow but steady.
Pumpkin puree can turn out different shades of orange, it just depends on the type of pumpkin. I’ve has some light, I’ve had some dark. Do not fret, it will all be delicious when you add it to your desired recipe.
How Much Puree Does One Pie Make?
One 3-pound pumpkins makes approximately 2 cups of pumpkin puree. This is slightly more than a standard can.
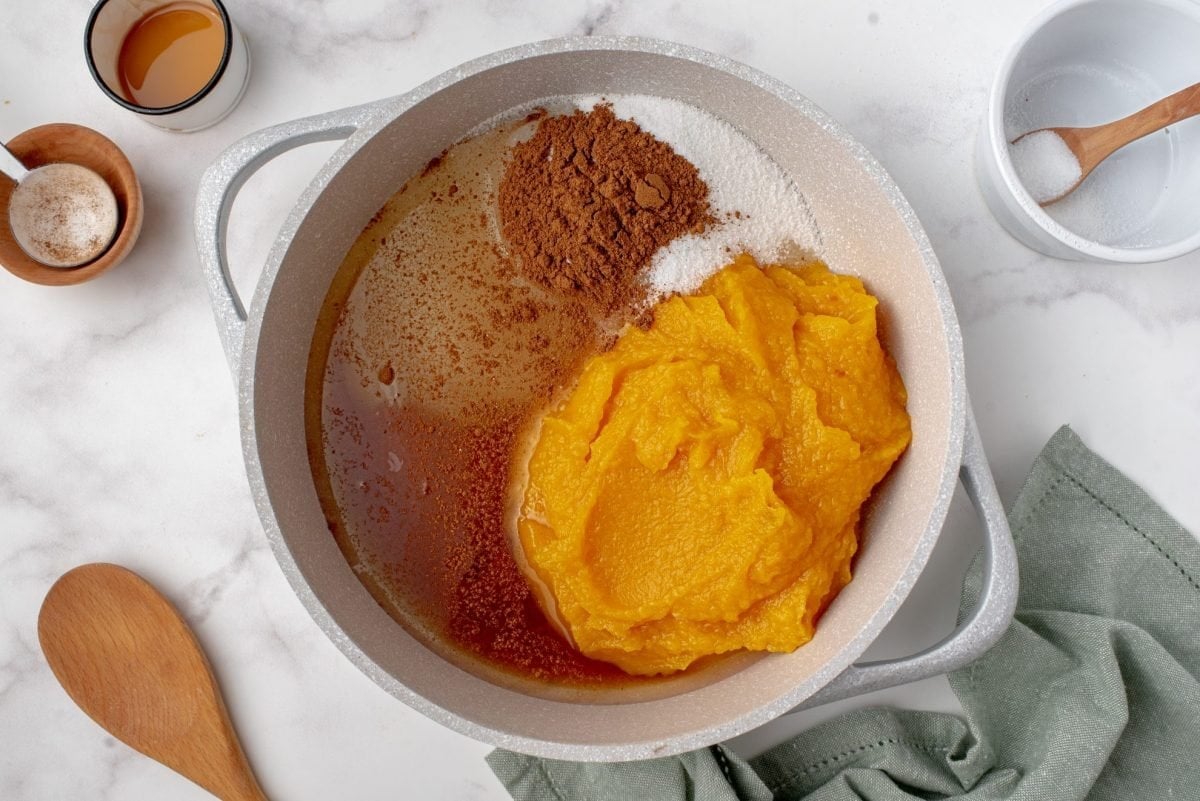
How to Make Pumpkin Pie Filling
To make pumpkin pie filling, combine 2 cups of the puree with a 12-ounce can of condensed milk, 2 eggs, 1 cup of brown or white sugar and 2 teaspoons of pumpkin pie spice.
Storage & Freezing
Storage: Since this is homemade and doesn’t contain preservatives or additives, it will last in the fridge for about 3-5 days in an airtight container. At that point you’ll either need to bake or cook with it or freeze it. Stir well before using.
Freeze: This works with canned or homemade pumpkin puree. Simply place it in an airtight plastic bag, remove as much air as possible and then freeze. For better storage, freeze it flat so bags can be stacked.
If you need small amounts on hand, freeze it in an ice cube tray and pop them out when frozen. Thaw however much you need in little cubes.
FAQs for Making Pumpkin Puree
While you can boil pumpkin, I believe that roasting gives the best, full flavors since it allows the natural sugars to caramelize and reduces the amount of water.
You can also use a blender or even potato masher, but a potato masher might not give you the same smooth consistency.
As a general rule, a 3-pound pie pumpkin yields about 2 cups of puree, which is just a bit more than a standard 15-ounce can (1.875 cups). If a recipe calls for one can of pumpkin, measure out 2 cups of homemade pumpkin puree and you’re good to go.
Some pumpkins naturally hold more water, and larger carving pumpkins are especially guilty. If your puree looks thin, drain it in a fine mesh strainer or cheesecloth for 20-30 minutes. For baking, you want a thick, spoonable puree that holds soft peaks, not something that pours like soup.
Recipes That Use Pumpkin Puree


Homemade Pumpkin Puree (How to Make Pumpkin Puree from Scratch)
Equipment
Ingredients
- 3 pound pie pumpkin , sometimes labeled as sugar pumpkin
Instructions
- Preheat the oven to 375°F. Line a rimmed baking sheet with aluminum foil. Set aside.
- Cut the 3 pound pie pumpkin in half, stem to base. Scrape out the seeds and pulp, but leave the flesh. Reserve seeds to make baked seeds, if desired.
- Place the halves, meaty side up, on a rimmed baking sheet. Pro tip- cut a small slice off the bottom of the shell so they sit flat without rolling.
- Cover each half with aluminum foil. Bake for 45 minutes. Remove the aluminum foil and roast for another 15 minutes or until the flash is fork-tender. Since pumpkins sizes vary greatly, the cook time can also vary.
- Remove and allow the pumpkin to cool slightly. Scrape the pumpkin flesh from shell halves and puree in a food processor or high powered blender.
- You might need to add just a little water to make it a "blendable" consistency. On the other hand, some are watery and need to be drained to be the right moisture level as canned pumpkin, which is fairly thick. Drain in a fine mesh sieve for 20-30 minutes to release extra liquid.
- If you've tried this recipe, come back and let us know how it was in the comments or ratings.
Notes
Nutrition


How long does it last and how do I store it?
Store in the fridge for up to a week. There aren’t any preservatives so it doesn’t last long.
You can also freeze it for up to a year.
This homemade pumpkin puree was soooo much better than the canned version!
Didn’t realize there were so many great uses for pumpkin puree! Definitely making some this weekend!
Love the tips shared to make the perfect pumpkin puree. Thanks.
Love this recipe, saving this for future use, thank for sharing
So much better than canned.
Hi!
I’ve been making pumpkin puree for about 5 years but mine always turns out much thinner than what I’m seeing in your pictures!
I always get pie pumpkins, bake until tender, and puree! Any thoughts?
Always love your content!
Jess
Hi Jess,
If mine was to turn out too thin, I would probably line a colander with cheesecloth and drain it a little or place it in the fridge uncovered to dry.If I don’t get to a thick, chunky consistency, then it doesn’t blend right for most pumpkin pie fillings and other recipes.
It might also be the type of pumpkin you are using- are you using a “pie pumpkin” specifically?
And thank you!
Jessica (also 🙂 )