How to Roast Hatch Chile Peppers
Servings: 10
Calories: 18kcal
Step-by-step instructions with pictures on how to roast Hatch chile peppers. Roast, peel and seed super easy!
Print Recipe
Ingredients
Instructions
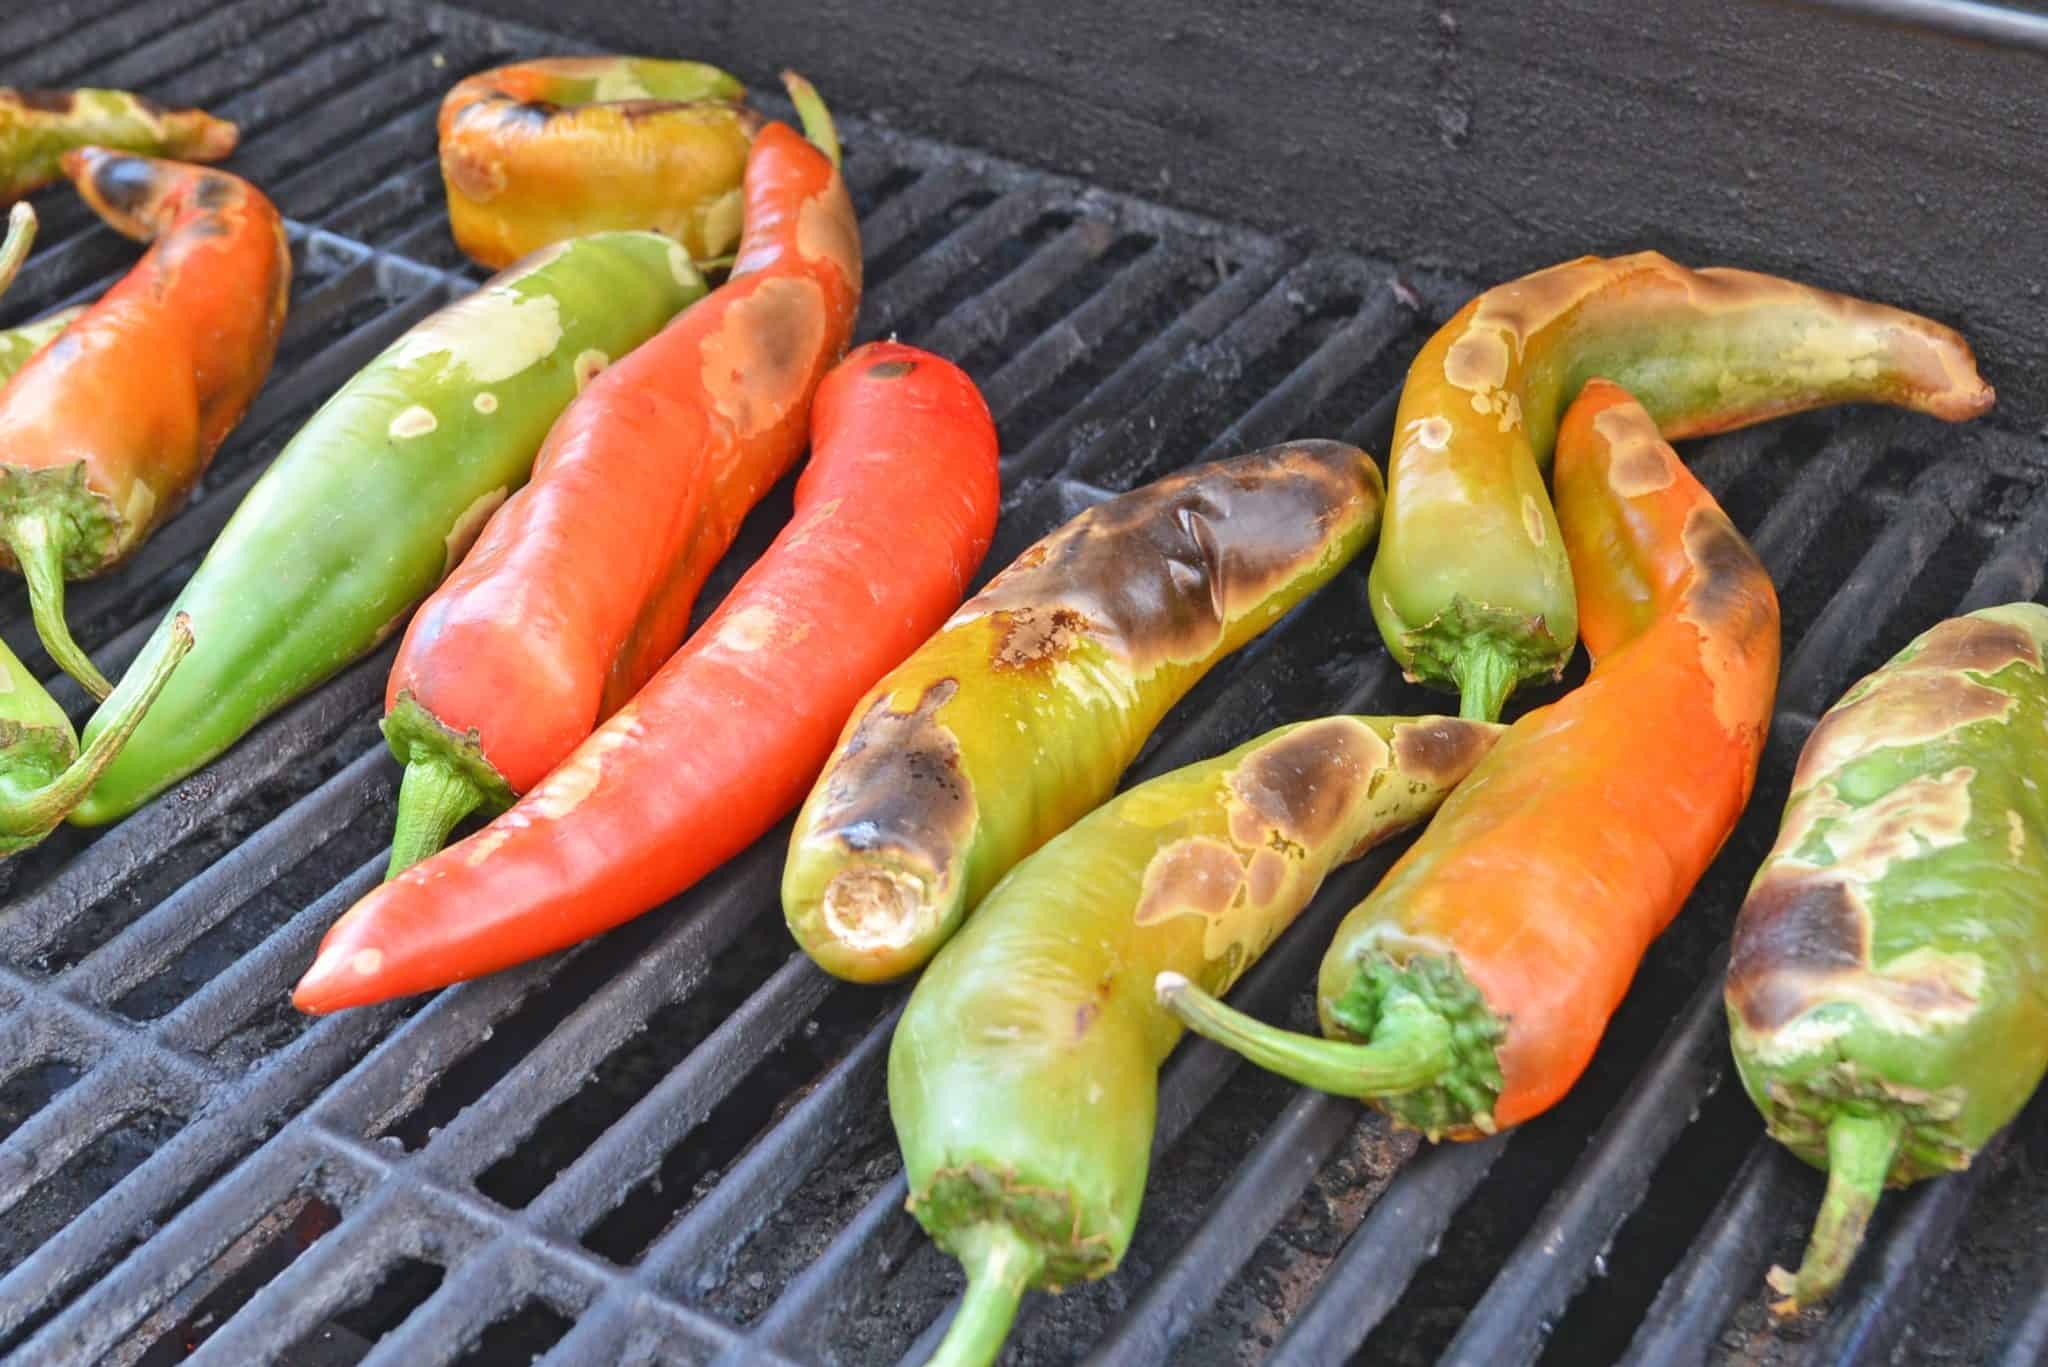
- First comes the roasting. You can choose to do this on the grill of in the oven under the broiler, even over the flame of a gas stove, but that will take a long time. If on the grill, place all of your chiles over direct heat and wait for them to start blistering. Turn them so the skins are evenly blistered.
- If using an oven, place them on a baking sheet and under the broiler, turning occasionally so all of the skins are blistered.
- Remove from heat and place into a large, airtight plastic bag. Seal tightly and wait for 15 minutes. The steam will help release the skin from flesh.
- Put on your plastic gloves and start gently peeling the skin off your Hatch chiles. It should come off relatively easy, but some are going to be challenging, it is just the nature of the beast.
- Using a paring knife, split the chile open and scrape out the seeds and discard the stem. Lie the chile flat and pat dry.
- Some people prefer to split them open, remove the seeds and the stem before roasting, that is just a matter of preference.
- Your Hatch chiles are ready to go! Use the in any recipe that calls for green chile or otherwise.
Video
Notes
If you are freezing your Hatch chile peppers...
Lay your chile peppers flat and pat dry so they aren't drenched. Place in airtight plastic bags in a single layer so there isn't much air. I like to pack mine in bags with about as much as I would need for a recipe, so 3-4 chiles per bag. I also label them with how hot they were.
Squeeze as much air out of the plastic bag as possible and then close and freeze. It's that easy to freeze chile peppers!
Nutrition
Calories: 18kcal | Carbohydrates: 3g | Sodium: 4mg | Potassium: 144mg | Sugar: 2g | Vitamin A: 430IU | Vitamin C: 64.7mg | Calcium: 6mg | Iron: 0.5mg